In this article, we will discuss how to build a strip foundation with your own hands. We’ll explore why it’s crucial to construct a proper strip foundation, the structure and types of strip foundations, including shallow strip foundations, pile strip foundations, and monolithic strip foundations, and how they differ. We’ll also delve into how to calculate a strip foundation and the necessary reinforcement. Additionally, we will cover many other aspects to ensure you understand how to build a strip foundation by yourself.
Types of Strip Foundations
Let’s start by examining the different types of strip foundations that exist. Having this knowledge will help you choose the right foundation for your future home. The correct choice of a foundation for your house not only affects the final construction cost but also the safety of the occupants. After all, selecting the wrong type of foundation can have disastrous consequences, including the potential collapse of the entire structure. So, let’s begin.
Shallow Strip Foundation
As the name suggests, a shallow strip foundation differs from deep foundations in its depth of placement. You might wonder, how deep does a strip foundation need to be to be considered shallow? The answer is that it should be shallower than the frost line in your region. This depth consideration leads to specific features associated with this type of foundation.
Since the ground beneath this foundation can freeze, it needs to be taken into account during the design phase. Freezing ground expands, which means it can push the foundation and anything built on it upward. This can lead to various problems, such as uneven settlement of the building, putting uneven stress on the foundation, or even causing structural damage. To prevent these issues, a shallow strip foundation requires adequate reinforcement.
In what situations is a shallow strip foundation commonly chosen?
- When the ground under the building is not expansive soil (rock, sand, etc.).
- When the groundwater level is relatively low.
- When a drainage system is installed around the building.
- When an insulated perimeter is created around the structure.
- When the structure being built is relatively lightweight and flexible (e.g., a frame house, log cabin, or greenhouse).
If you decide to opt for this type of foundation for your construction project, be sure to avoid planning mistakes and take into account all the mentioned factors. A shallow strip foundation has a significant advantage: it is relatively strong and cost-effective.
Pile Strip Foundation
In reality, this type of foundation is not a strip foundation. The correct name for a pile-strip foundation is a pile-beam foundation. It should be constructed with both piles and beams. However, some people opt for an easier approach, pouring the piles and the foundation strip directly on the ground or burying it only slightly. As a result, during the winter, this strip and the piles may protrude from the ground. Soil can enter the voids beneath the piles, and in the spring, when the ground returns the foundation to its place, it may become uneven or crack. We do not recommend building a pile-beam foundation in this manner. There should always be sufficient space between the beams and the ground to accommodate soil expansion due to frost heaving.
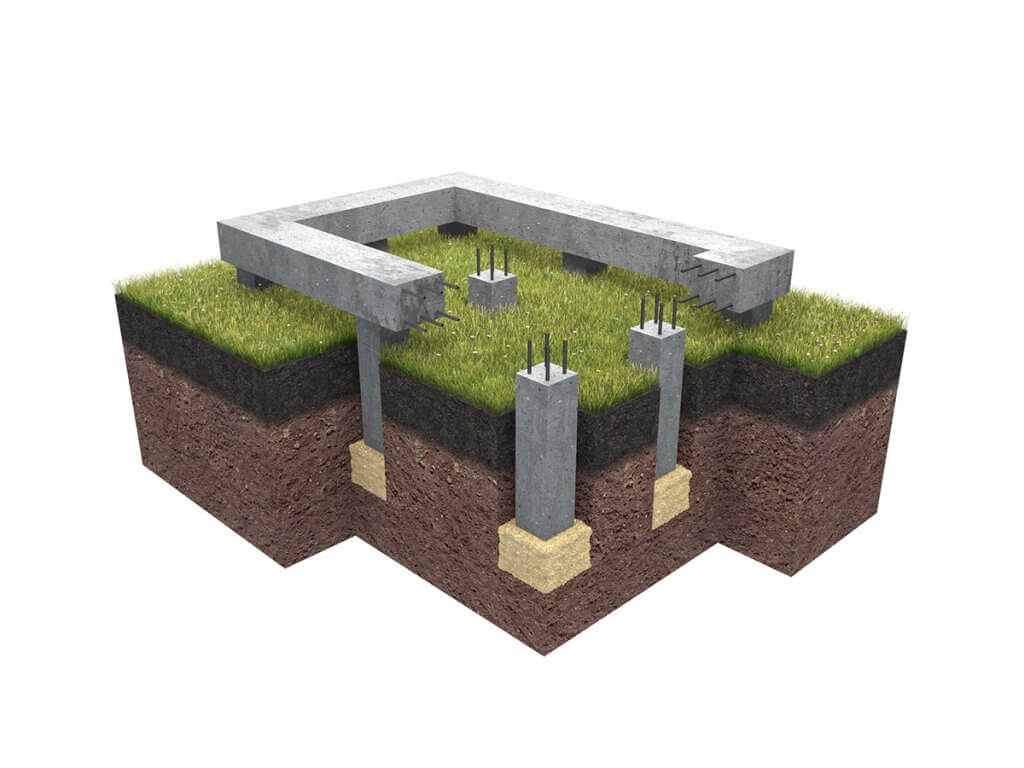
Deep Strip Foundation
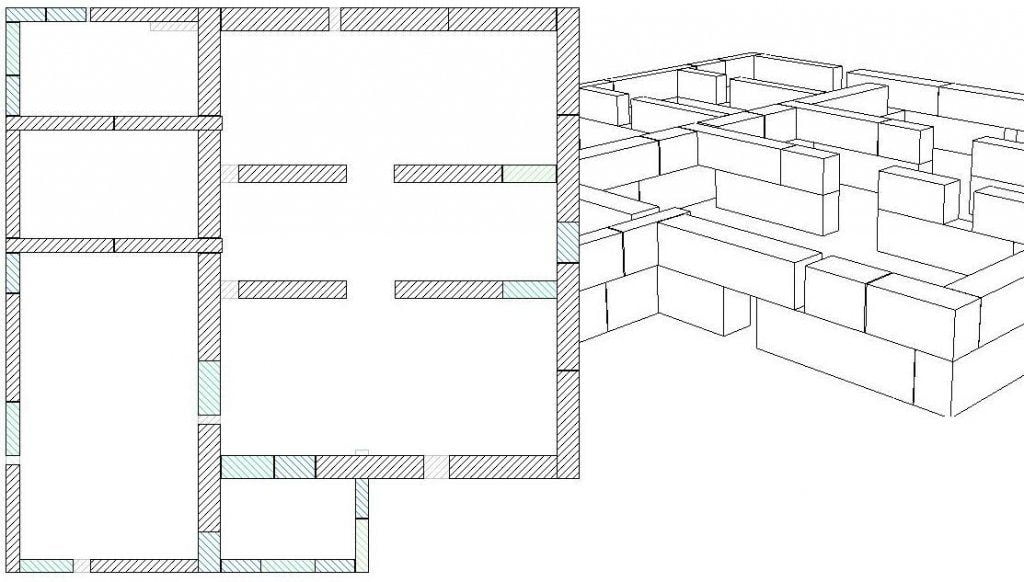
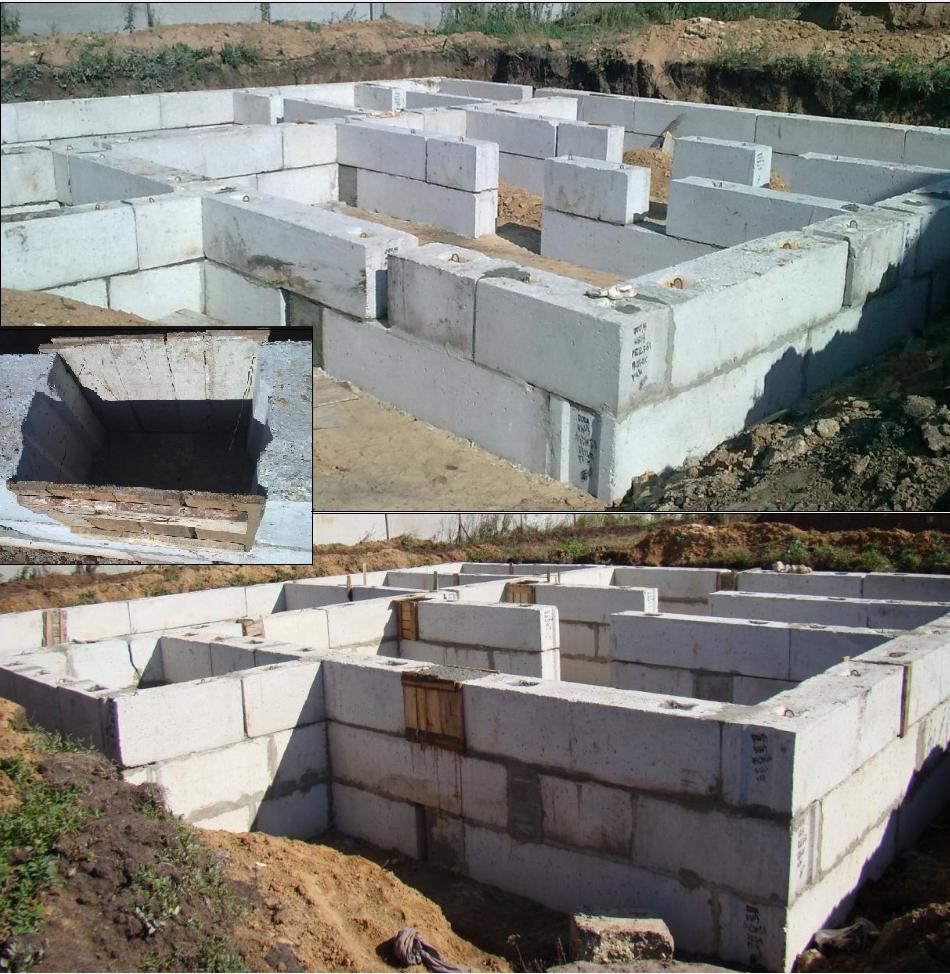
Finally, the most commonly poured type of foundation is the deep strip foundation. It should be placed deeper than the frost line in the ground. It can be constructed as a monolithic reinforced concrete strip or made from precast concrete blocks, which are placed on a reinforced concrete cushion. An additional reinforcement belt is usually added on top of the blockwork to bond the foundation into a unified structure.
Building a Strip Foundation Yourself: Step-by-Step Guide
How to create a strip foundation? How to pour a strip foundation? Let’s try to provide answers to these and other questions in the form of a sequential, step-by-step instruction. We hope that even a novice who has decided to build a strip foundation with their own hands for the first time will be able to understand this guide. So, here’s the instruction.
- Determine the type of strip foundation you will be constructing.
- Create a drawing of the strip foundation. The strip foundation diagram will help us determine its depth (height) and width. The depth of the foundation depends on its type (shallow or deep). The height depends on whether you will be building a plinth as a continuation of the foundation or if you will be constructing it from another material, such as bricks or concrete blocks. It is recommended to make the plinth’s height equal to the average snow cover depth in your area. The width of the strip foundation depends on the width of the walls of your future house. Depending on the wall material, it may be acceptable to make the foundation width one-quarter less than the wall width.
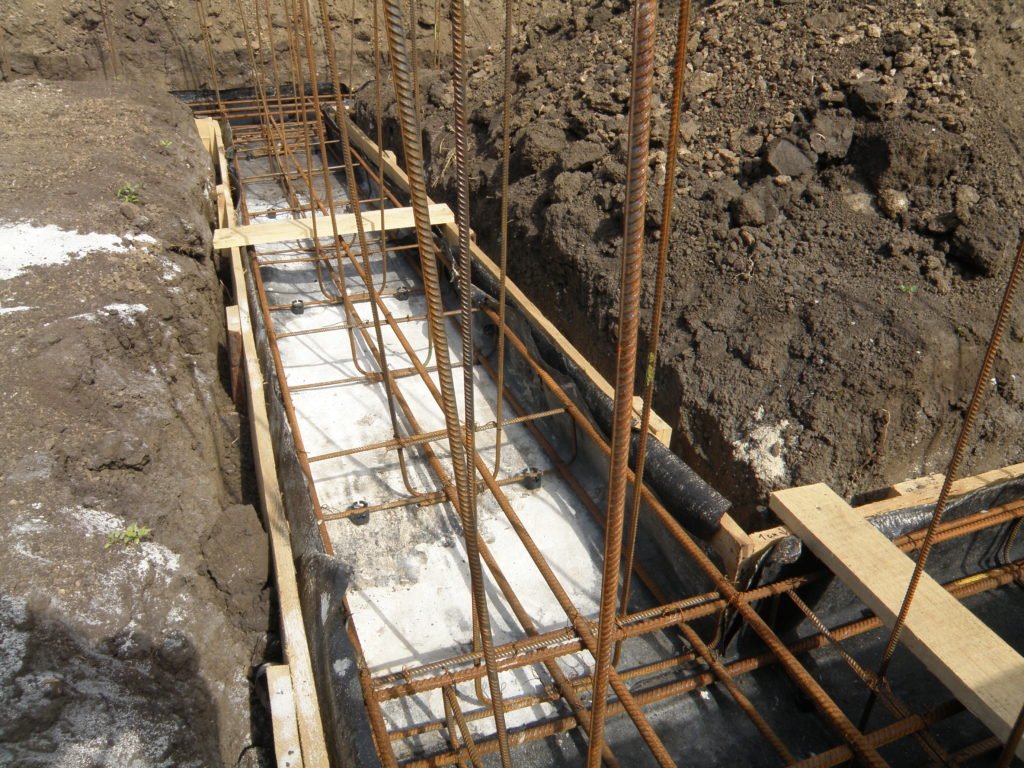
- The reinforcement scheme of the strip foundation is crucial, so we create it. We can provide general recommendations on suitable reinforcement for the strip foundation and how to perform the reinforcement. The diameter of the reinforcement used typically falls within the range of 10-16 mm. Place the reinforcement rods 20-30 mm from the bottom and top edges of the foundation strip. The number of reinforcement rods depends on the width of the foundation, usually consisting of 2-3 rods at the top and bottom. If the foundation is planned to be over 400 mm in height, vertical reinforcement with 8-12 mm diameter should also be added every 300-500 mm. In complex cases, consult a foundation specialist for proper design. Incorrect reinforcement can negate all your efforts.
- Perform the calculation for the strip foundation.
- Select the concrete grade or type of precast concrete blocks (FBS). If you are constructing a monolithic reinforced concrete foundation, the suitable concrete grade for the strip foundation should be no less than M200. For precast blocks, choose them based on the required dimensions in terms of width, height, and length.
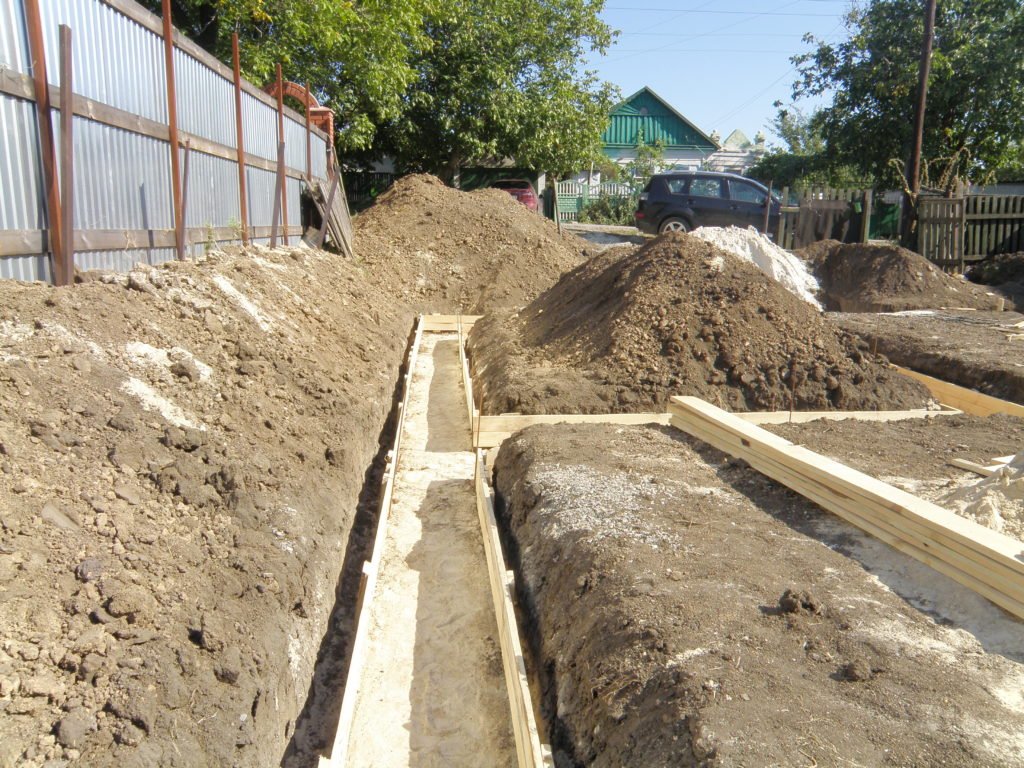
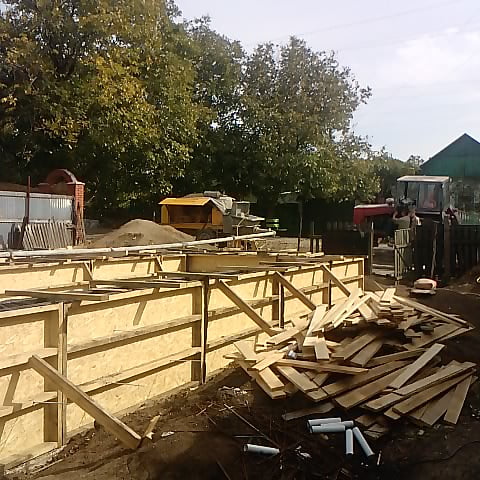
- Mark the layout of the future strip foundation. Set up wooden structures at the corners in the shape of the letter “P”. Stretch a string or cord, marking the foundation walls. Ensure that the lengths of the diagonals of the resulting rectangle match. After setting up the external house walls, repeat the same process for all internal load-bearing walls.
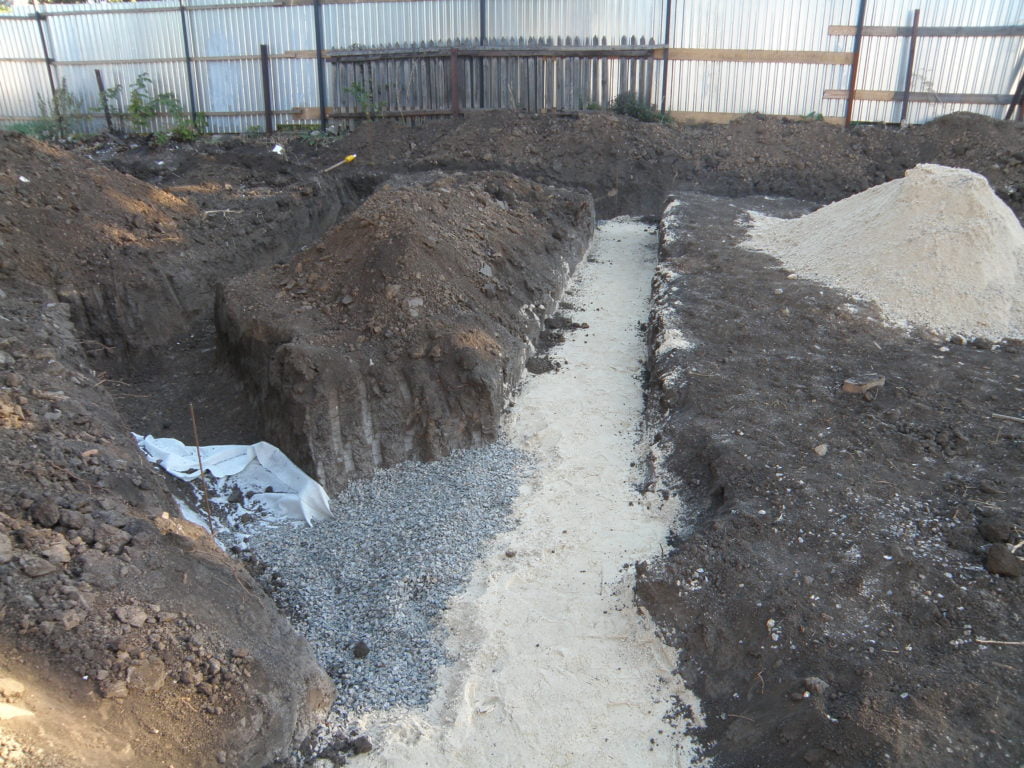
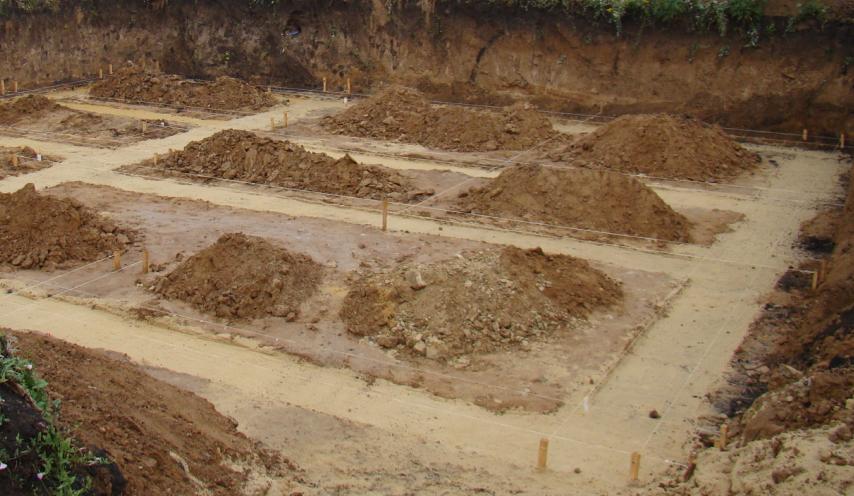
- Excavate the trench. Continuously monitor its depth using a laser level, level, etc. The trench’s bottom should be in a uniform horizontal plane.
- Place geotextile on the trench bottom, fill it with a layer of coarse sand approximately 10-15 cm thick, and compact it. Pour water over the sand and compact it again.
- Install the waterproofing layer. You can use a membrane, roofing felt, etc.
- Set up the reinforcement frame. For the lower reinforcement, use either stone fragments, brick shards, or place them on special plastic supports for the concrete cover layer.
- Proceed according to the type of soil on your site. If the soil is dense, such as clay, you can pour the concrete strip foundation directly into the ground. Then, build formwork for the plinth and pour the remaining part. Alternatively, you can construct the plinth using stone, bricks, etc. If the soil is loose, set up formwork right away.
- Formwork for the strip foundation is made from boards with a minimum thickness of 30 mm, with vertical supports every 50 cm. Alternatively, you can create formwork panels from timber and sheet materials such as plywood or OSB boards. If you want to keep the boards or panels intact and free from concrete, line the inside of the formwork with a dense construction film no less than 100 microns thick.
- Secure the formwork around the perimeter. Do not skimp on this, as concrete is very heavy and can easily crush an inadequately supported structure. To secure the formwork panels, use spikes (threaded rods) passed through sections of plastic water pipe to protect them from concrete.
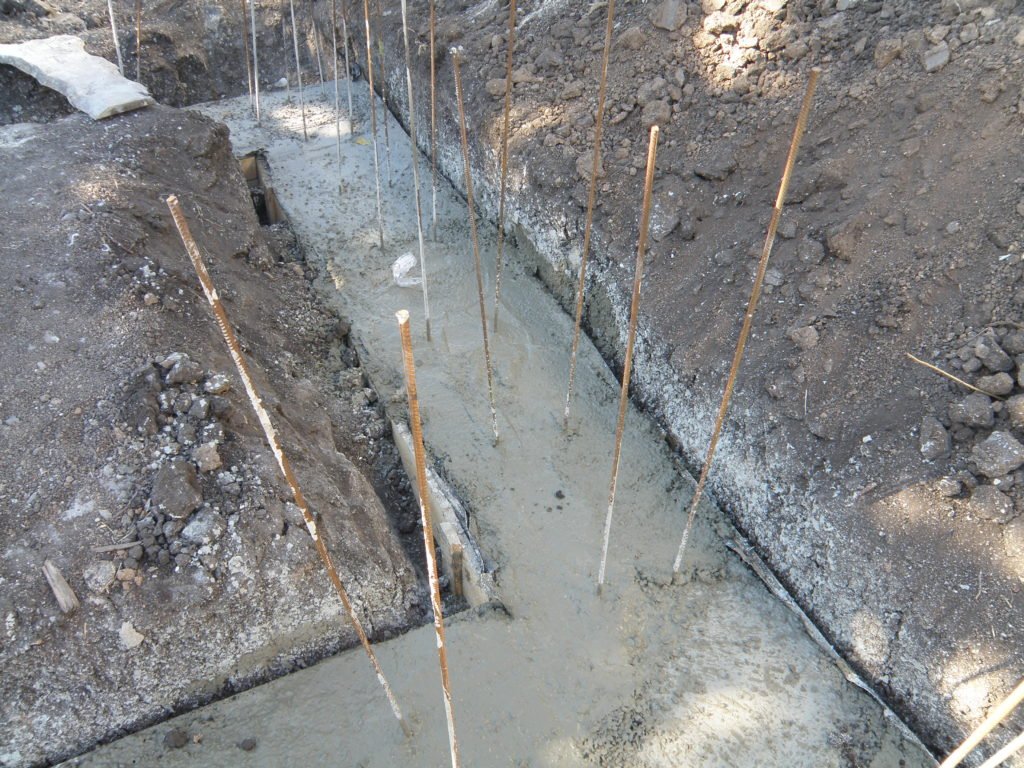
- Pour concrete into the formwork. The pouring of the strip foundation should be done in one go. In extreme cases, you can pour the foundation in several stages, but in that case, it should be done layer by layer without any vertical gaps. The concrete grade for the strip foundation should be M200 or higher.
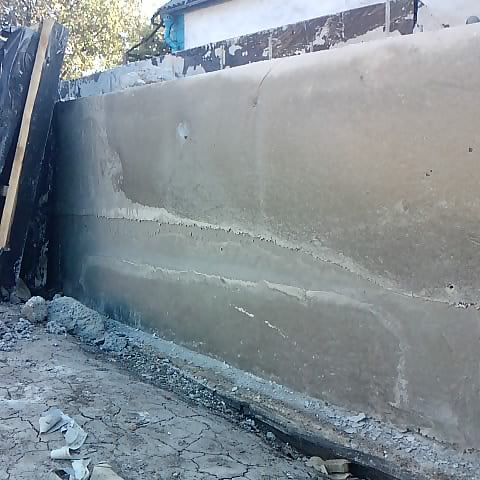
- Sprinkle the freshly poured concrete with a thin layer of cement (you can use a sieve) and cover it with waterproofing.
- For the first few days, you will need to thoroughly water the cured concrete to prevent cracking.
- Afterward, you can remove the formwork. You can start loading the foundation approximately one week after pouring.
For a block strip foundation, we perform the same steps. We pour a concrete supporting cushion and place FBS blocks on it, securing them with cement mortar. Then, we create a reinforcement belt on top of the blocks.
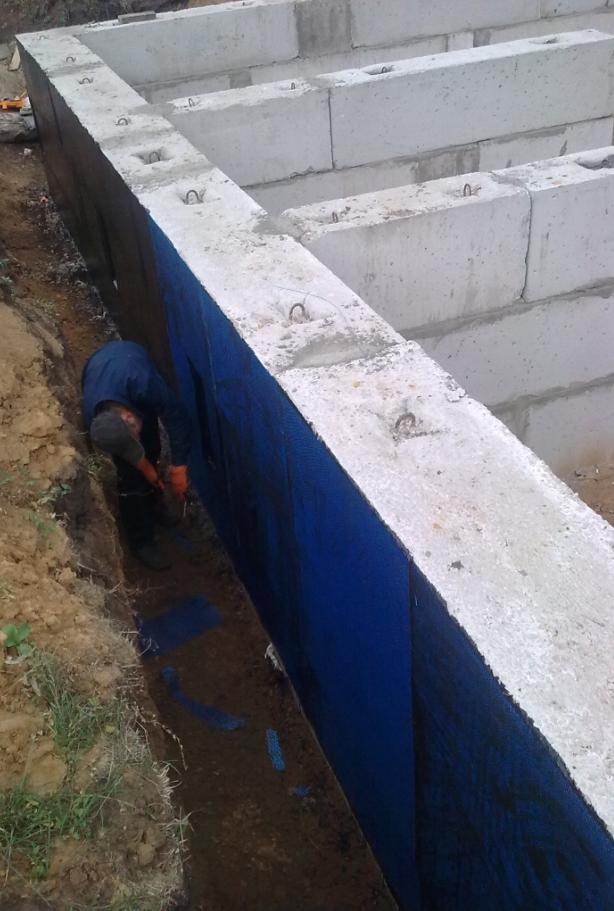
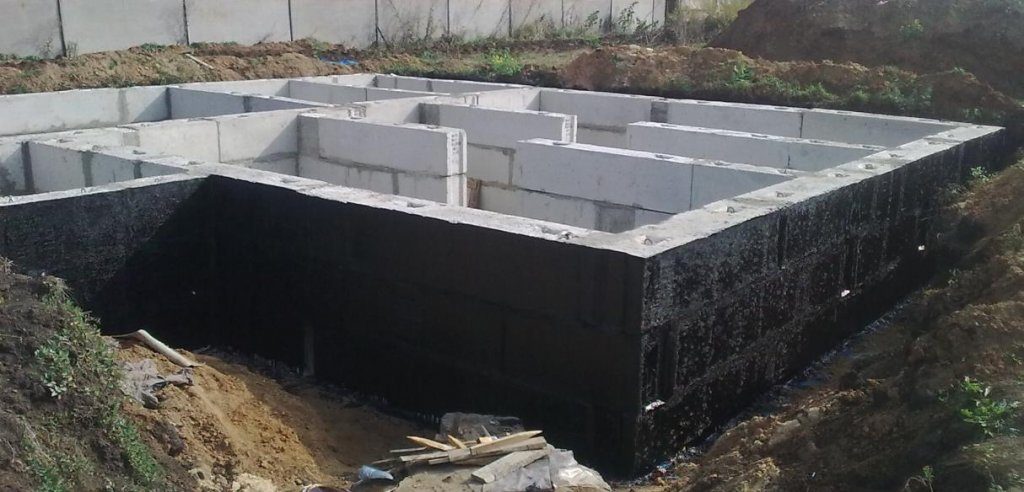
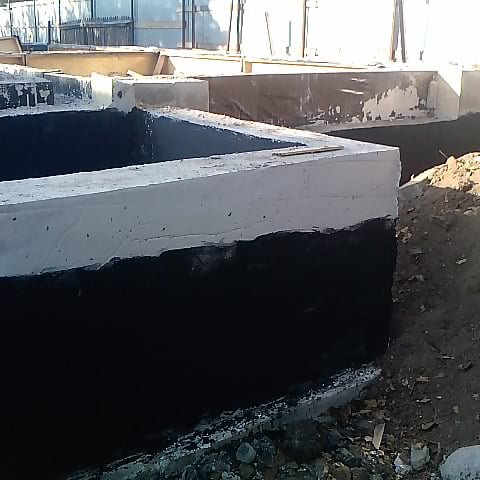
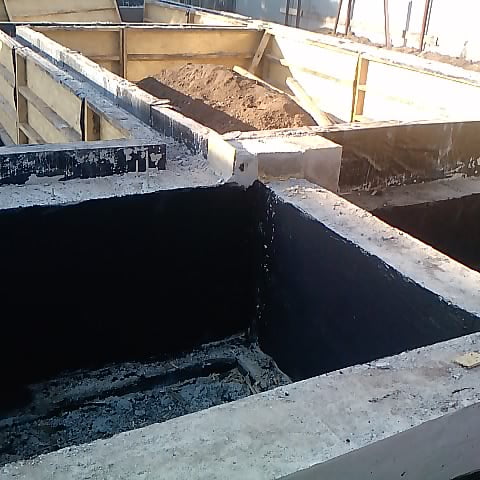
- If you have a basement, you need to apply waterproofing to the strip foundation. This is usually done with bitumen-based waterproofing.
- Next, insulation for the strip foundation is applied using extruded polystyrene. Ordinary white polystyrene is not suitable as it deteriorates when exposed to moisture.
However, if you are not planning to have a basement, you can apply horizontal waterproofing on top of the foundation strip using roofing felt or penetrating waterproofing. Your strip foundation for the house is now ready. You can start laying the walls and continue building your home.