What is a reinforcement belt?
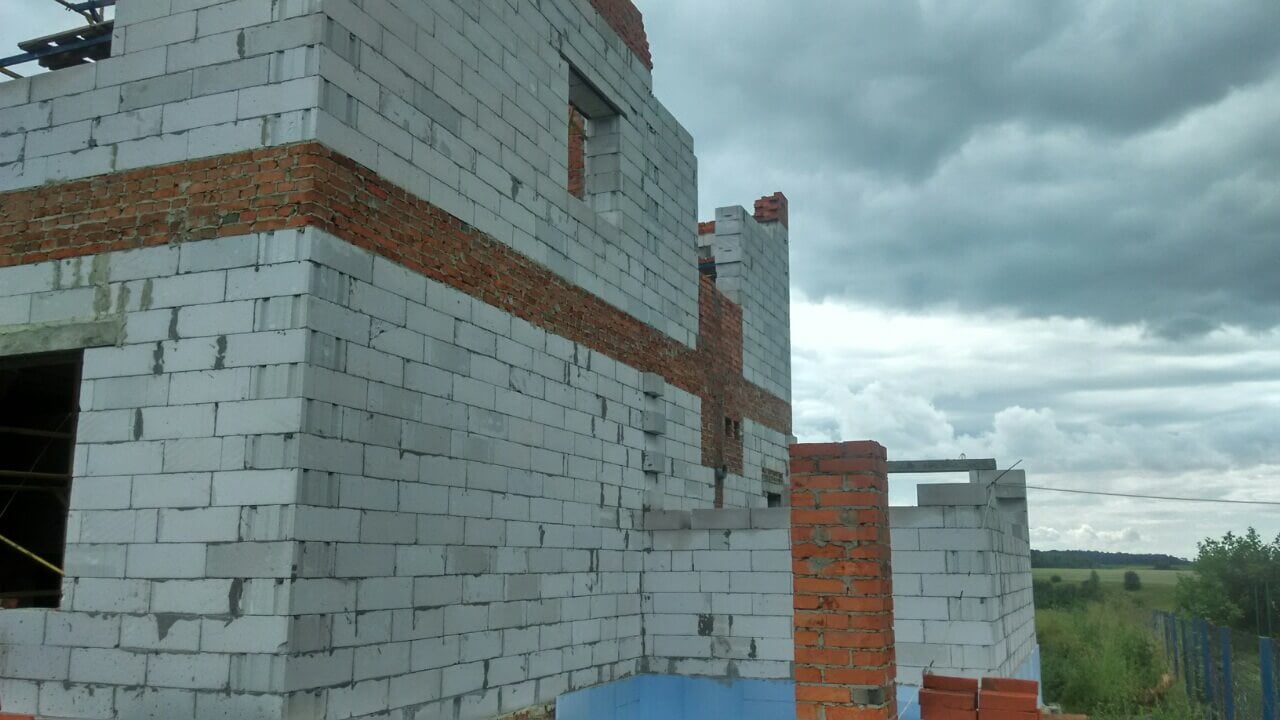
A reinforced belt, also known as a monolithic belt or a seismic belt, is a special construction designed to accomplish two tasks. Firstly, it distributes the load from what will be placed on top to what will be below. Secondly, it ties the entire surface on which it is located into a single unit. Both monolithic concrete belts and reinforced brick belts handle load distribution effectively, such as from floor slabs to walls. However, if the goal is to connect the walls into a single structure, for example, to handle the spreading load from roof trusses onto the house walls, then a concrete reinforced belt is needed.
How to Make a Reinforcement Belt by Yourself
Now that we’ve understood what a reinforcement belt is, let’s find out how to make one yourself. Making a brick reinforcement belt is relatively simple. Typically, it involves laying solid red bricks of at least grade M100 in several rows with reinforcement using a masonry grid. Alternatively, you can reinforce the masonry with 6-8 mm diameter rebar. Creating a concrete monolithic belt is a more complex process.
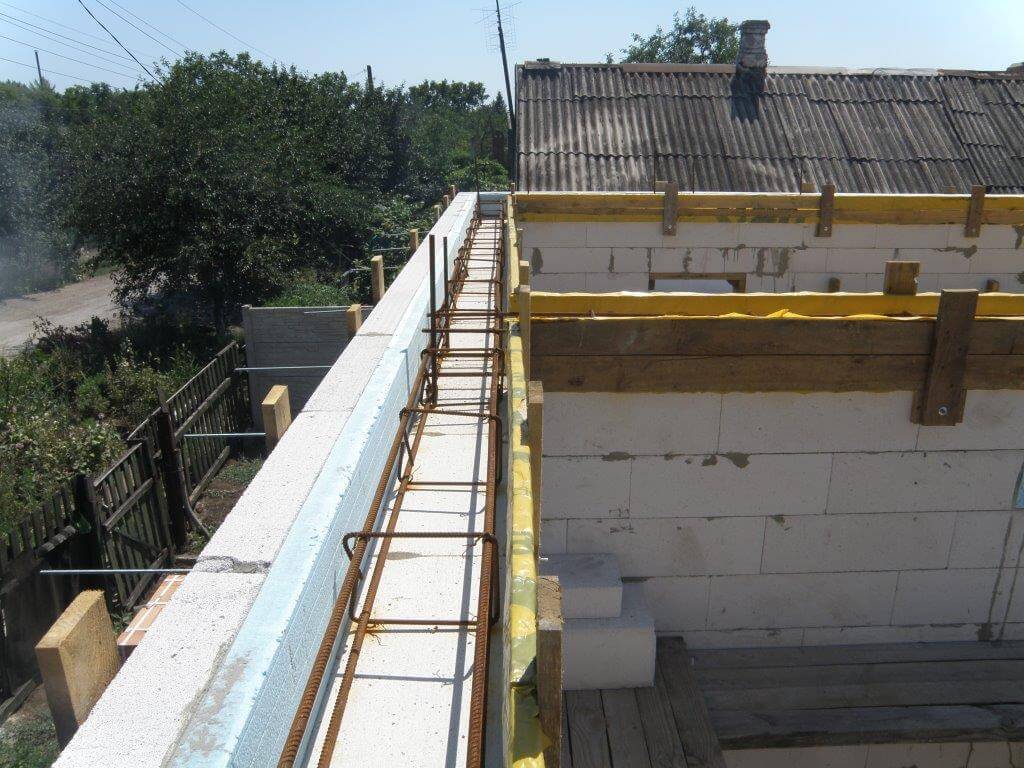
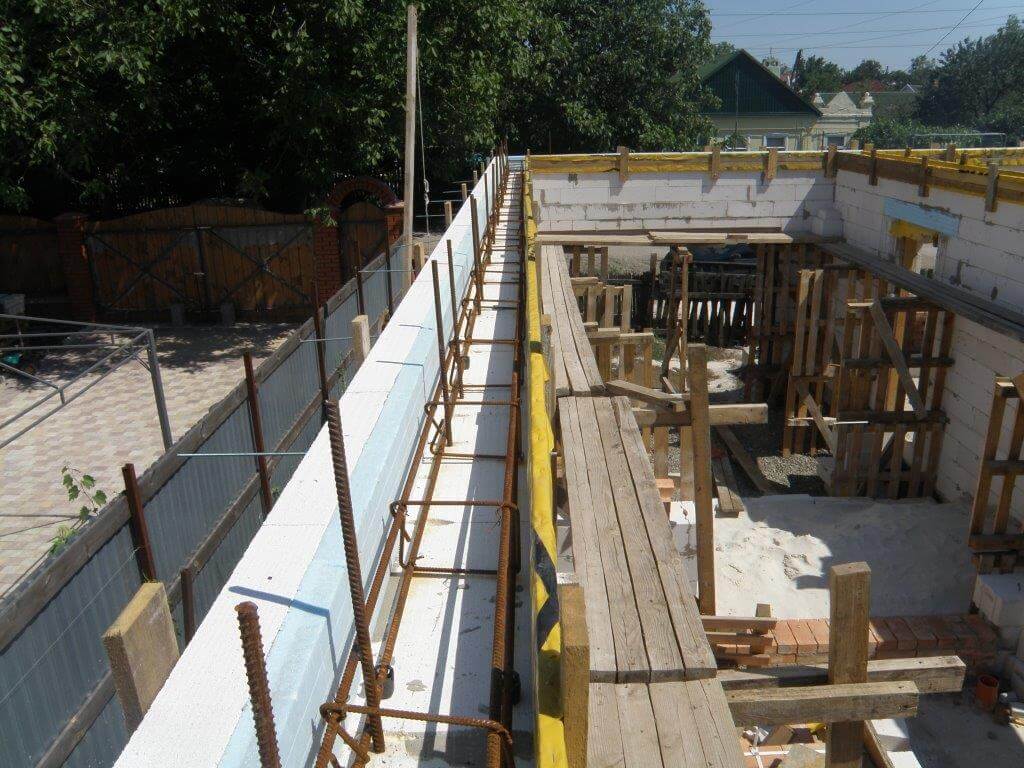
First, you need to set up the formwork. This can be wooden formwork or a non-removable formwork, especially if you are working with aerated concrete or foam concrete blocks. You can use factory-made U-blocks or create your own trays. It’s not necessary to cut U-blocks from a regular aerated concrete block; you can simply build a masonry wall with thin aerated concrete blocks on the outside and inside. The space between these blocks can be insulated with extruded polystyrene.
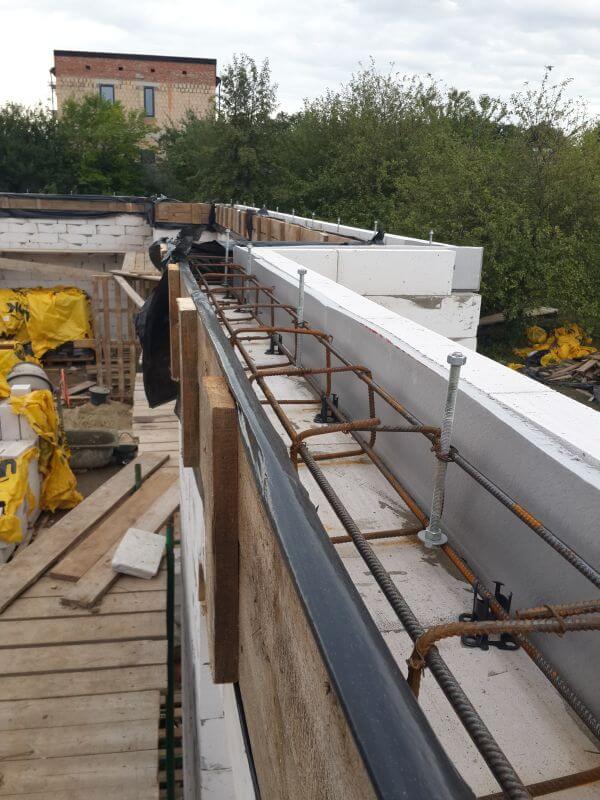
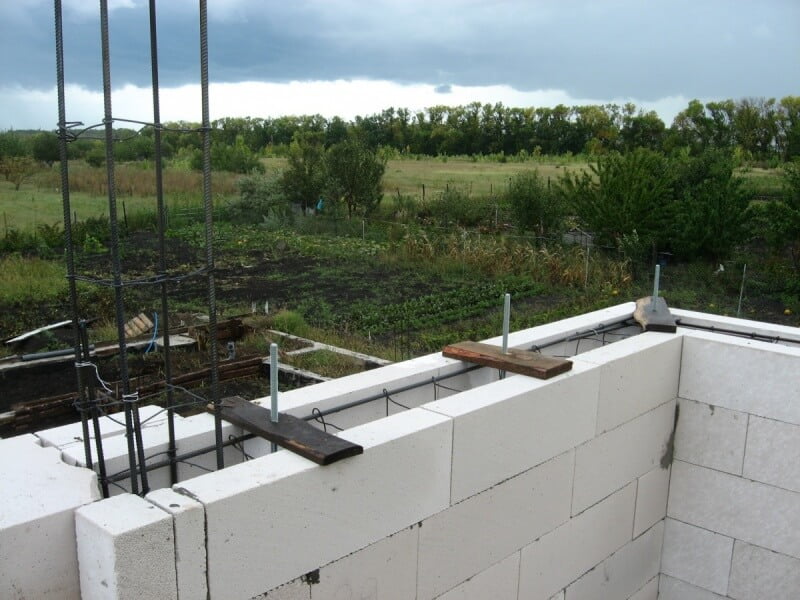
After you have set up the formwork, a reinforcement framework is placed inside the tray.
A sufficient reinforcement for a 200 by 200 mm reinforcement belt consists of a framework made of four reinforcement bars with a diameter of 12 mm (two on top and two on the bottom), fastened with cross clamps with a diameter of 6-8 mm at intervals of every 30-50 cm.
The standard overlap of the reinforcement should be 30-40 diameters. This means that if you are using 12 mm reinforcement, the overlap should be approximately 40 cm when extending it.
In the corners, it is necessary to bend the reinforcement so that it connects with solid reinforcement.
It’s advisable to place the reinforcement framework on plastic supports with a thickness matching the protective layer of concrete. Additionally, secure the supports on the vertical clamps. If factory-made protective layer supports are not available, you can use pieces of stone, brick, and so on.
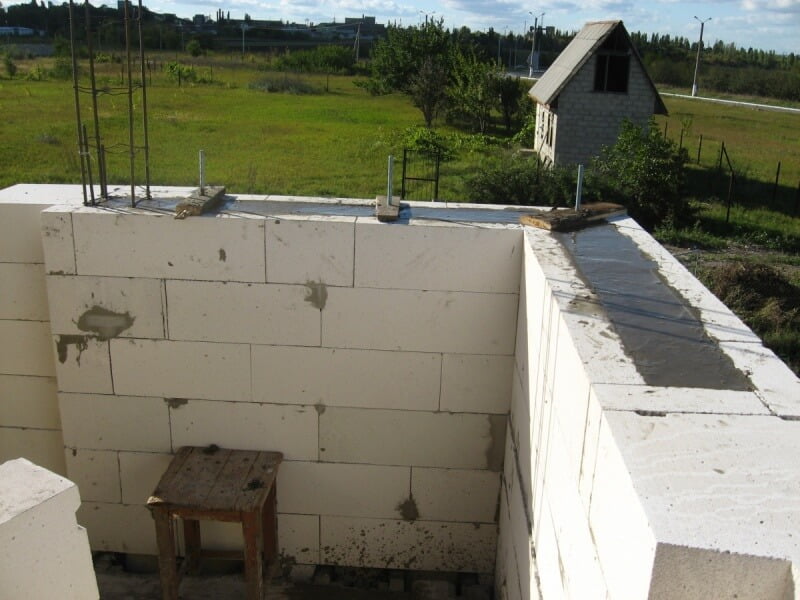
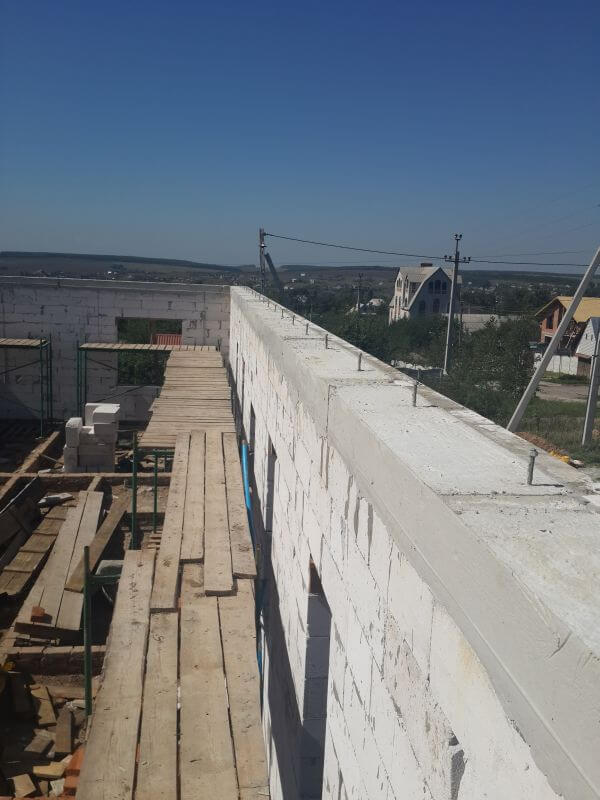
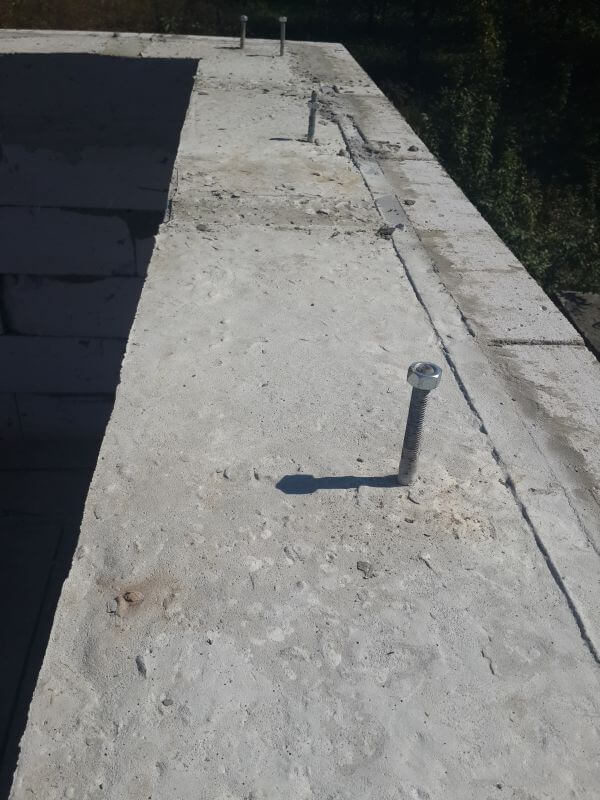
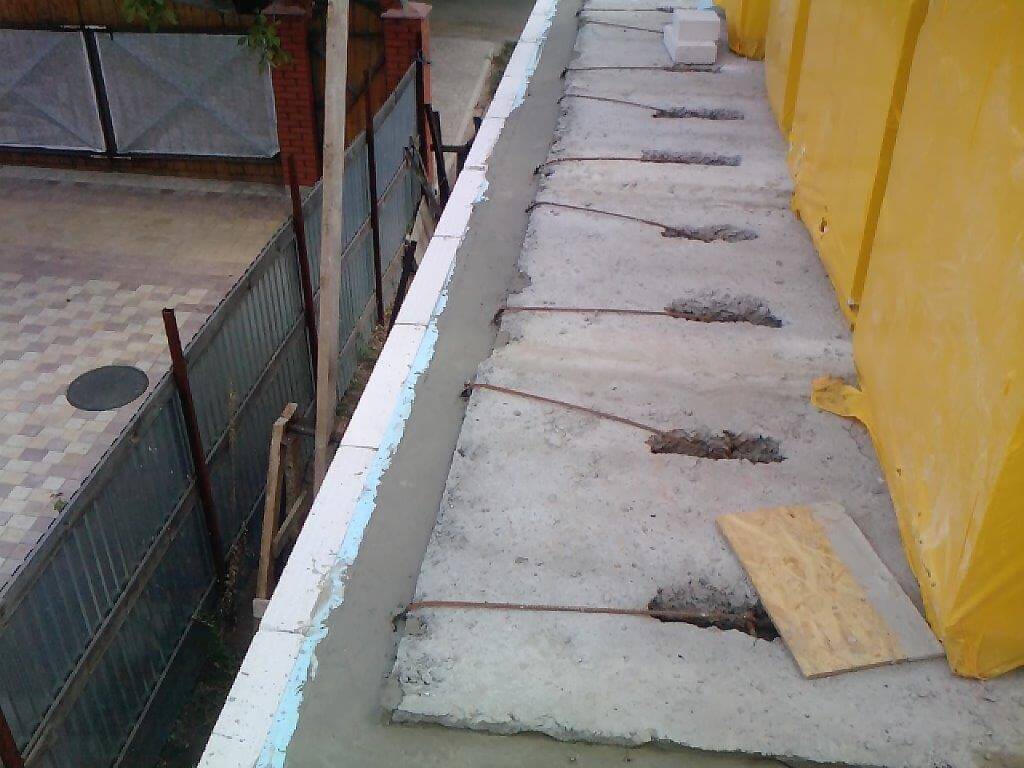
To the reinforcement framework, dowels for the facing or pieces of reinforcement for subsequent fixing of the floor slabs are attached.
Now you can proceed directly to pouring the reinforcement belt with concrete.
If you plan to use ready-mixed concrete, choose a grade of M200-M250. This strength grade is more than sufficient for private construction.
However, if you intend to prepare the concrete for pouring the reinforcement belt yourself, use the universal concrete proportions recipe: 1 part cement with a grade of 500, 2 parts sand, and 4 parts gravel.
Don’t forget to add a concrete plasticizer to the mix. This will make the pouring process more convenient for you and result in a stronger reinforcement belt.
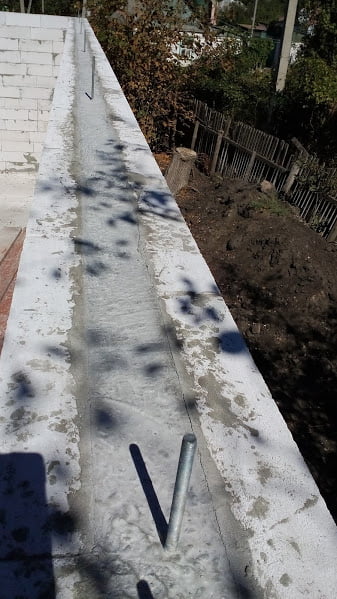
After pouring, cover the reinforcement belt with plastic film to prevent rapid drying. For the same purpose, moisten the concrete for the first 2-3 days.
The reinforcement belt will be ready for load-bearing within a week. However, the complete curing of the concrete will be finished 28 days after pouring.

Most Frequently Asked Questions About Reinforcement Belts
In which cases is a reinforcement belt necessary?
A monolithic reinforced concrete belt is required for:
- Block foundations
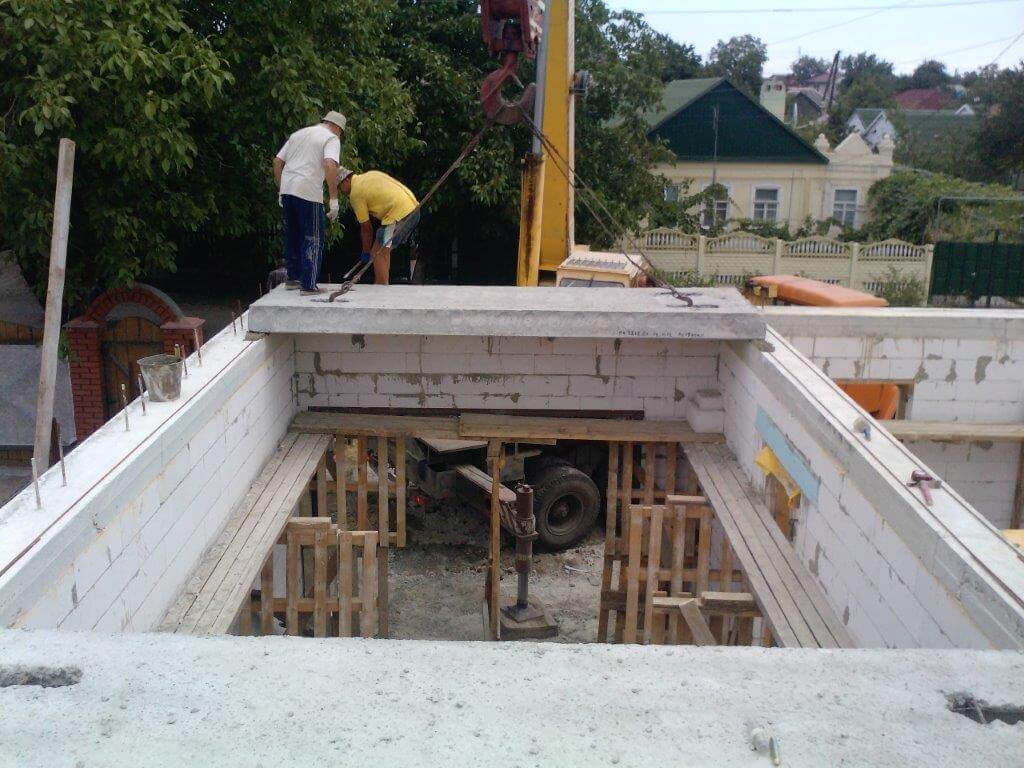
- Walls made of aerated concrete, foam blocks, etc., under hollow slabs and wooden floor beams (to prevent sagging). Here, the reinforcement belt can be made of bricks.
- Under roofing material on a roof whose design involves a supporting load on this roofing material.
Can a reinforcement belt be poured in winter, in freezing temperatures?
Pouring a reinforcement belt in winter is a questionable task. However, if it’s absolutely necessary to pour it in cold weather, take all necessary measures to protect the concrete. Add special anti-freeze additives to the concrete mix. Use as little water as possible when mixing the concrete. After pouring, be sure to cover the reinforcement belt to protect it from the cold, such as with sawdust. In sub-zero temperatures, consider using a special heating cable, which is available in any construction supply store.
What is the minimum thickness, height, width, and size of a reinforcement belt?
The minimum size for a reinforcement belt is 150 by 150 mm, but it should not be narrower than the bearing width of the slabs or floor beams.
If a reinforcement belt freezes, what should be done?
If you or your workers forget to insulate the reinforcement belt before pouring, then you’ll need to insulate it afterward. Insulation is applied from the outside.
Condensation on the reinforcement belt. The reinforcement belt is sweating. What should be done?
Insulate it. Other options include raising the temperature in the room or reducing the room’s humidity.
Can a reinforcement belt be poured in sections?
Yes, it can. To do this, create a bevel at the joint. The concrete should not be smooth at the joint.