In order for your sliding gates to serve you as long as possible, they require a reliable and sturdy foundation. Our article will help you understand how to create such a foundation with your own hands and explain some nuances related to this construction. Photos of the process, diagrams, and drawings will visually demonstrate how to pour such a foundation yourself.
Preparing for Foundation Construction
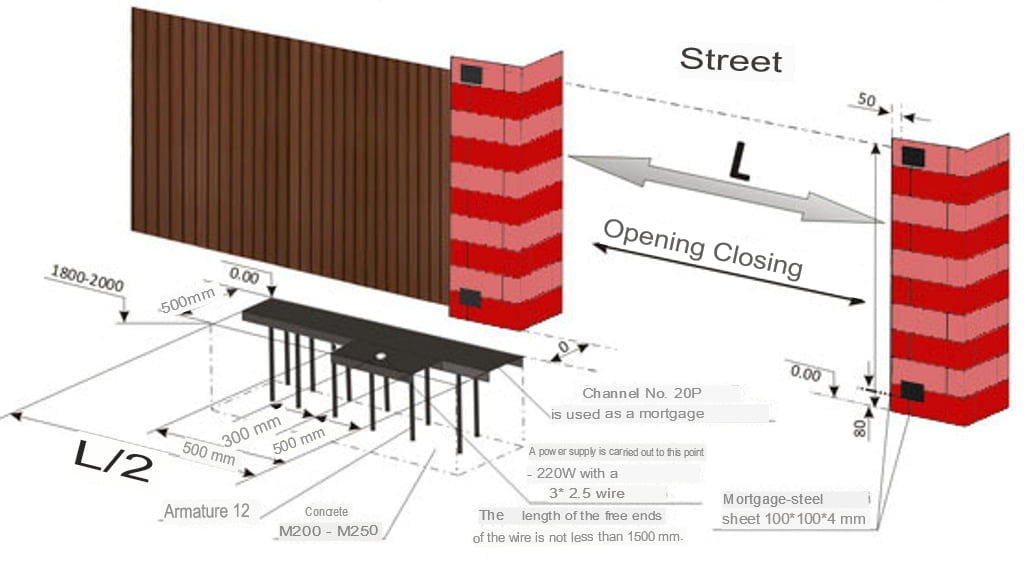
First of all, you need to calculate the dimensions of the future foundation for sliding gates. Typically, for gates in a private house, the foundation size depends on the width of the opening. The length of the foundation should be about half the width of the gates. For example, if you plan to create a driveway opening that is 3-4 meters wide, the length of the foundation should be 1.5-2 meters.
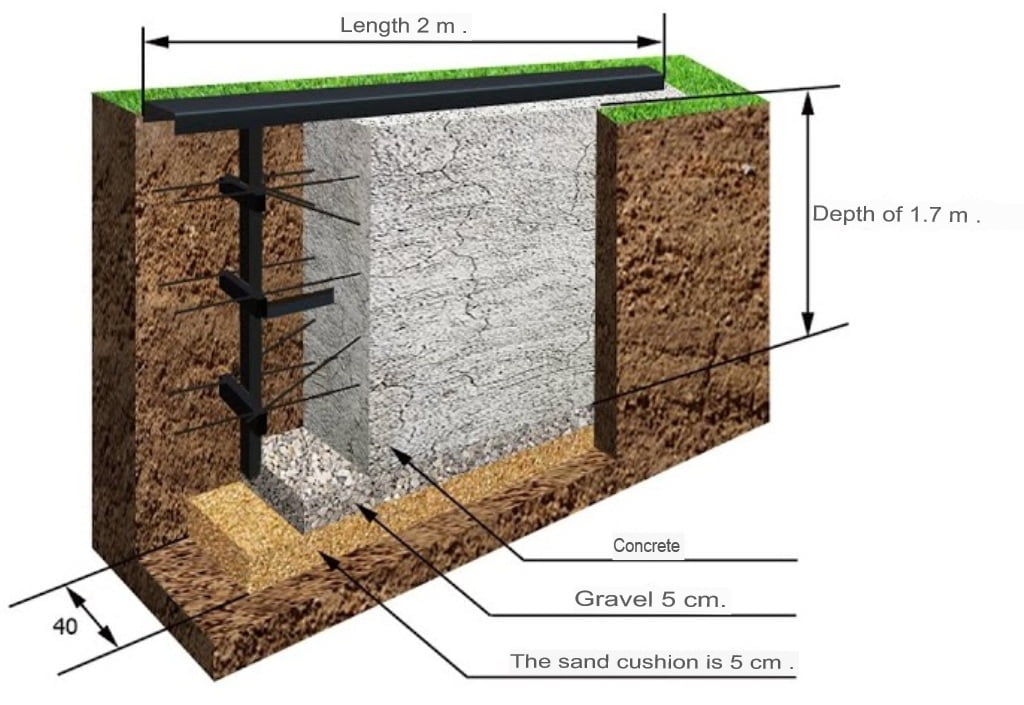
The width, on the other hand, depends on the height and weight of the future gates. As a reference, a standard foundation width is 30 centimeters. This width allows you to securely attach the main anchor part made of a 200 mm channel to the surface. In the construction of a foundation for gates, the channel plays an important role: guide rollers, on which the sliding gates will glide, are attached to it. The more massive the gates, the larger the channel and wider the foundation should be.
The depth of the foundation depends on the frost depth in your area. Keep in mind that concrete is a good conductor of cold, so the height of the foundation should be 20 cm greater than the frost depth.
You will also need ribbed metal reinforcement for the foundation. It will serve as the framework for the foundation, and the channel will be attached to it.
Step-by-Step Foundation Pouring Process
First, dig a trench for the foundation close to the fence. Make the depth 15-20 cm greater than the height of the foundation. These extra centimeters will be needed for filling the sand-gravel cushion. It should be thoroughly soaked with water and compacted.
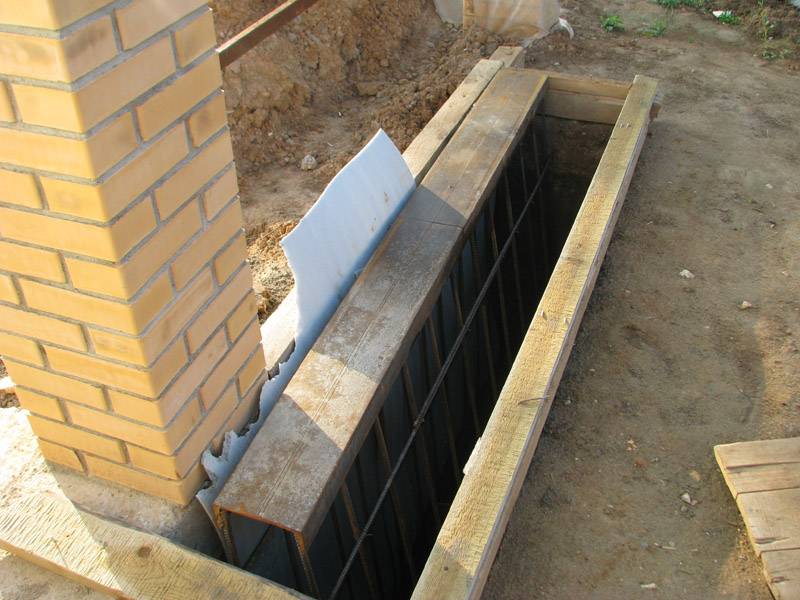
Next, create a rebar frame and weld it to the shelf of the channel. Make the frame of such dimensions that there is a protective layer of concrete of 2-3 cm on both sides and at the bottom. It is advisable to paint the channel to protect it from corrosion at this stage of construction.

Lower the frame into the trench and level it precisely. The channel should be perfectly level with the finished floor level and horizontally aligned. It should also be parallel to the fence line, right next to the support post. Secure the frame securely to prevent movement and prepare to pour the concrete.
You can buy ready-mixed concrete or make it yourself. The key is to choose high-quality components and maintain the right proportions. Typically, cement-sand-gravel is mixed in a 1:2.5:4 ratio, and water is added in equal parts to the cement. For more detailed information on the correct concrete proportions for the foundation, refer to our article in the relevant section.
Pour the concrete level with the channel surface and leave it to set for at least a week. After pouring, don’t forget to cover the concrete with waterproofing and water it abundantly for the first 2-3 days to prevent drying out.
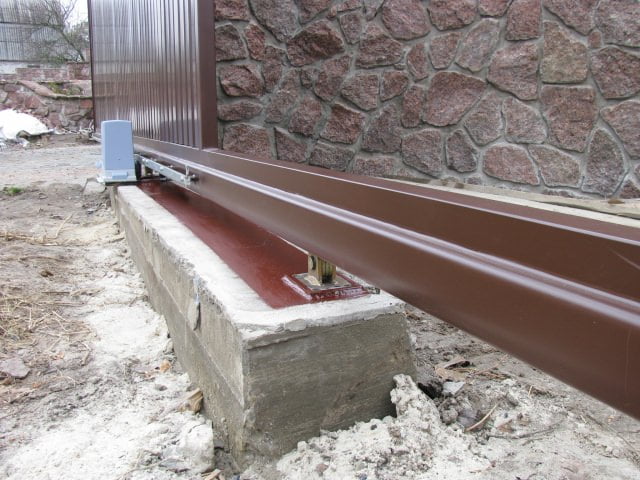
After setting and welding the gate’s guide rollers, apply 2-3 coats of anti-corrosion paint to the top part of the channel. The foundation is ready!