In our guide, we will explain how to make an outdoor barbecue grill and brick oven complex yourself. A step-by-step instruction with photos of the construction process will help you understand the details of laying this structure.
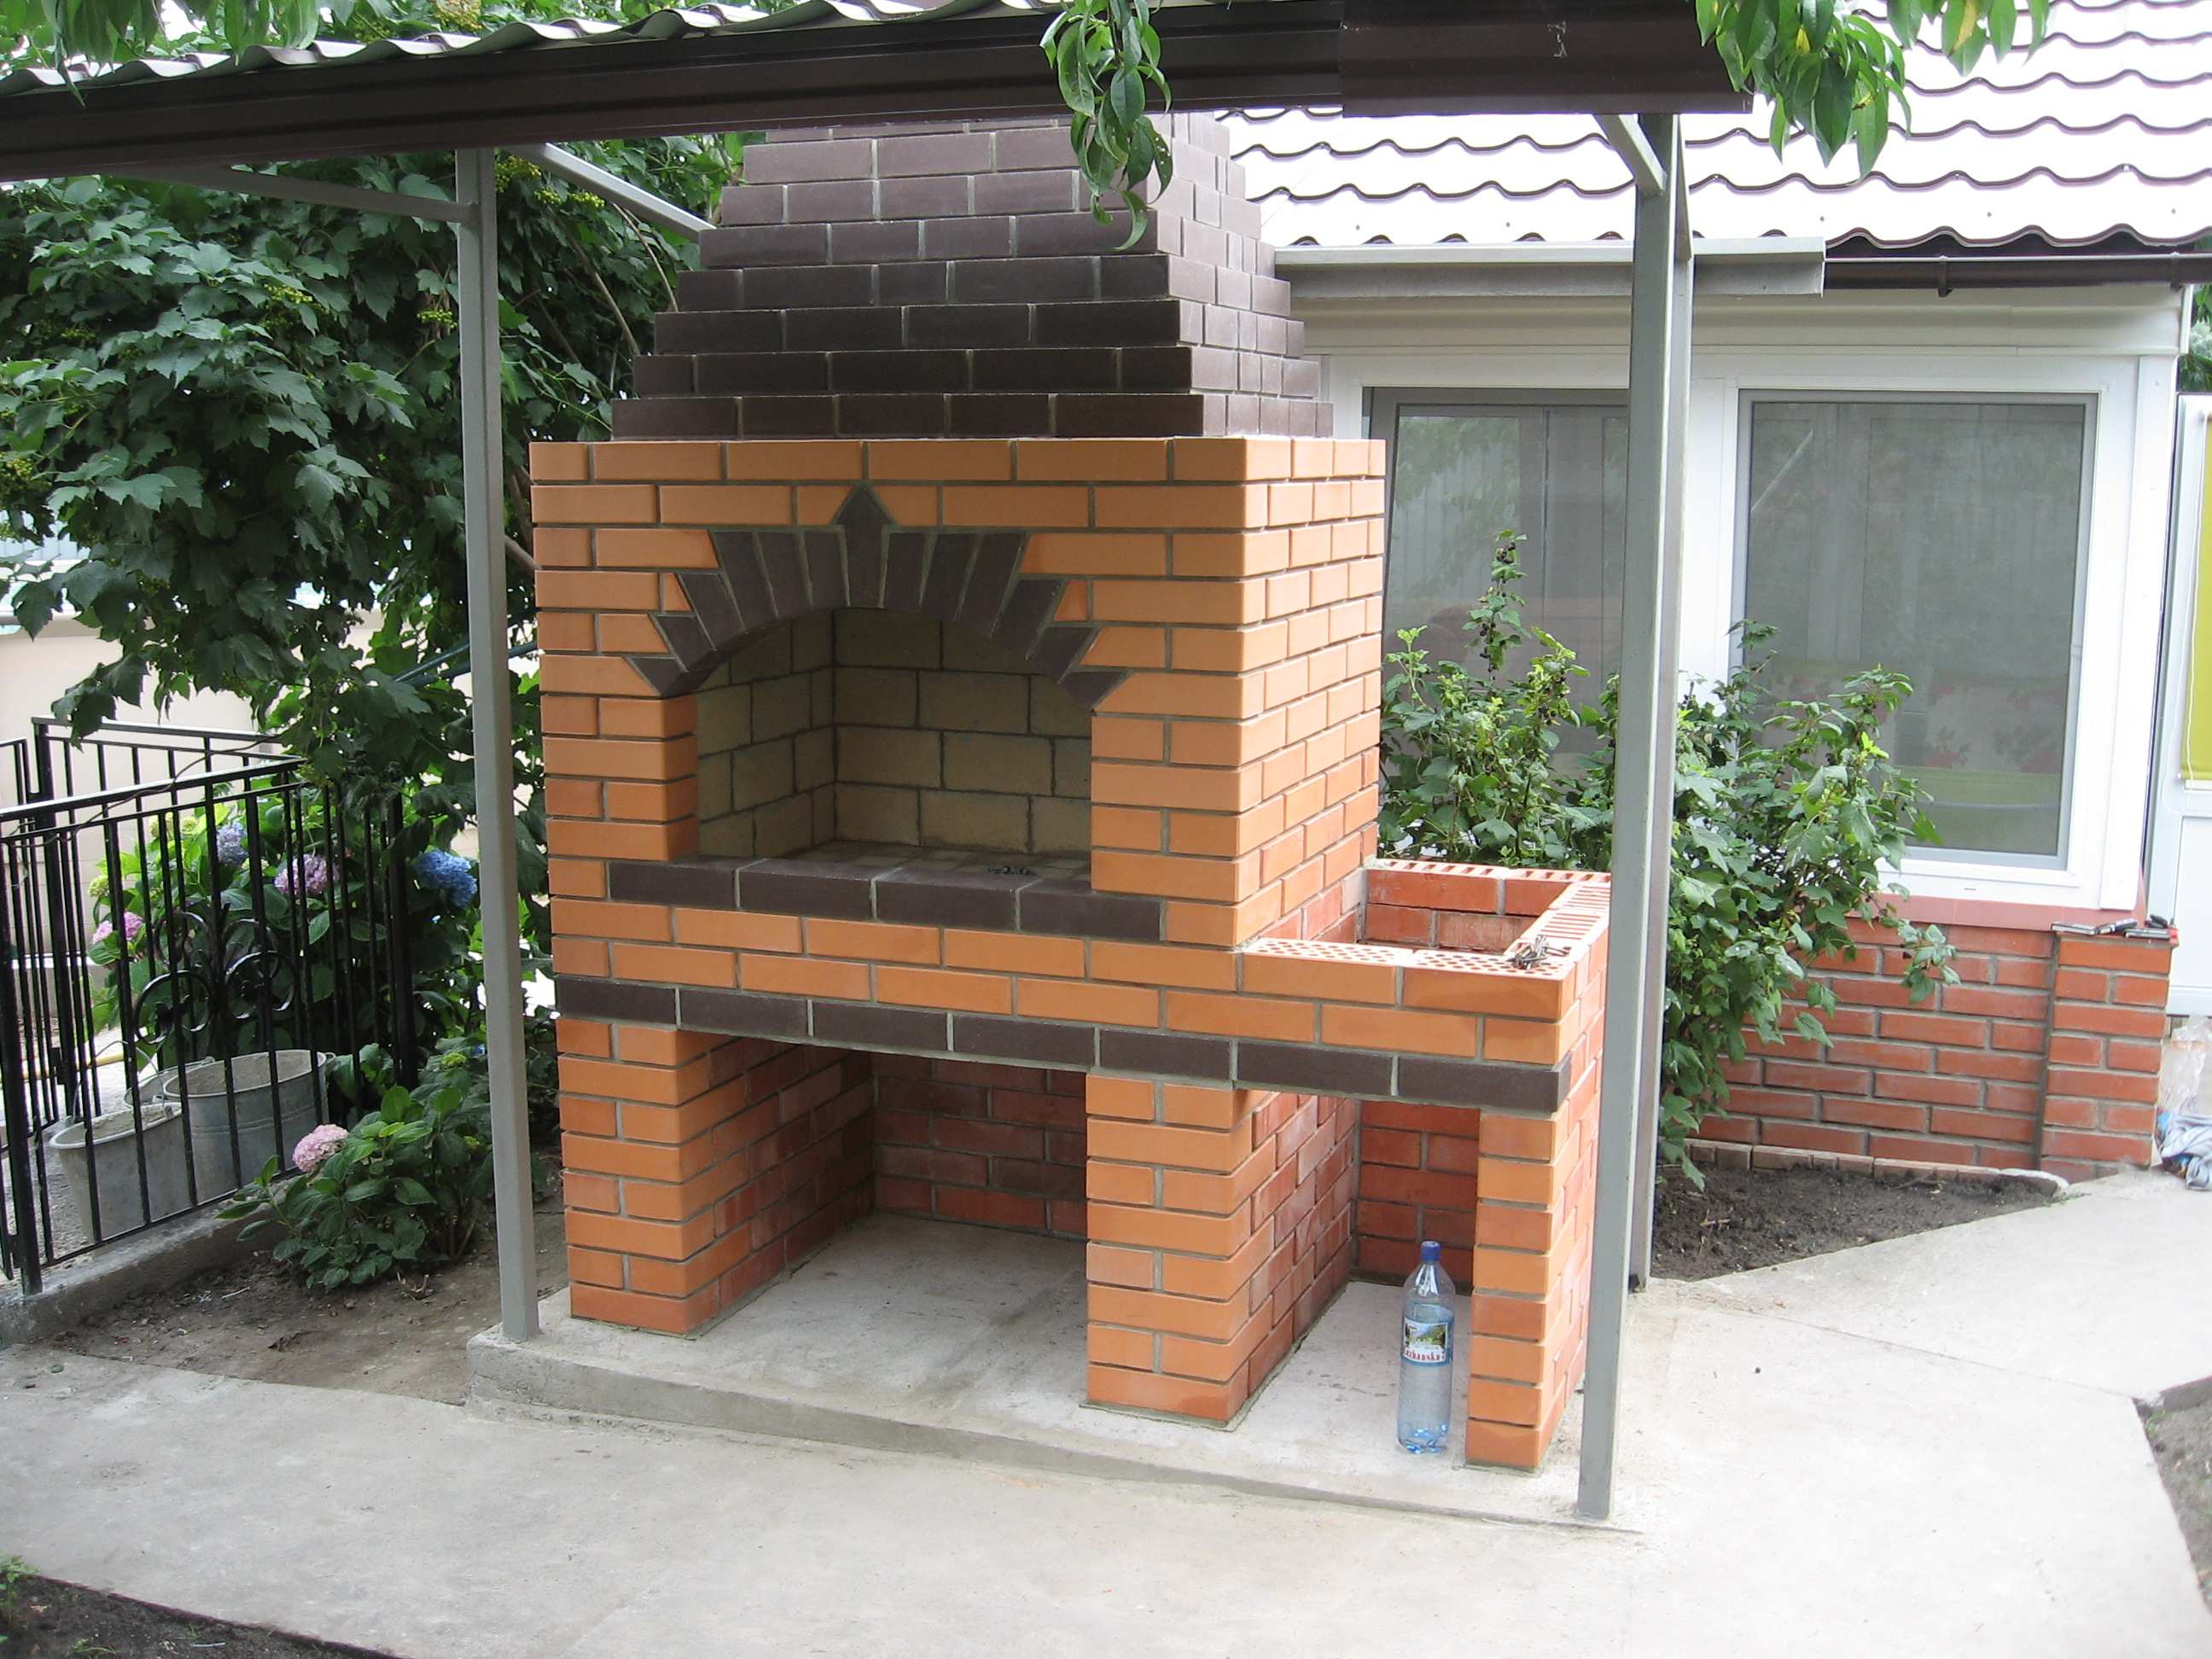
As a result, you should have a barbecue grill like the one shown in the photo below.
Where to Start Building a Barbecue Grill
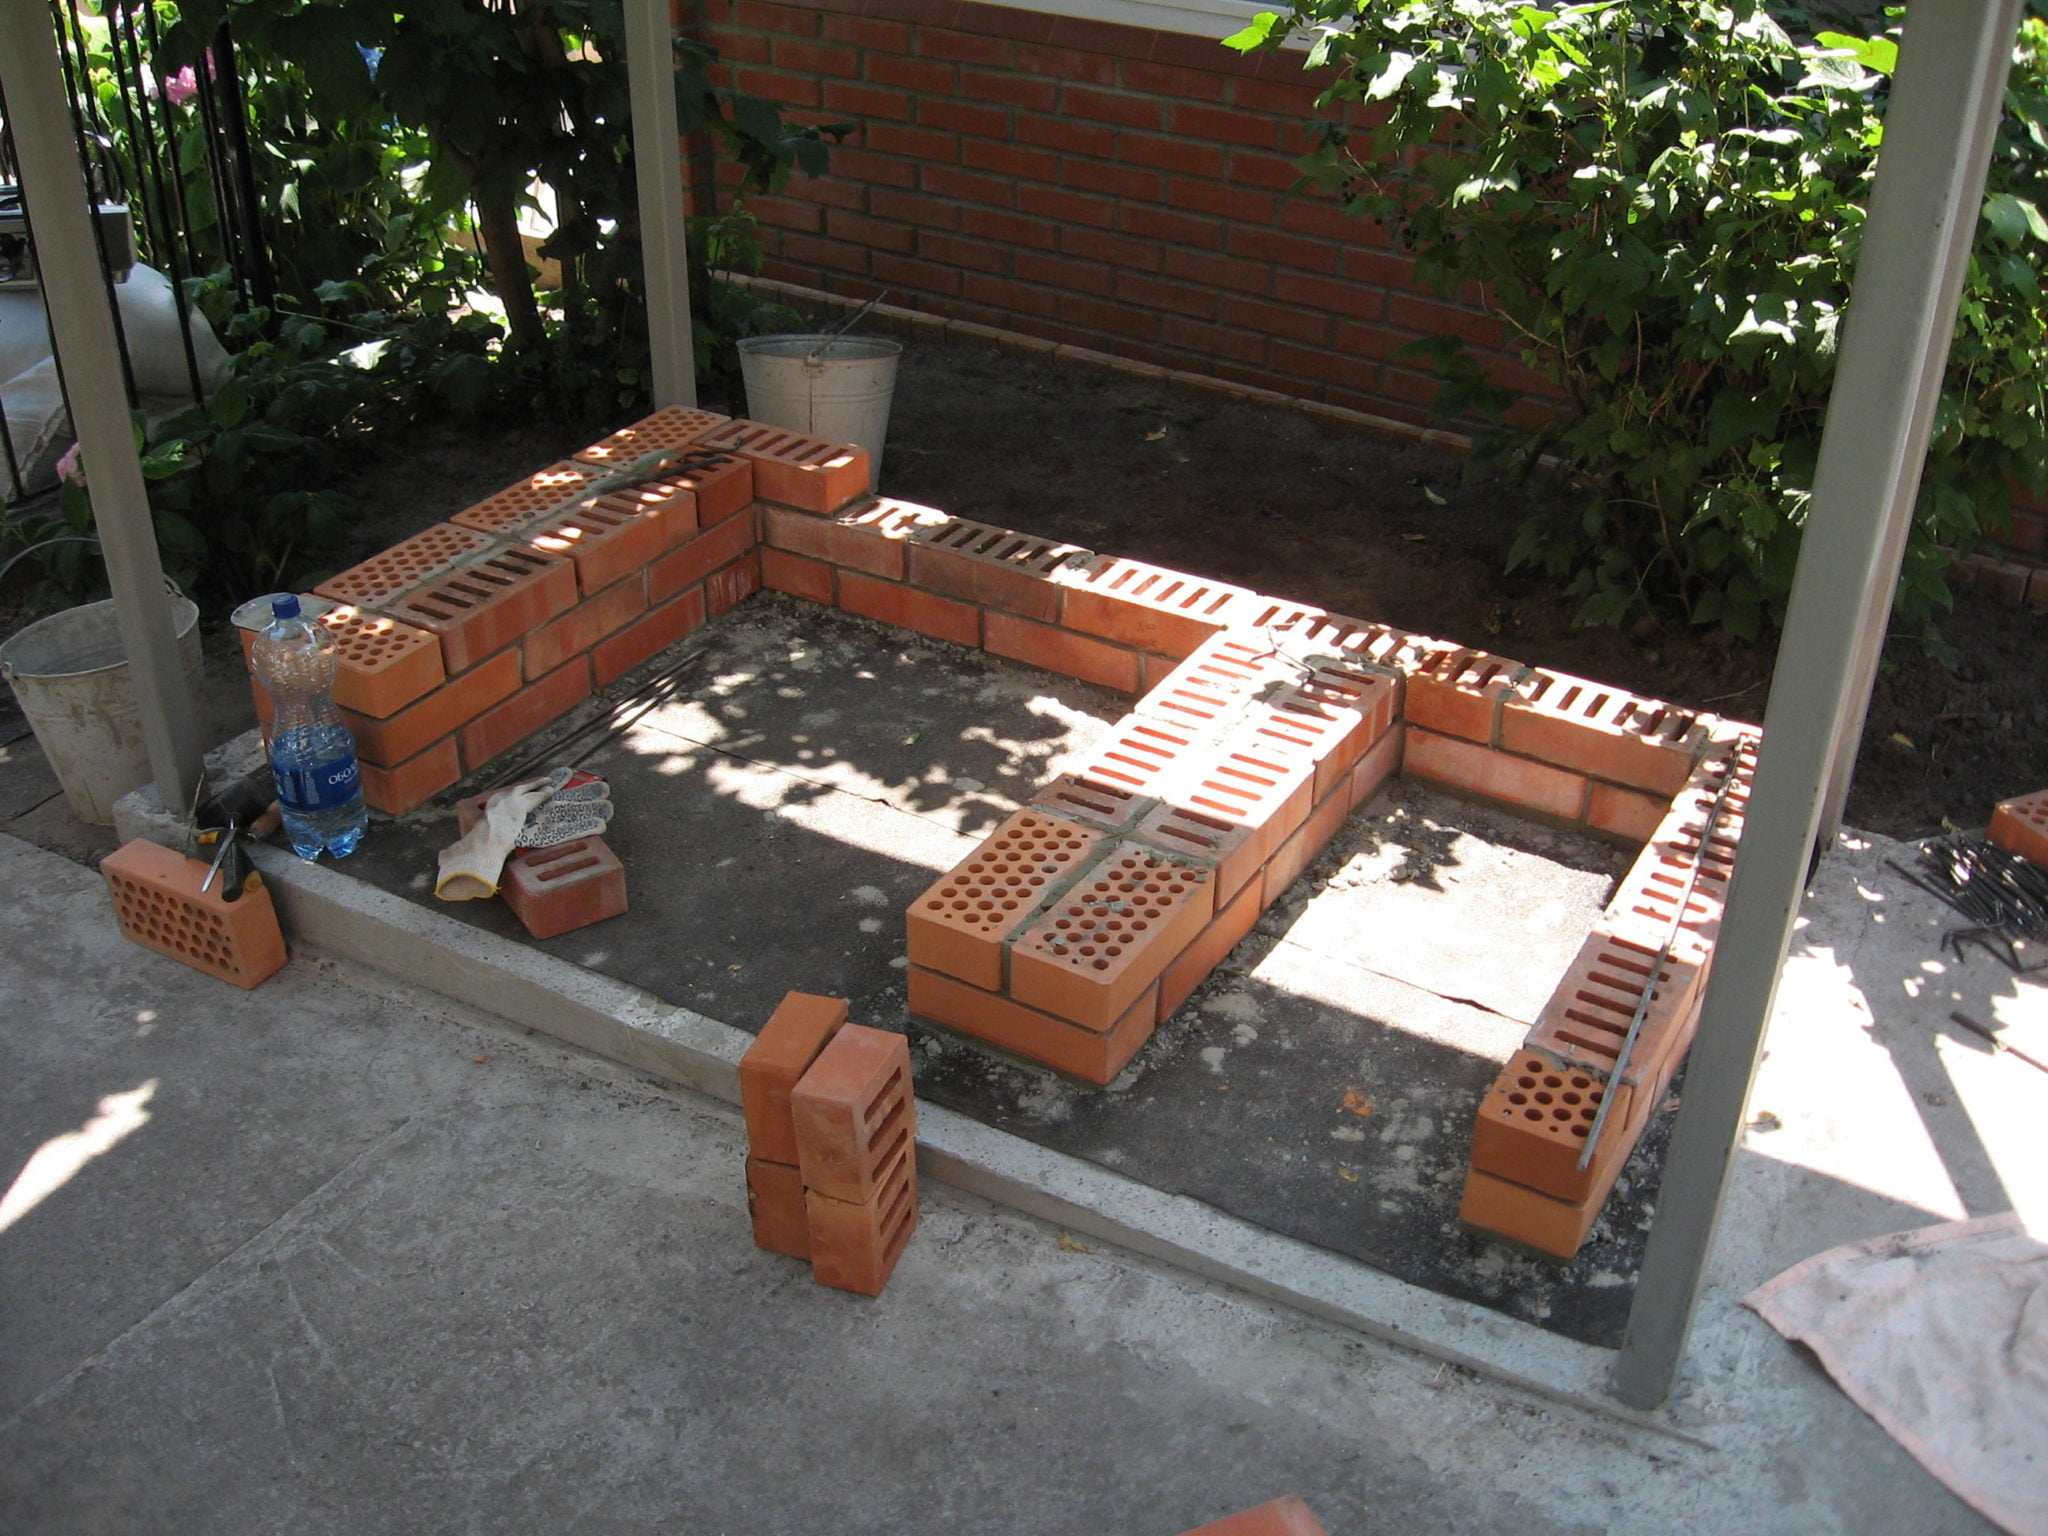
So, you have decided on the type of barbecue grill, its dimensions, and its location. Now, you need to construct a foundation for it.
Usually, such constructions are made outdoors, in a gazebo, or on a terrace. If the foundation of the gazebo or terrace can withstand the weight of a brick oven, which is around 3 tons, you can start building right away. However, if you are planning to build the barbecue grill from scratch, the first thing to do is to pour a suitable foundation for it: either a strip foundation or a slab foundation.
You can find instructions for building such foundations in our “Foundation” section.
The next step will be to install waterproofing for the brick barbecue. It is done to prevent the lower bricks from getting wet through capillary action. You can simply lay a roll of roofing felt or waterproofing material. After completing the construction, trim any excess with a knife.
Brick Barbecue Grill Made by Your Own Hands. Step-by-Step Instructions with Photos.
Let’s proceed directly to laying the barbecue.
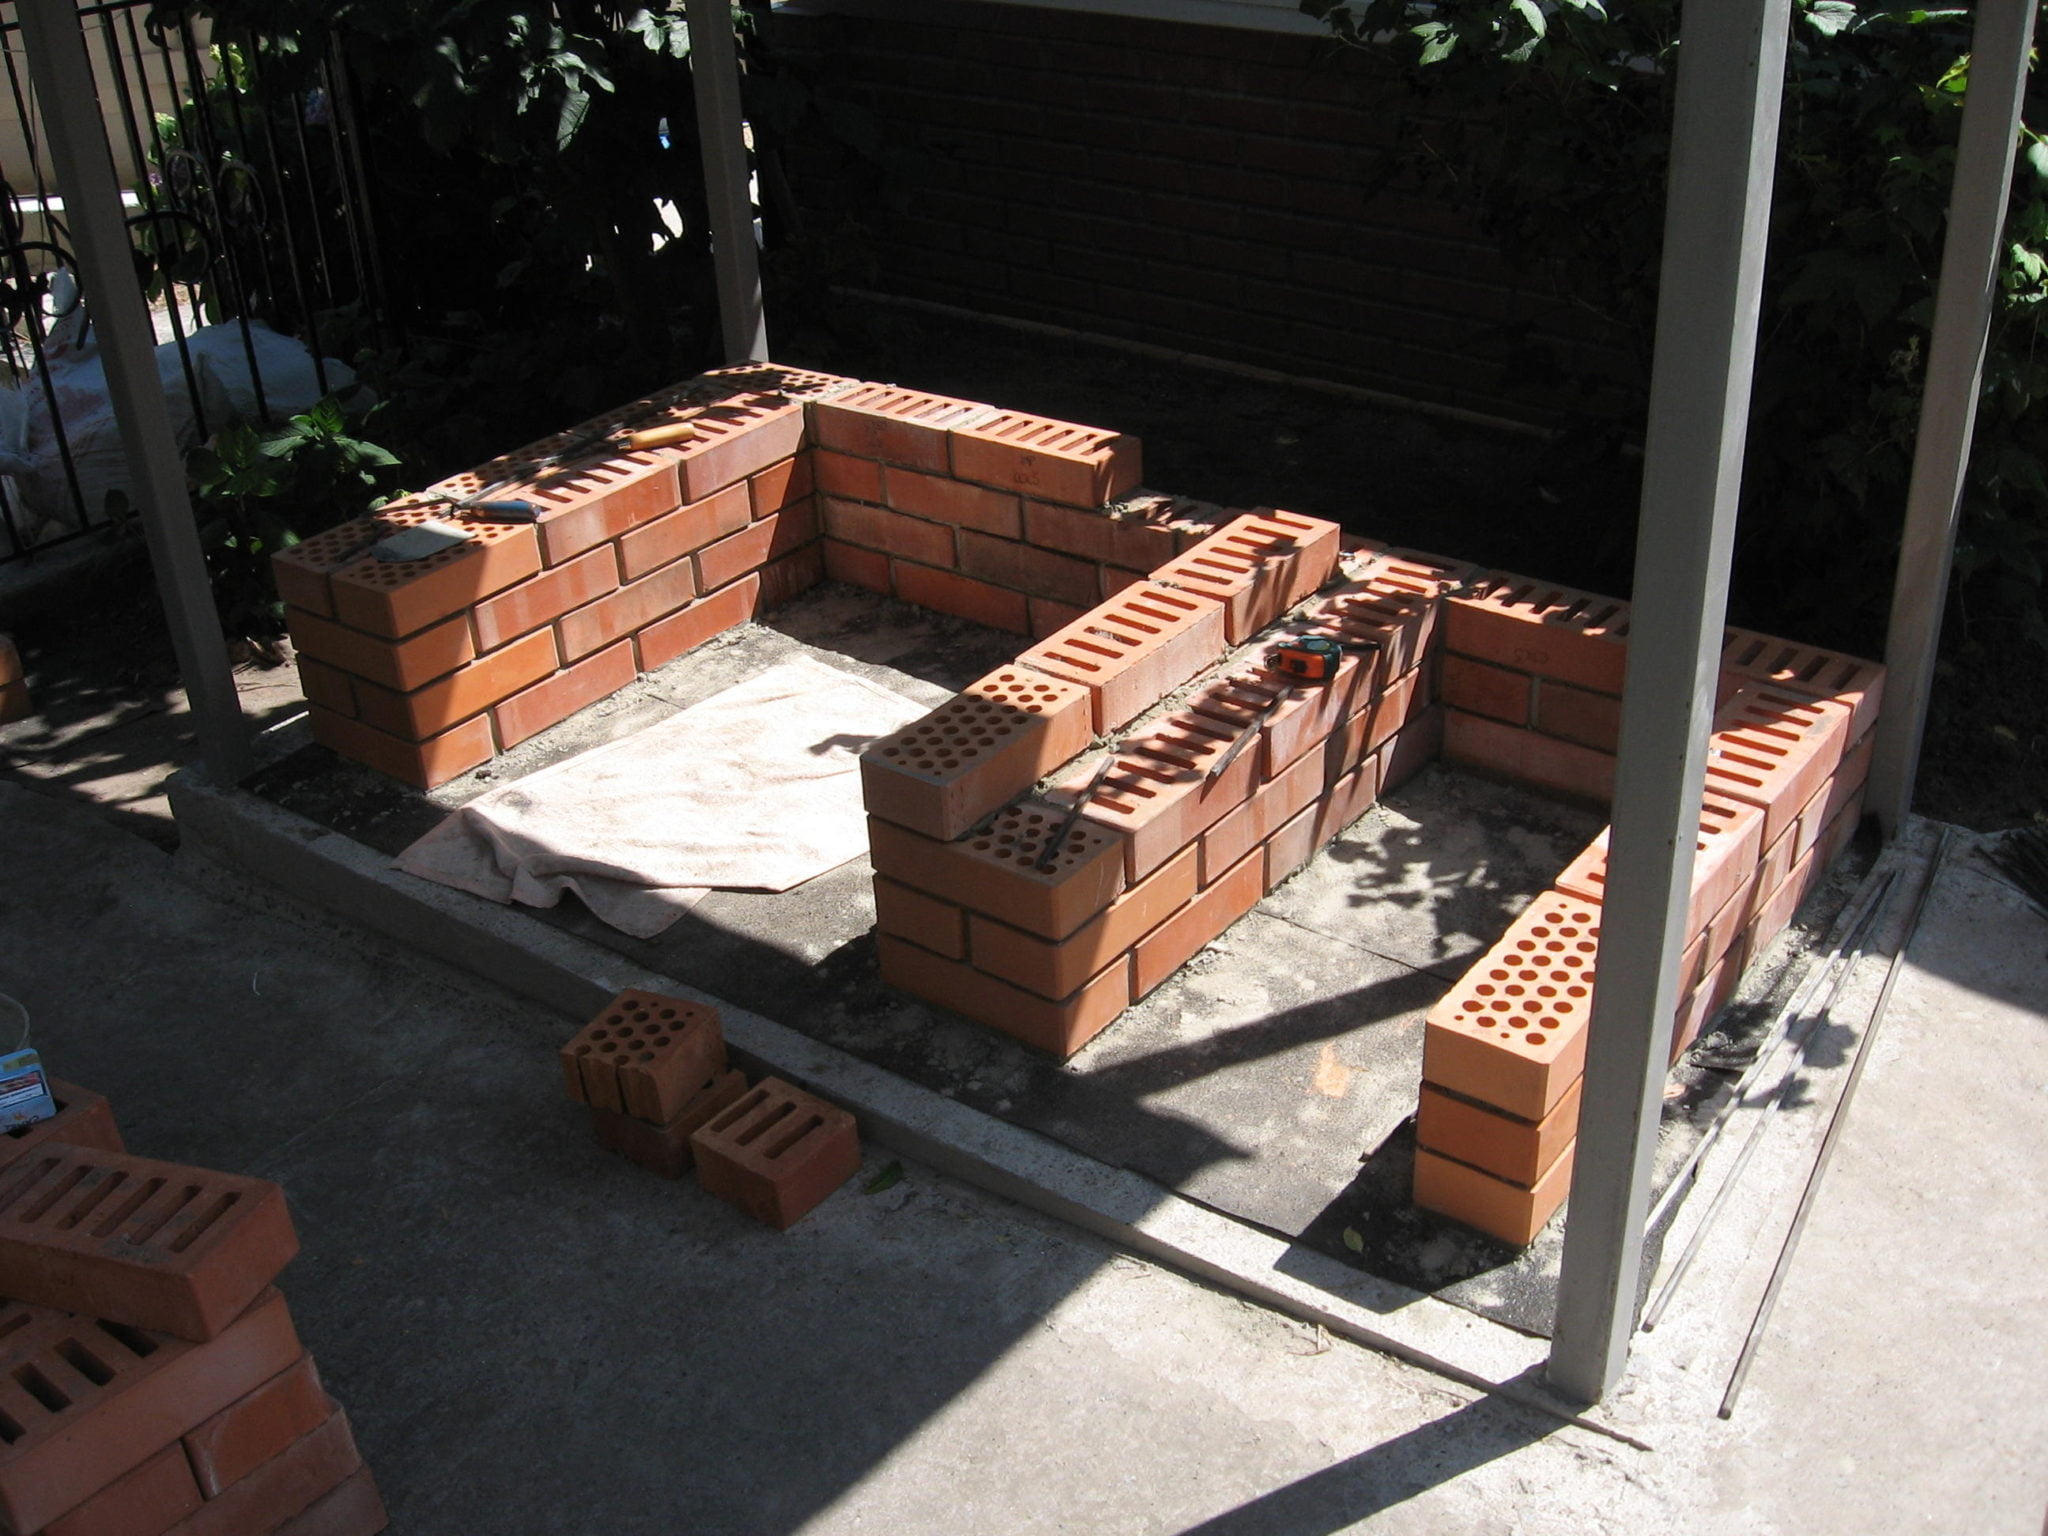
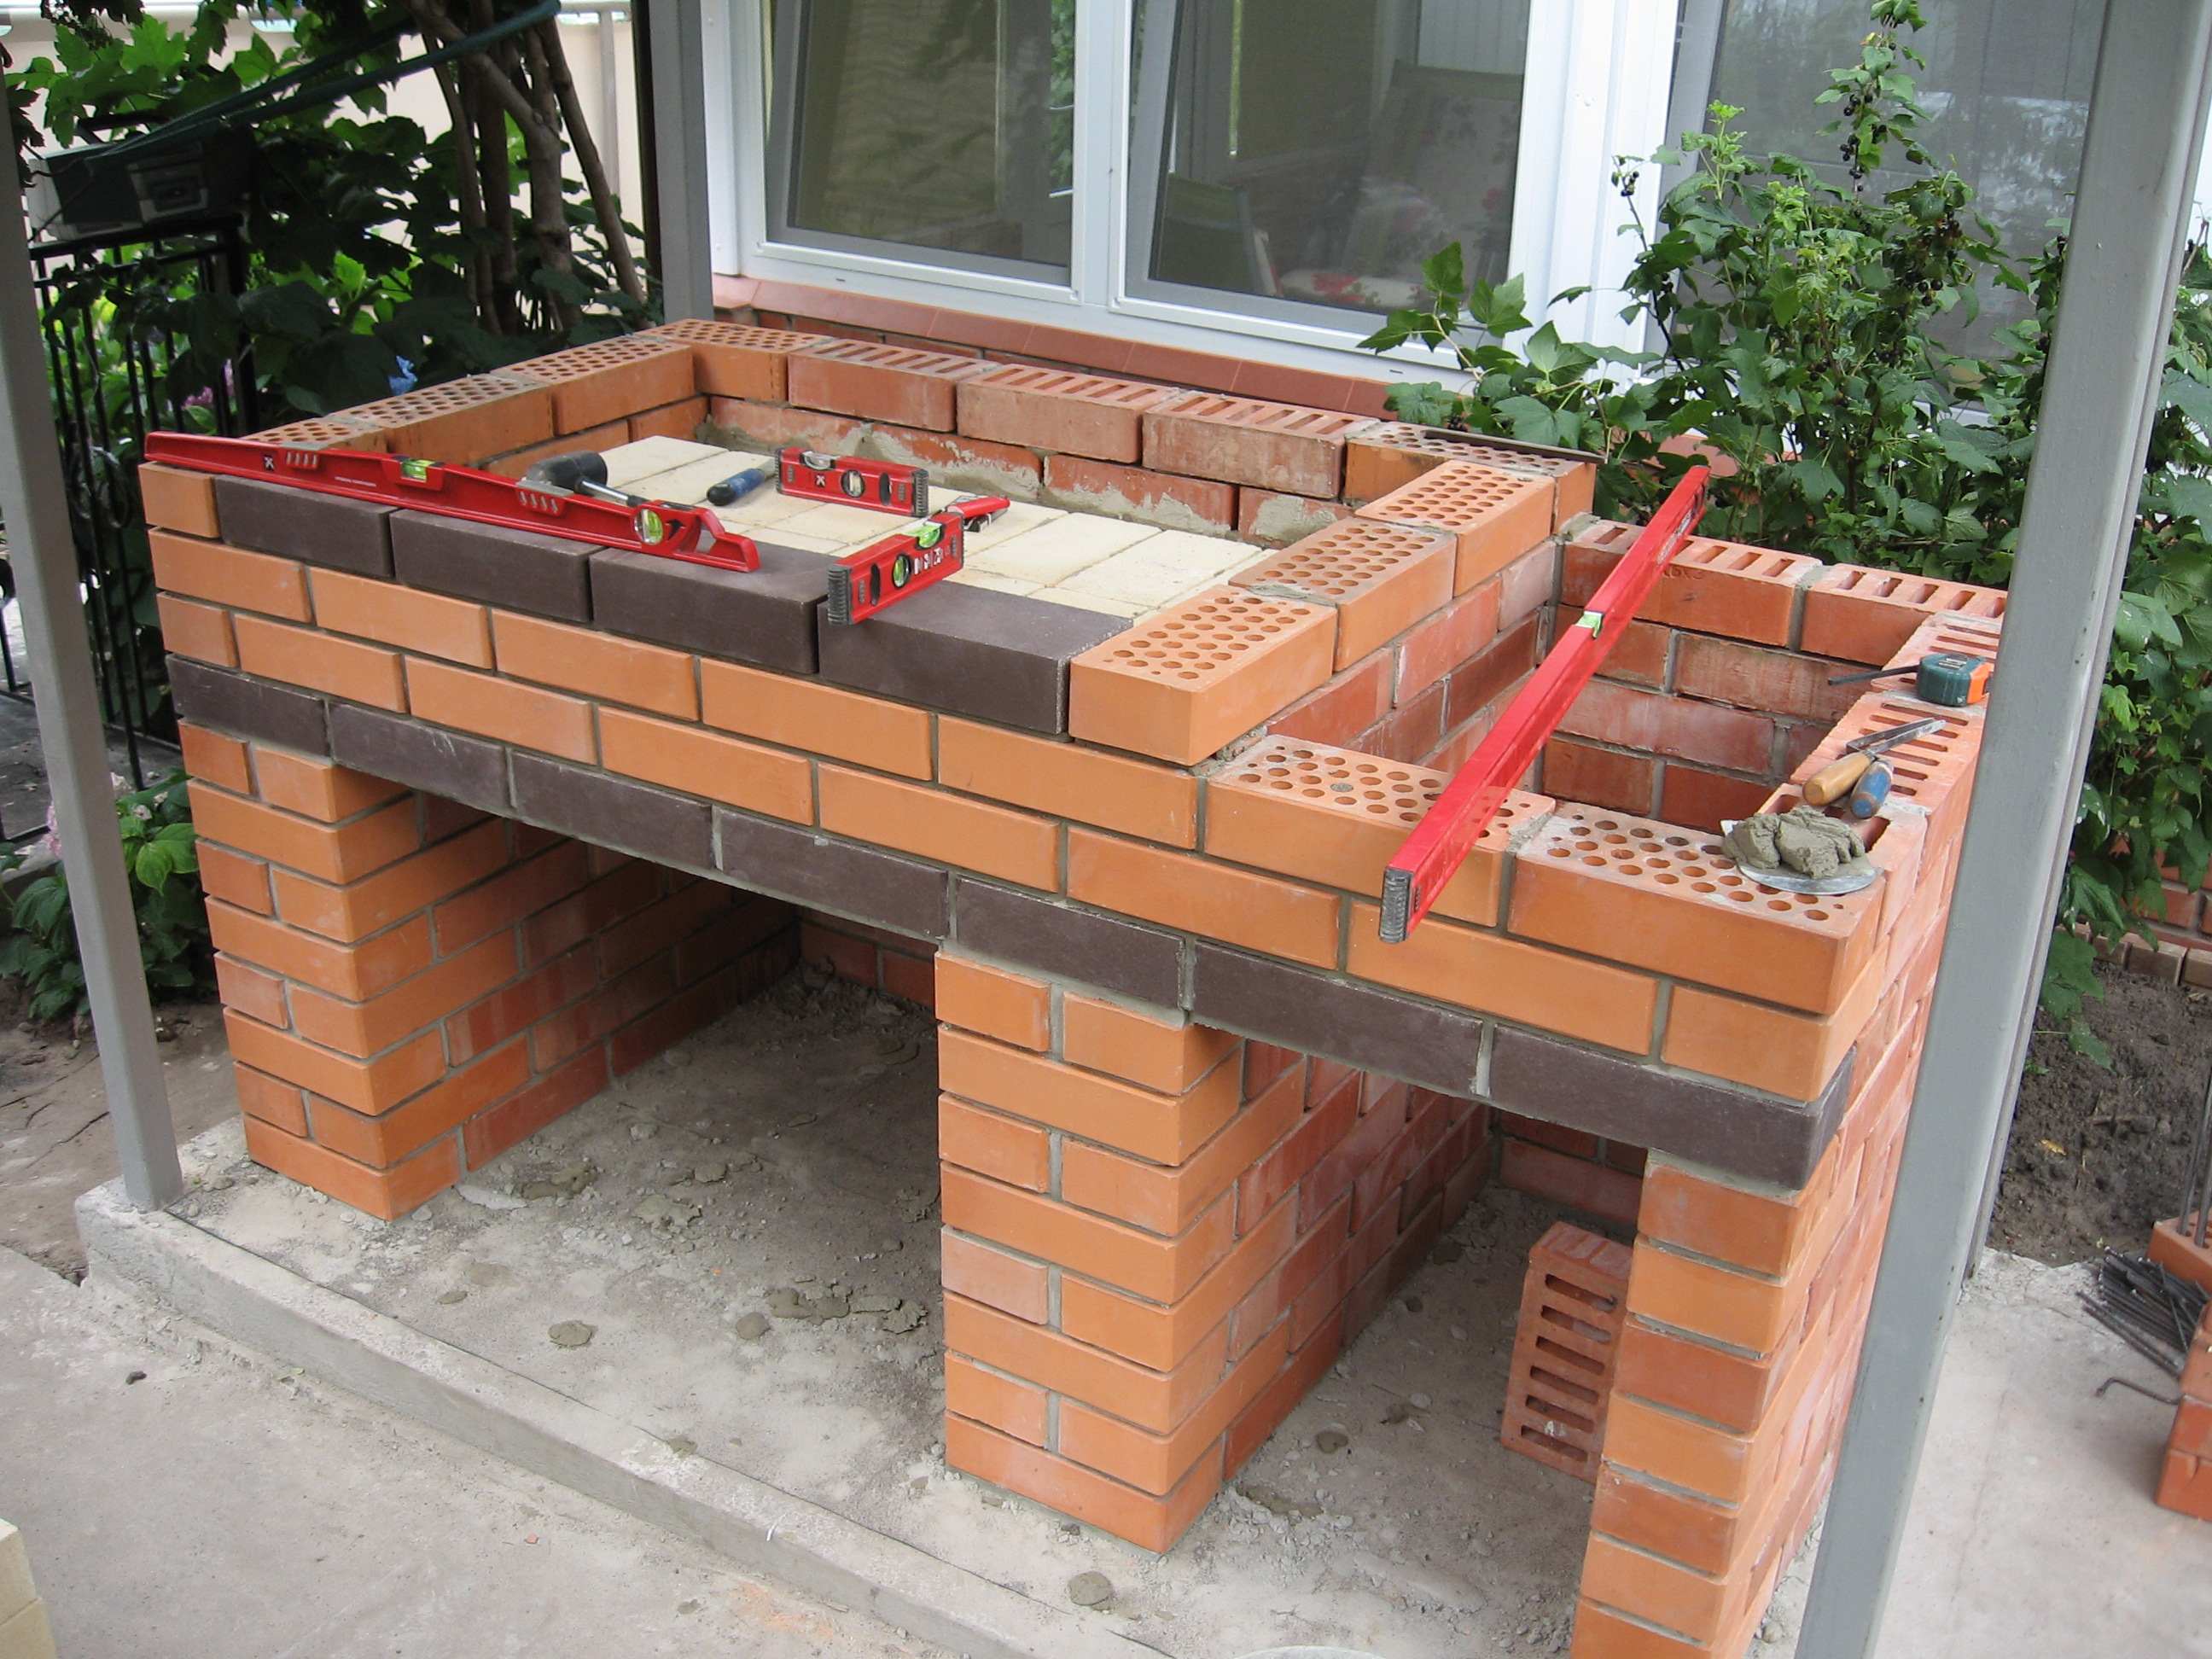
We recommend starting by laying the first row of bricks without mortar and assessing how your future structure fits on the foundation. Don’t forget to leave 1 cm gaps between the bricks. Also, check the diagonals; they should match.
After that, you can begin laying the barbecue. The face brick is laid using a cement-sand mortar (cement-sand ratio 1:3). To improve the mortar’s plasticity, you can add lime or a special bricklaying plasticizer from the nearest construction store. Make the joints 8-10 mm wide using a metal rod, rebar, or similar tools. In places where bricks meet without overlap, reinforce the masonry with perforated tape, wire, etc.

Lay the bricks with a half-brick offset for each subsequent row. To cut the bricks, you’ll need an angle grinder with a stone-cutting disc.
Continue laying the brick barbecue.
Don’t forget to check the vertical alignment of the masonry at least every 3 rows using the corners. Also, ensure that the lengths of the diagonals of the barbecue match.
Continue the masonry.
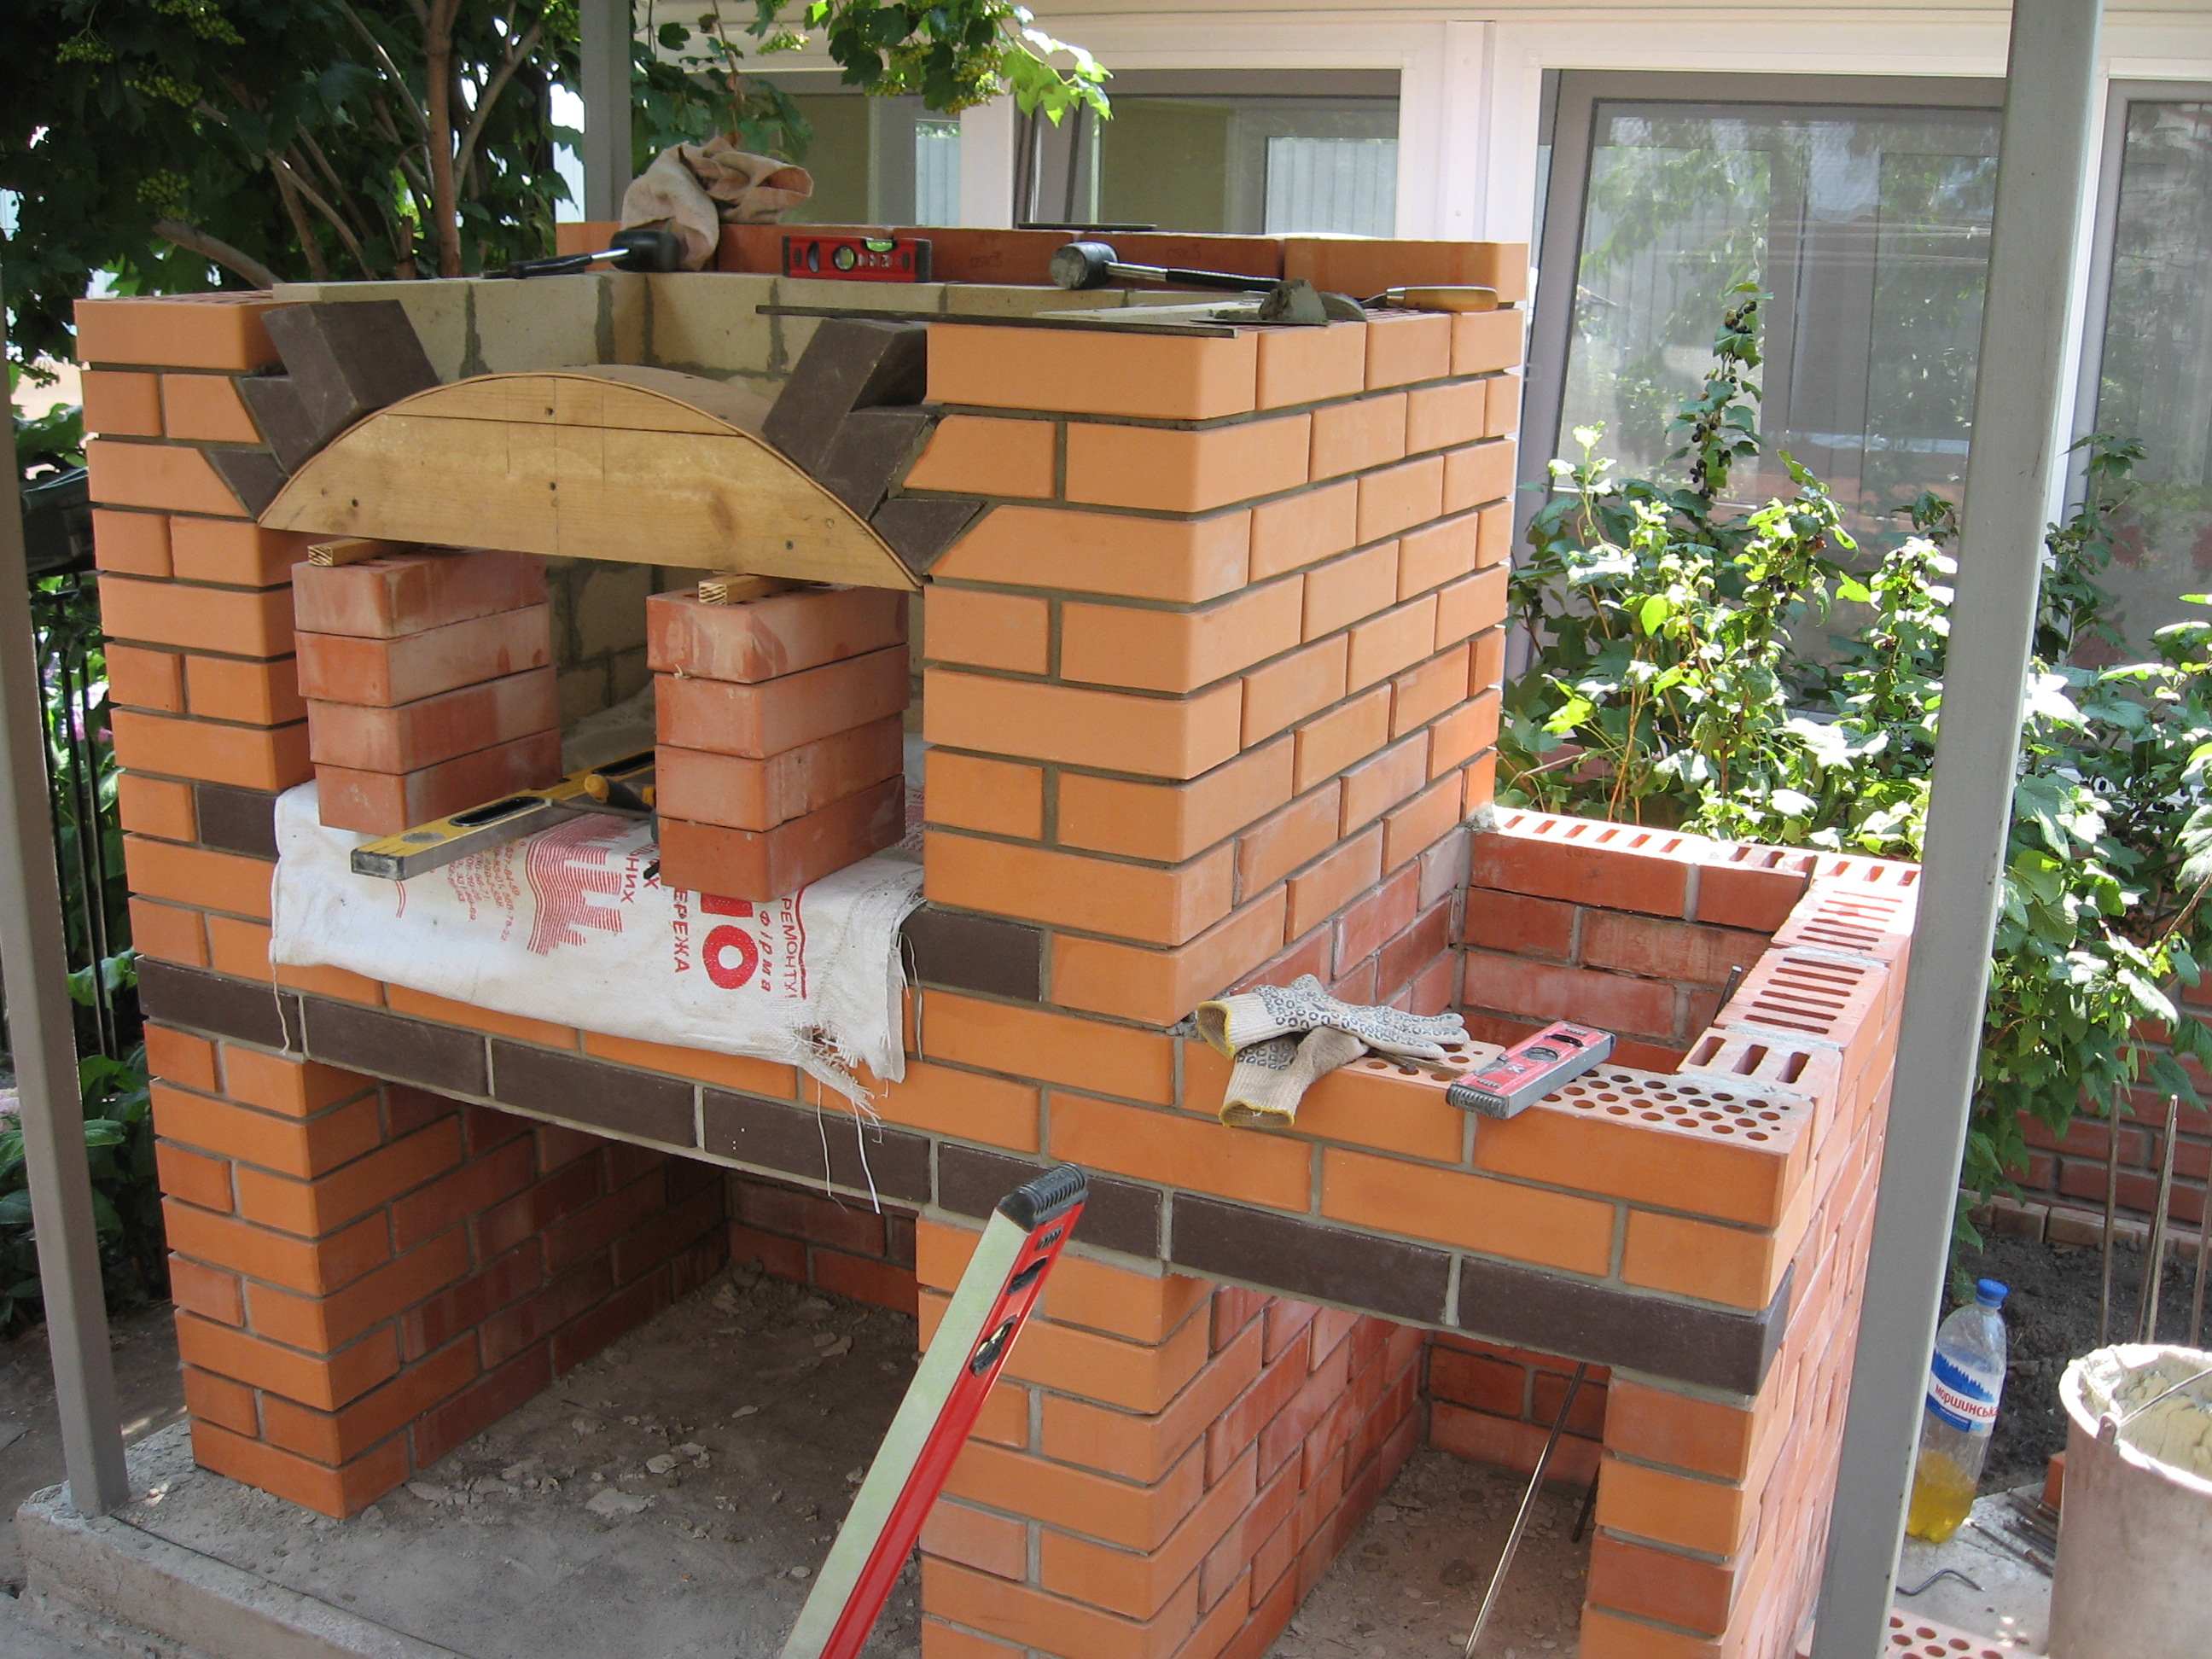
After you’ve completed 8 rows of masonry, it’s time to create lintels for the barbecue and the countertop. They should look like the ones shown in the photo below.
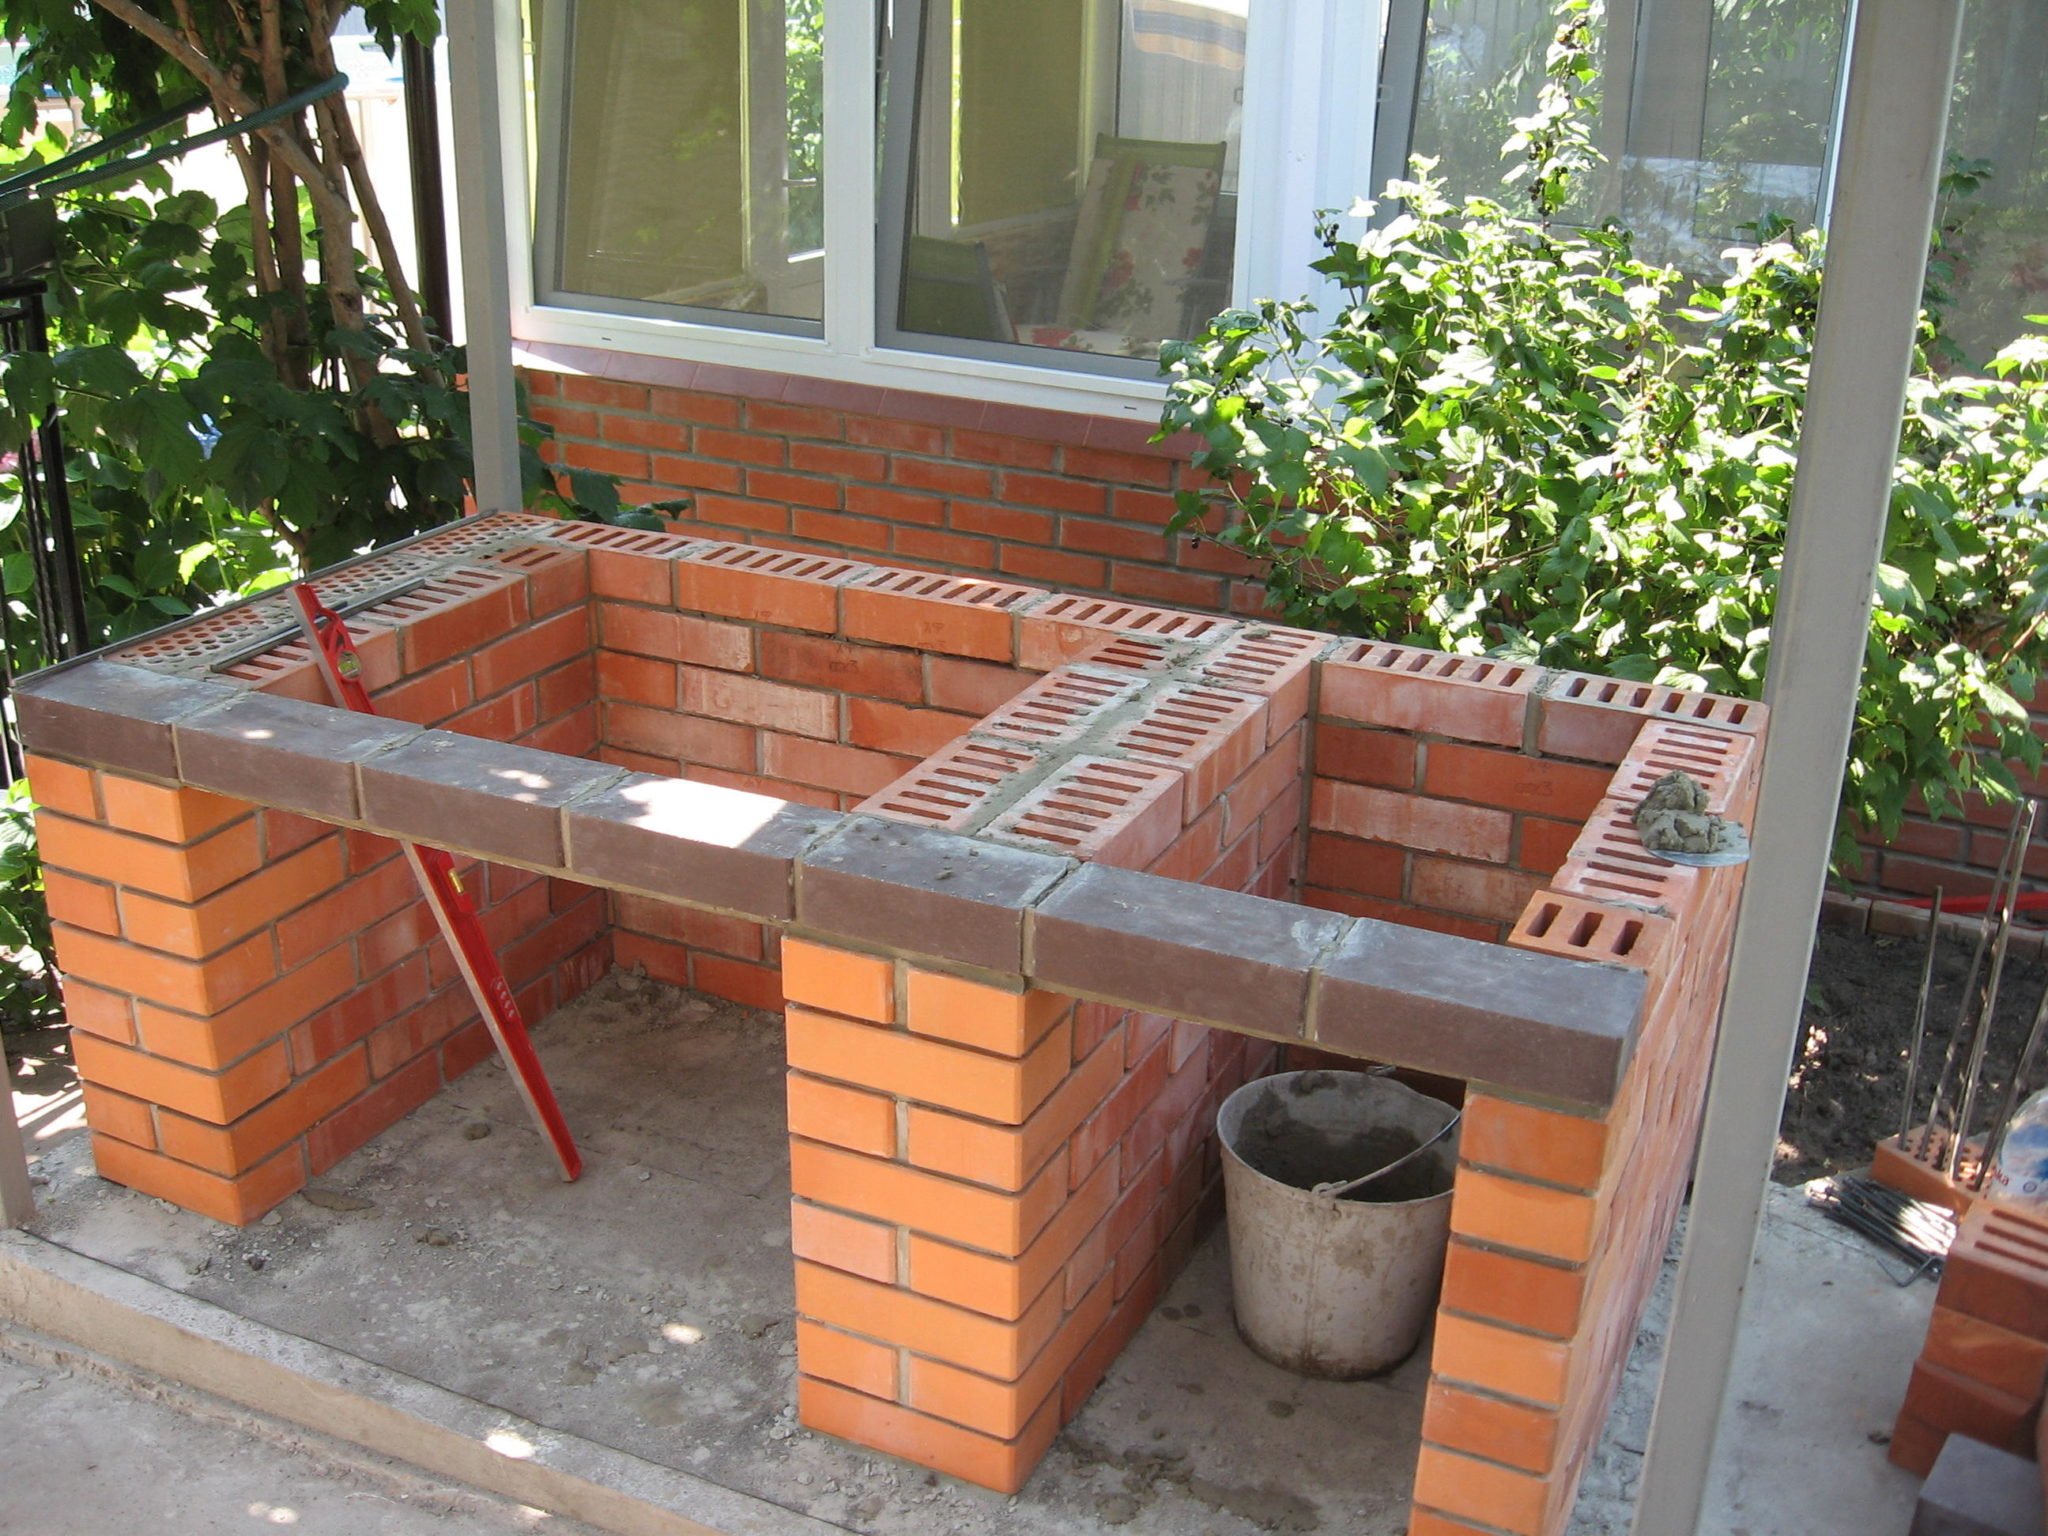
You can create such lintels using a few different methods.
Firstly, you can fasten the bricks together with metal rods and mortar.

Secondly, you can use metal brackets.
In our case, we used the second method. We assembled the brackets in the shape of an inverted letter T and cut half of the shelf. Here’s what we got.
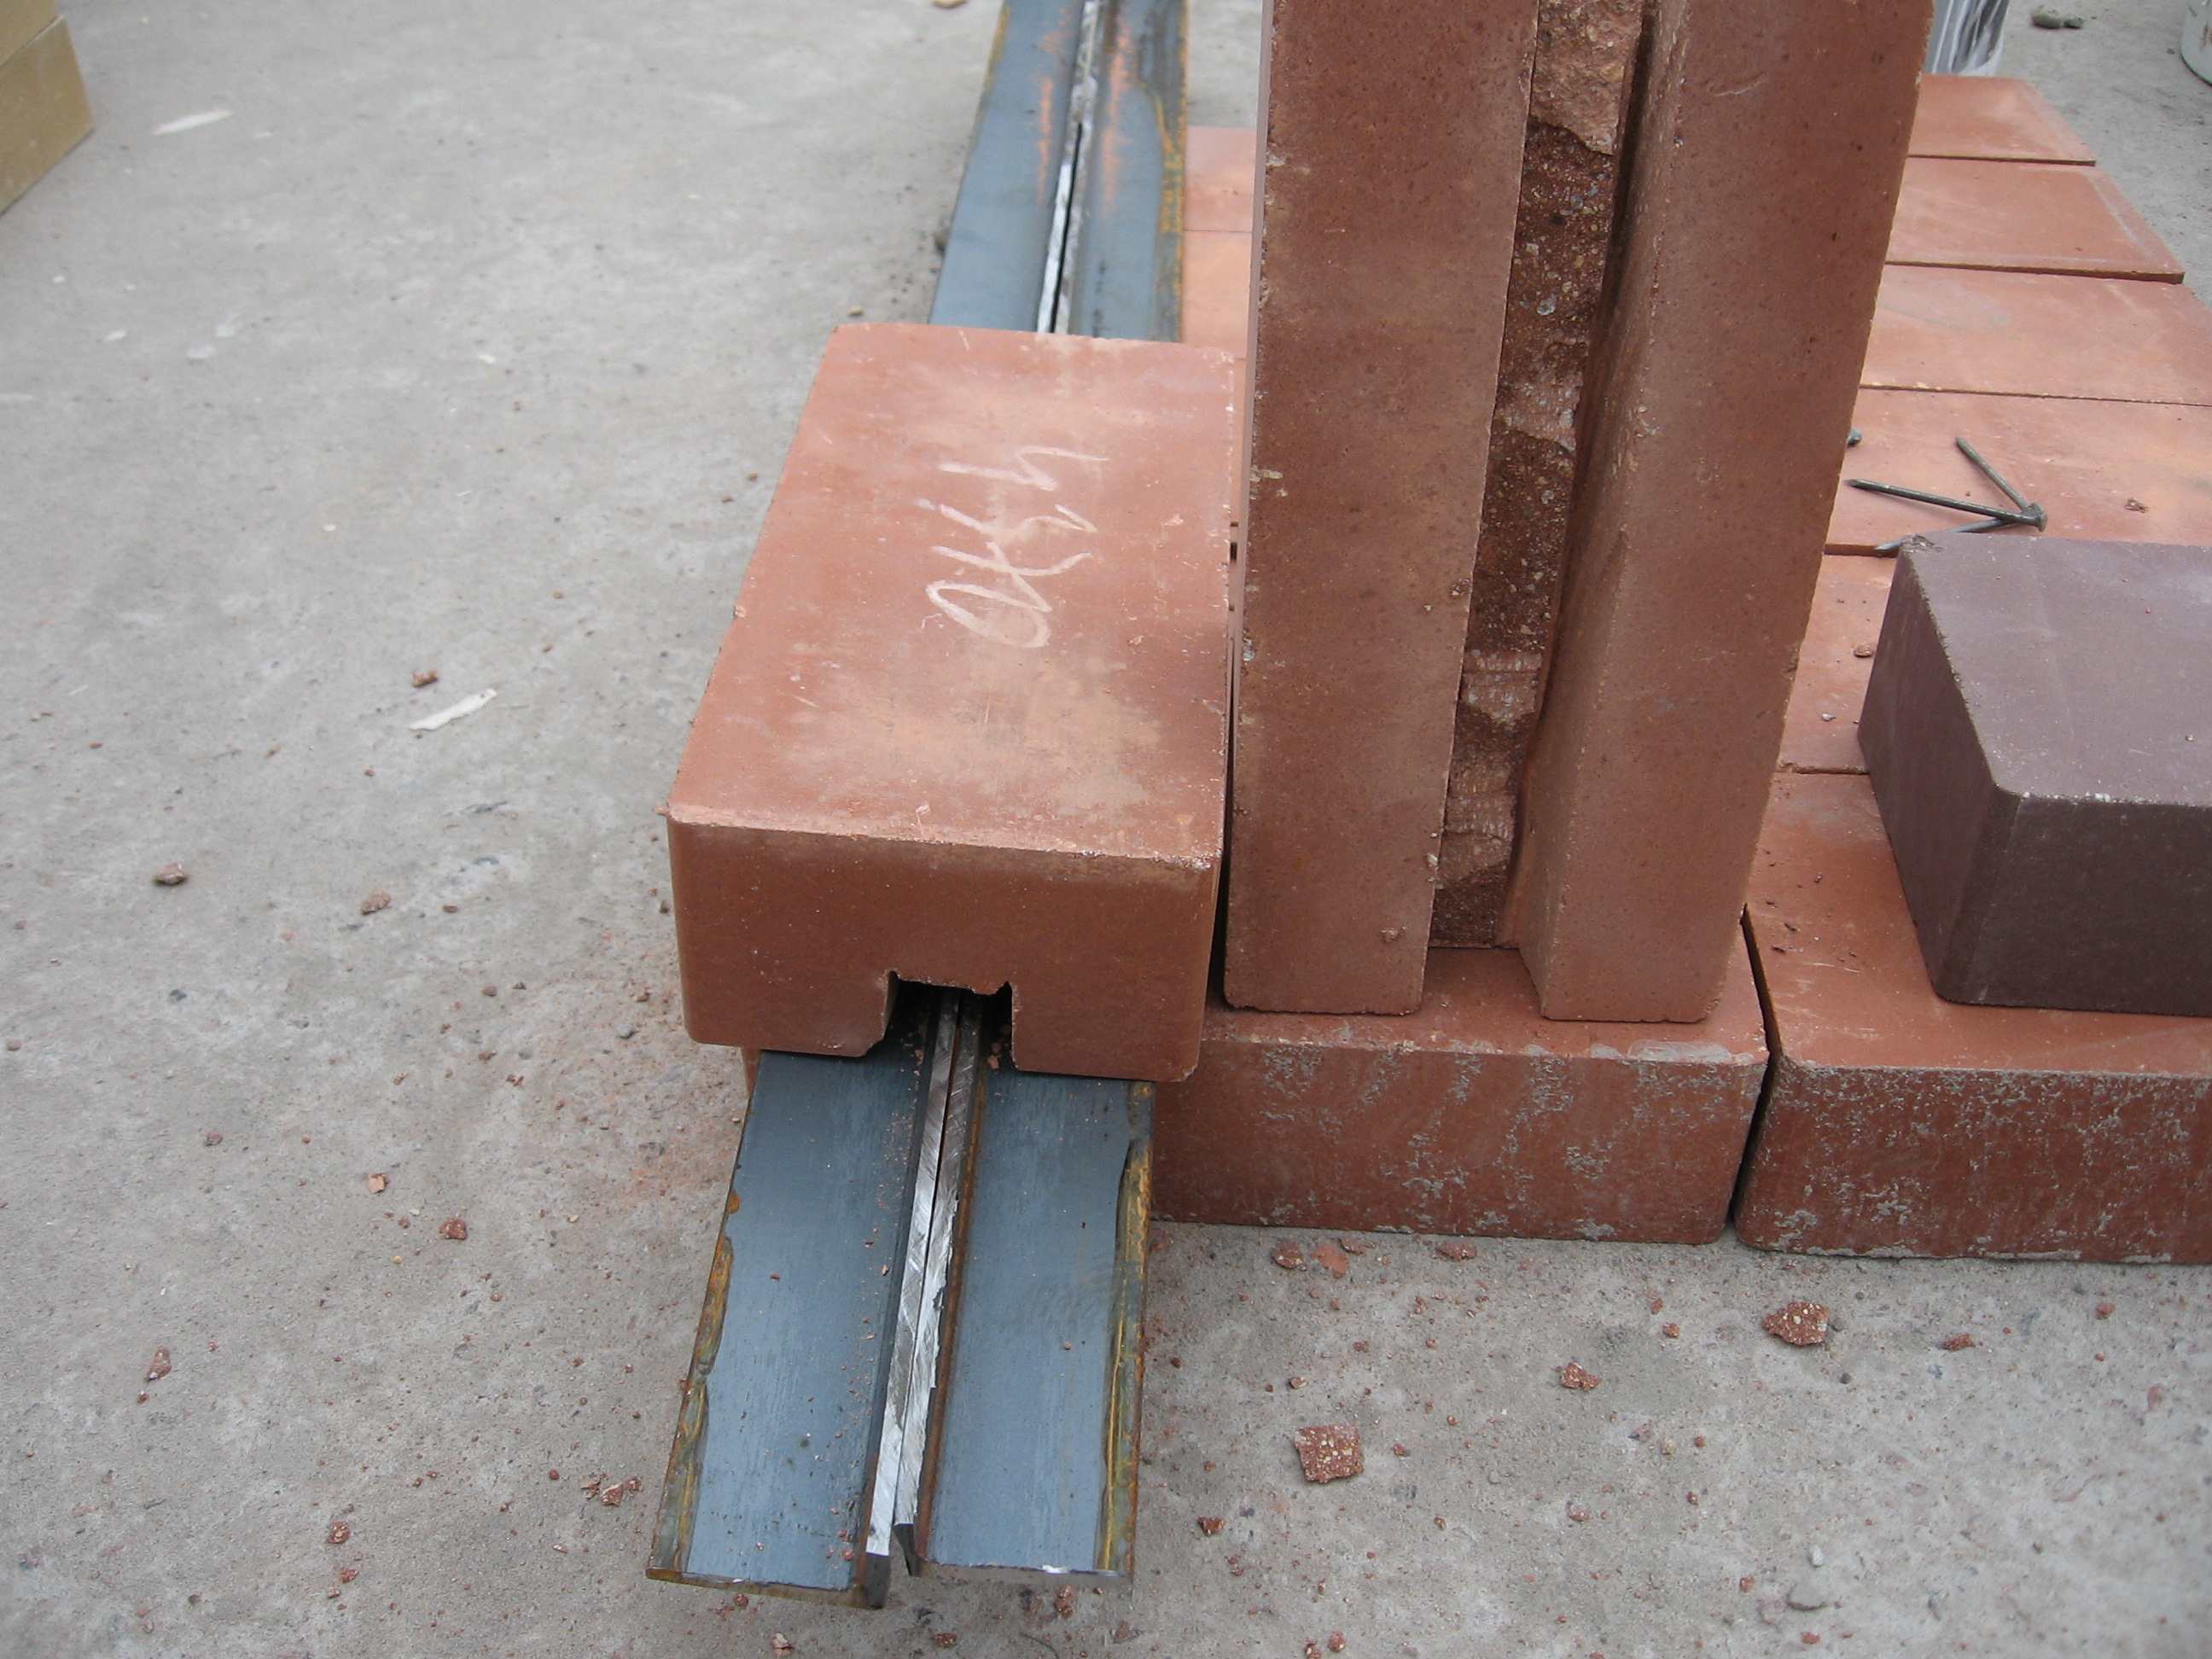
Choose a bracket size of at least 45×45 mm. A smaller bracket may bend, but don’t go too large to avoid it protruding beyond the edges of the brick.
Make the notch in the brick with a generous margin to prevent the metal from breaking the masonry when heated.
Such a ledge is not noticeable, reliable, and aesthetically pleasing.
Let’s continue.
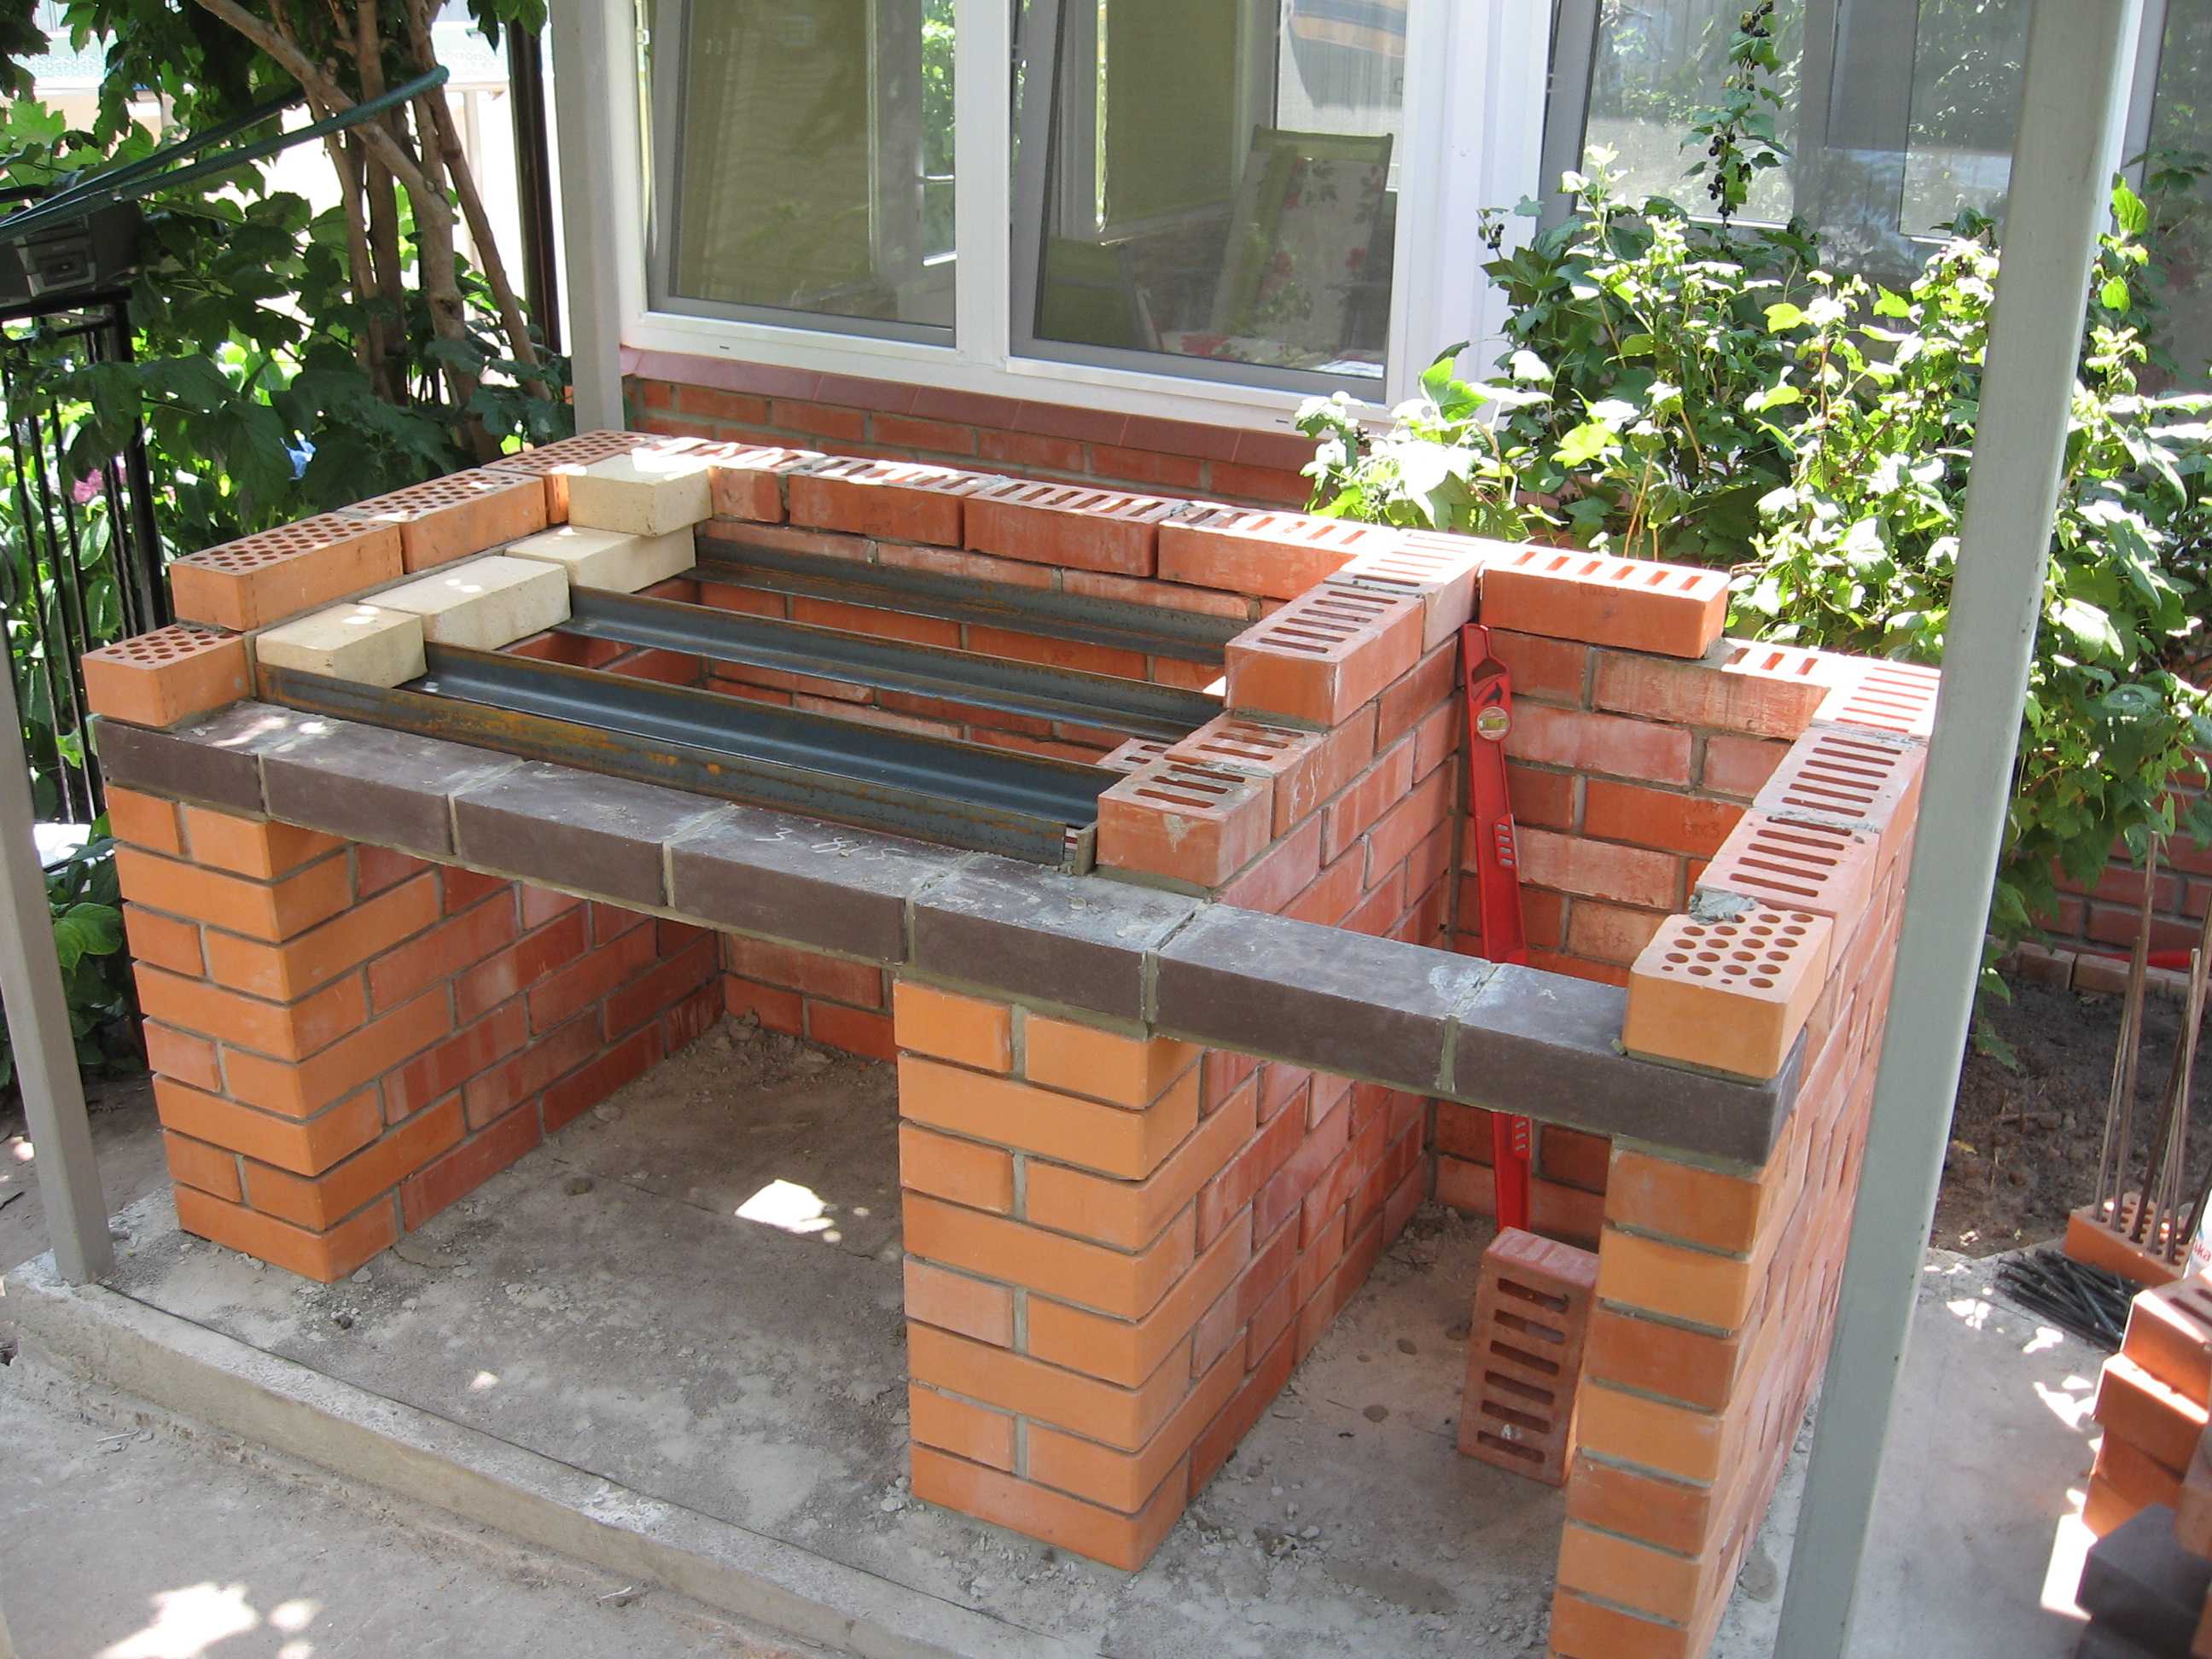
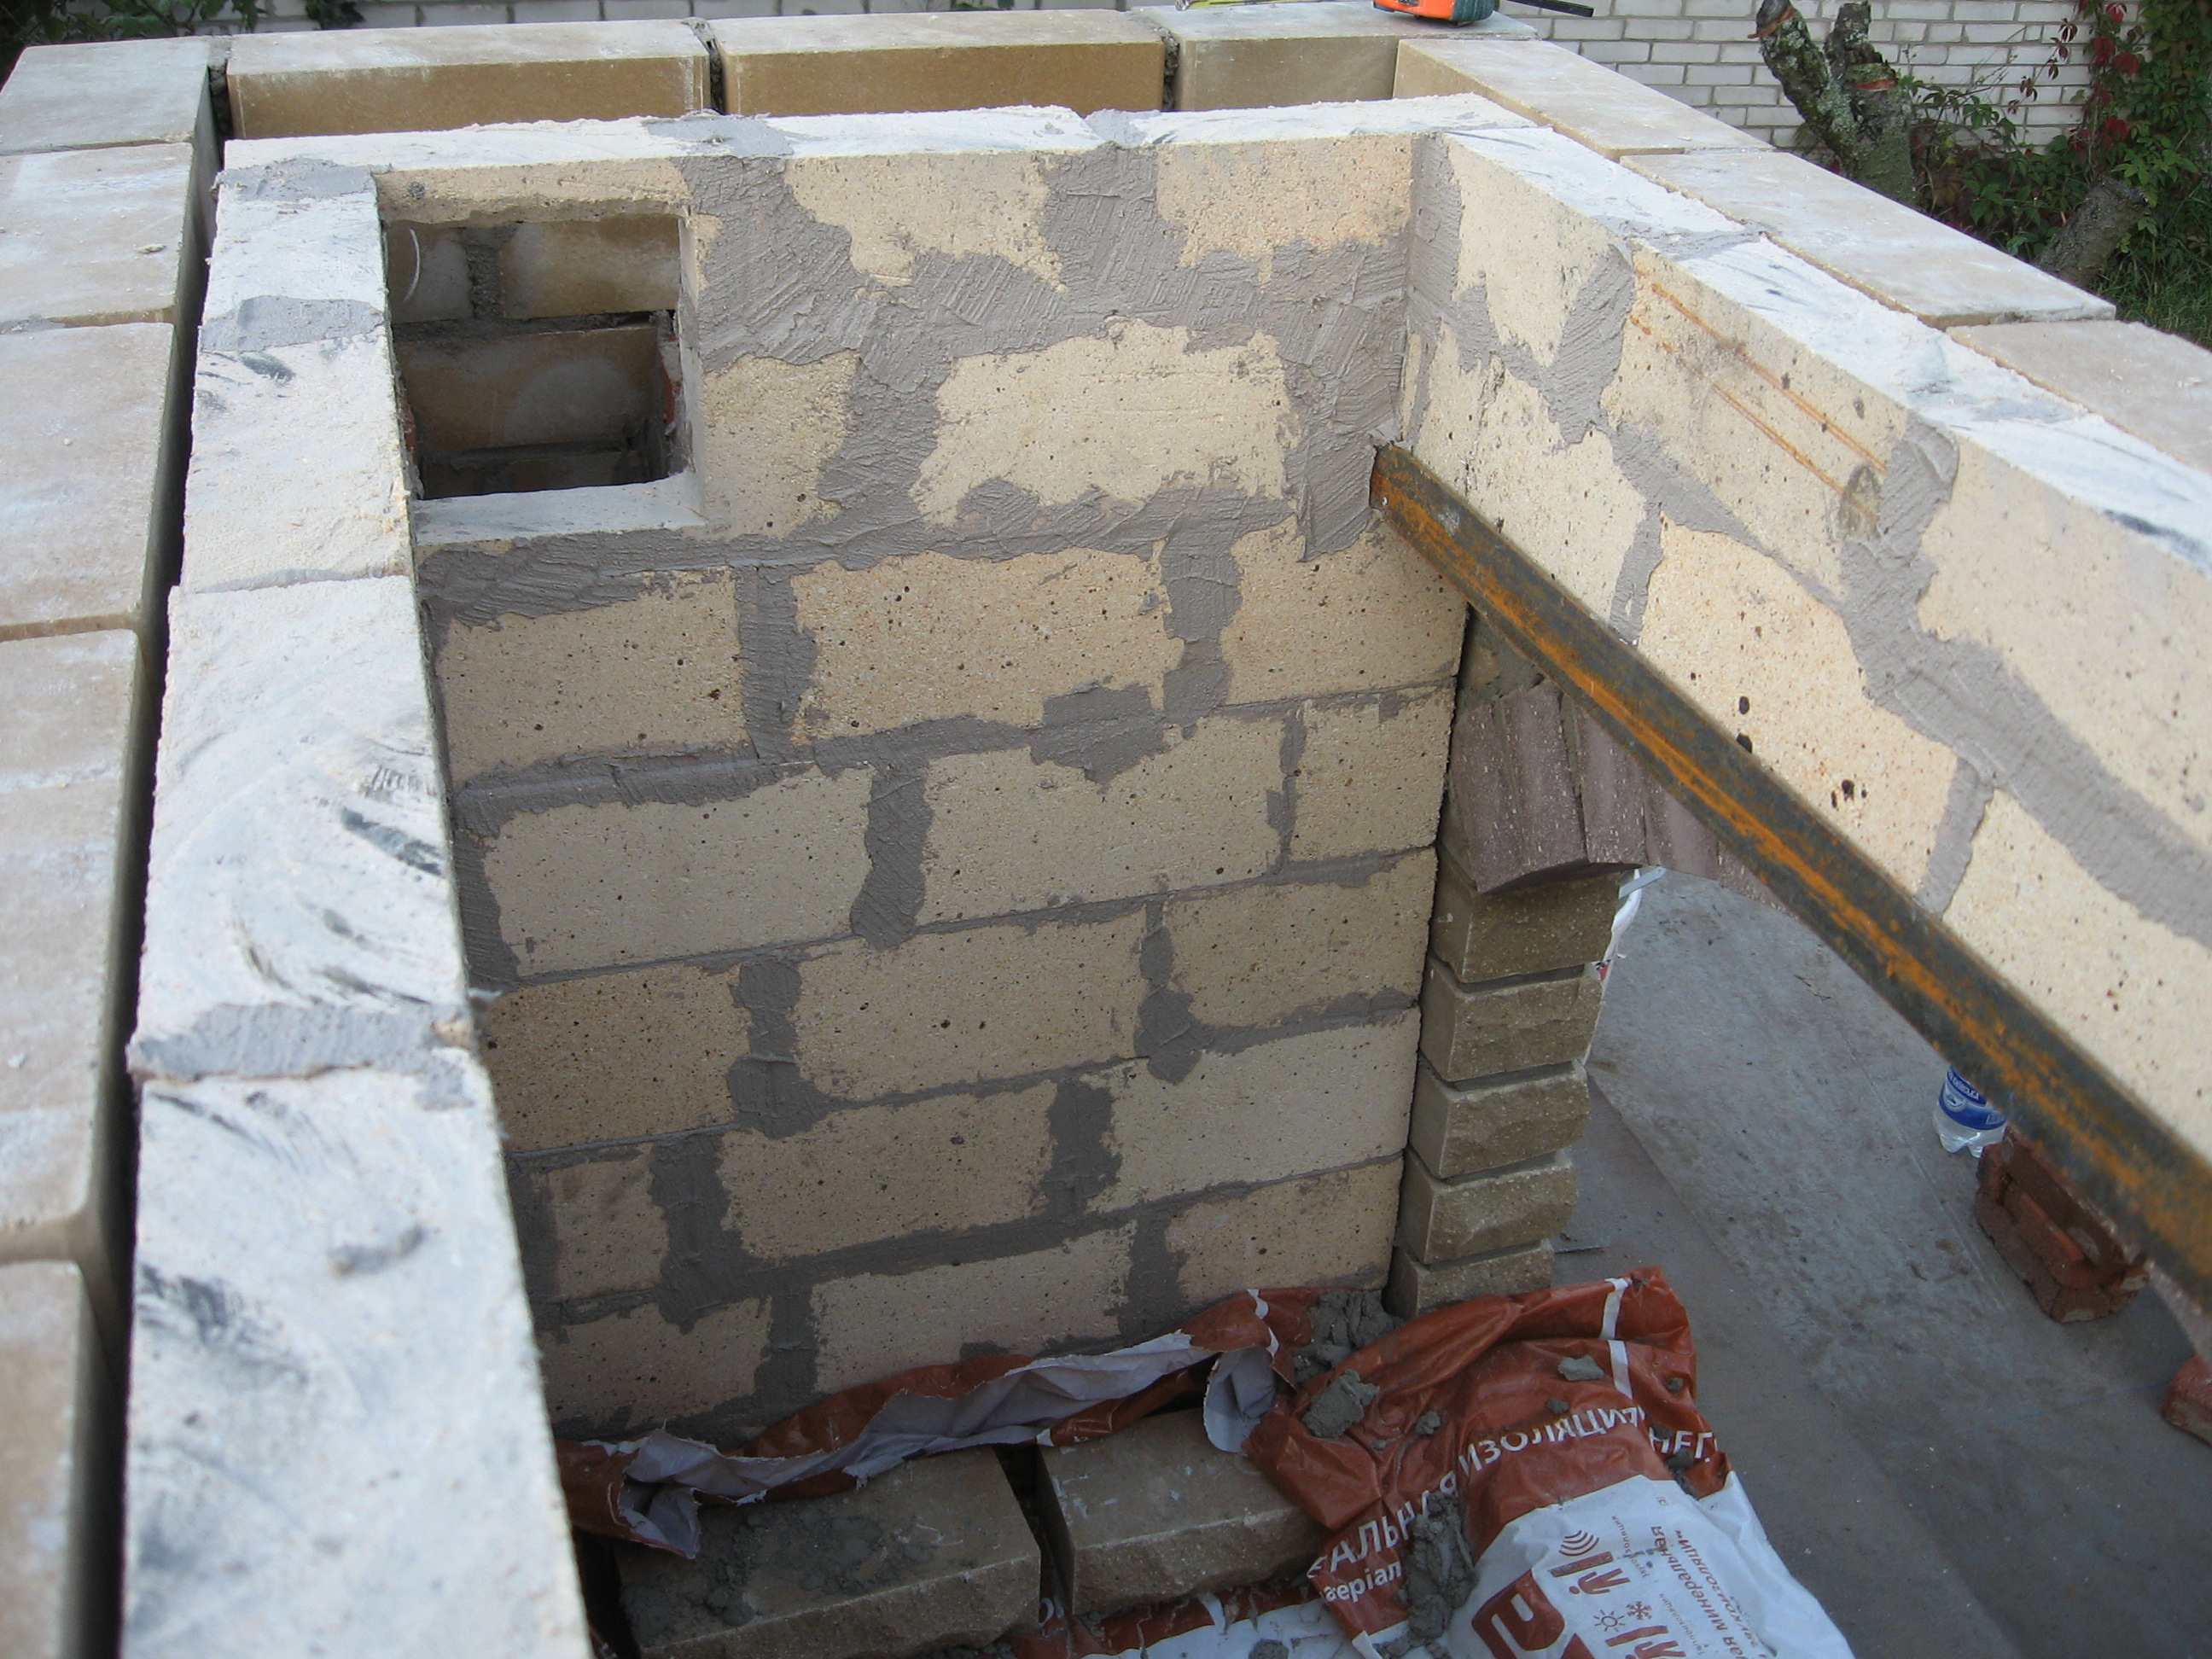
Start laying the bottom of the barbecue. Use refractory firebrick for the firebox. Lay the bricks on a ready-made refractory mixture from a construction supply store made of clay and sand. You can use mortar. Keep the joints as thin as possible, about 3-4 mm.
For the support of the bottom of the barbecue, we use brackets. Remember to leave at least a 1 cm gap between the ends of the brackets and the brick. This will protect the masonry from cracking when the brackets expand.
On the first row of the bottom of the firebox, place the second row, covering all the joints of the first row. This will prevent the joints from burning through and prevent charcoal from falling onto the firewood in the storage compartment below. Of course, you can pour a concrete slab instead of using brackets and the first row of the firebox. However, in our case, it was cheaper and faster to do it this way.
If you plan to pour a concrete covering, one row of refractory brick for the bottom of the firebox will be sufficient.
Continue laying the walls of the barbecue.
You can lay the face brick and the firebox either in parallel or alternately. You can start by building the walls of the firebox and then cover it with face bricks.
Important! Leave a 1 cm gap between the facing brick and the refractory brick. The firebox and the facing should not touch each other.
We lay the next rows of the barbecue grill.

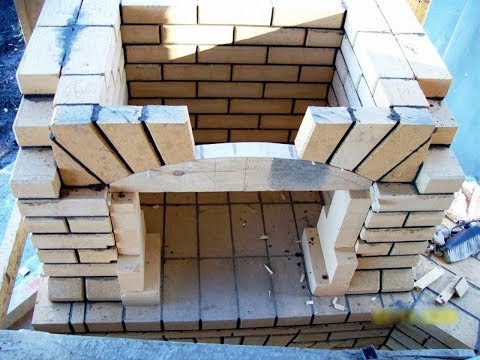
We are approaching the moment of constructing the firebox arch. Create a wooden form (a curved structure) and install it in the portal of the barbecue. Then, start laying the arch by cutting the bricks to the required size. Place a brick keystone in the center of the top point. The arch is complete.
Pay attention! The arch made of face bricks is covered from the inside with a lintel made of firebrick. It is laid on a metal angle slightly above the top of the arch to make it less visible. It looks like this.
The arch is assembled, and we continue to build the walls of the barbecue grill.
Don’t forget to check the vertical alignment of the masonry.

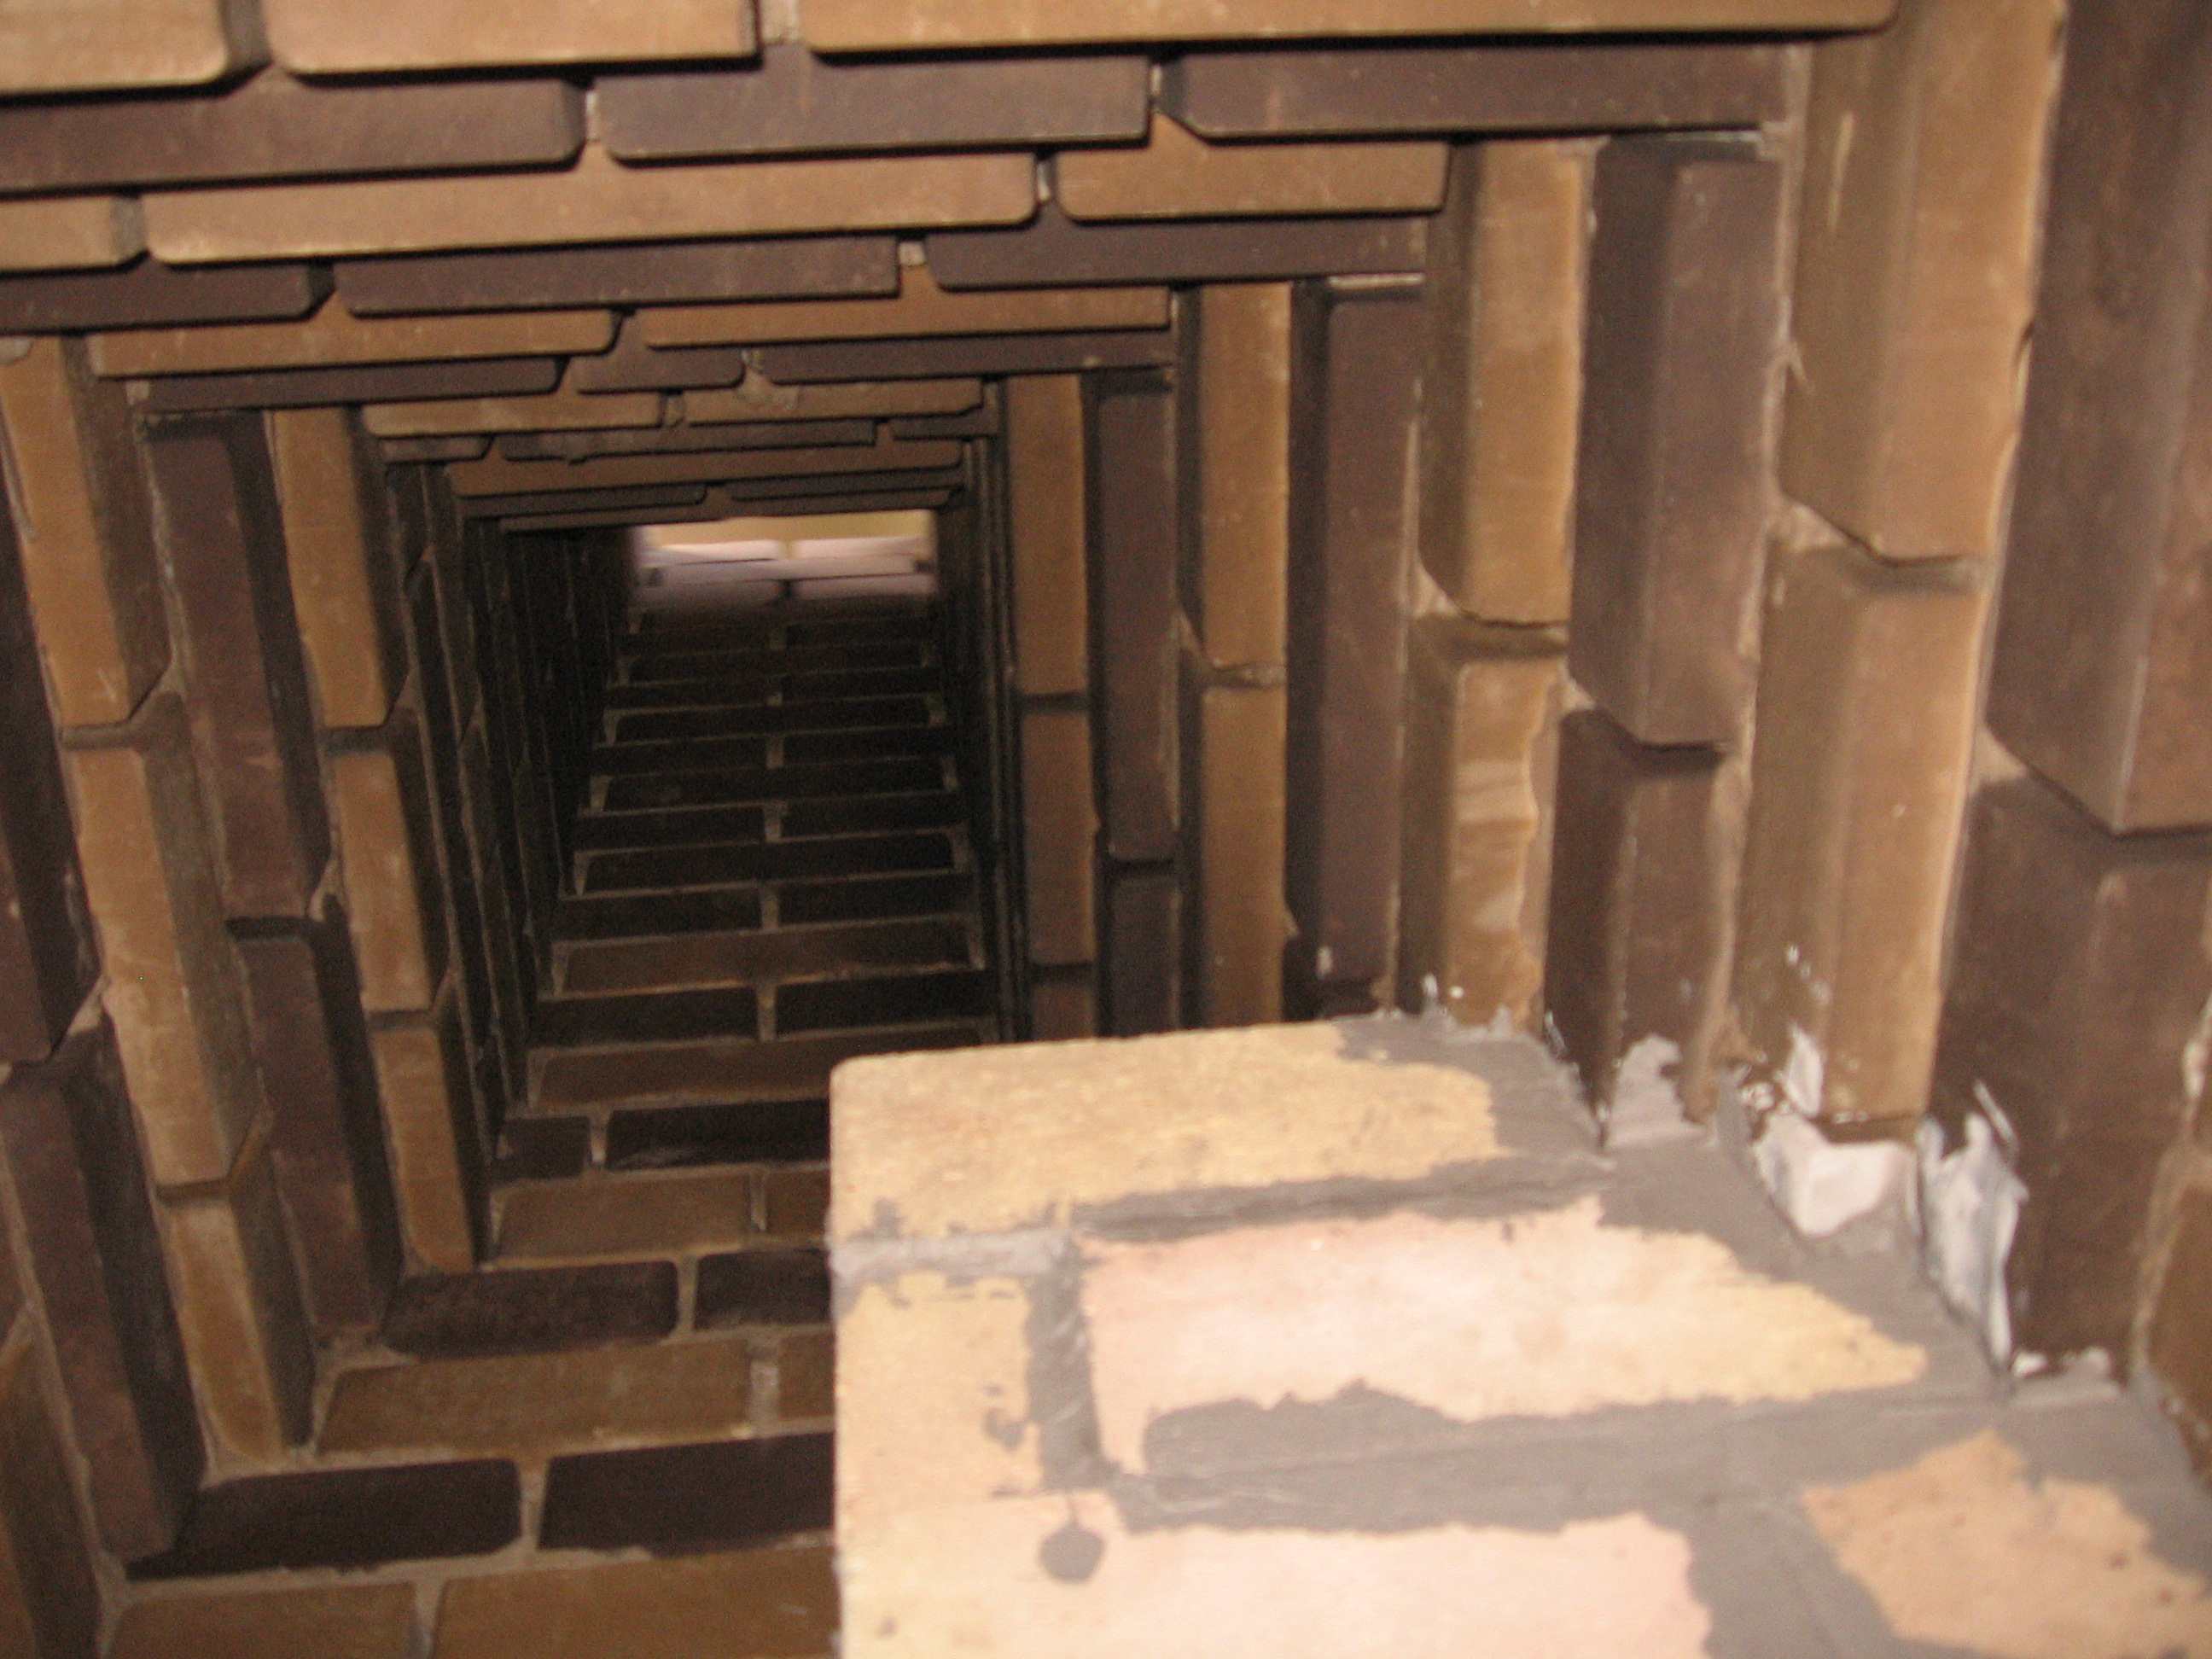
We are approaching the moment of constructing the smoke collector.
We bring the top of the firebox and the facing to the same level and start laying the smoke collector. Lay the masonry with full-bodied bricks of no less than M150 grade. Use a cement-sand mortar. Lay the first row flush with the inner wall of the firebox. Lay the subsequent rows with an offset of about one-third of a brick.
Do not offset the bricks by more than half, or they will fall inside the firebox.
Continue laying the smoke collector until there is a hole left for the chimney, which should be 27×27 cm in size, accounting for the joints. The size of your chimney may differ from ours. In that case, build the smoke collector to the dimensions of your chimney.
Some stove builders smooth the inner surfaces of the bricks in the smoke collector to make it smooth on the inside. However, we didn’t notice any operational differences between a smooth and a ribbed inner surface of the smoke collector. This is true as long as you have maintained the correct proportions between the dimensions of the portal – smoke collector – chimney (read about the proportions below).
This is what the smoke collector looks like from the inside without trimmed bricks.
Continue laying the chimney. Its dimensions depend on the size of your barbecue grill portal.
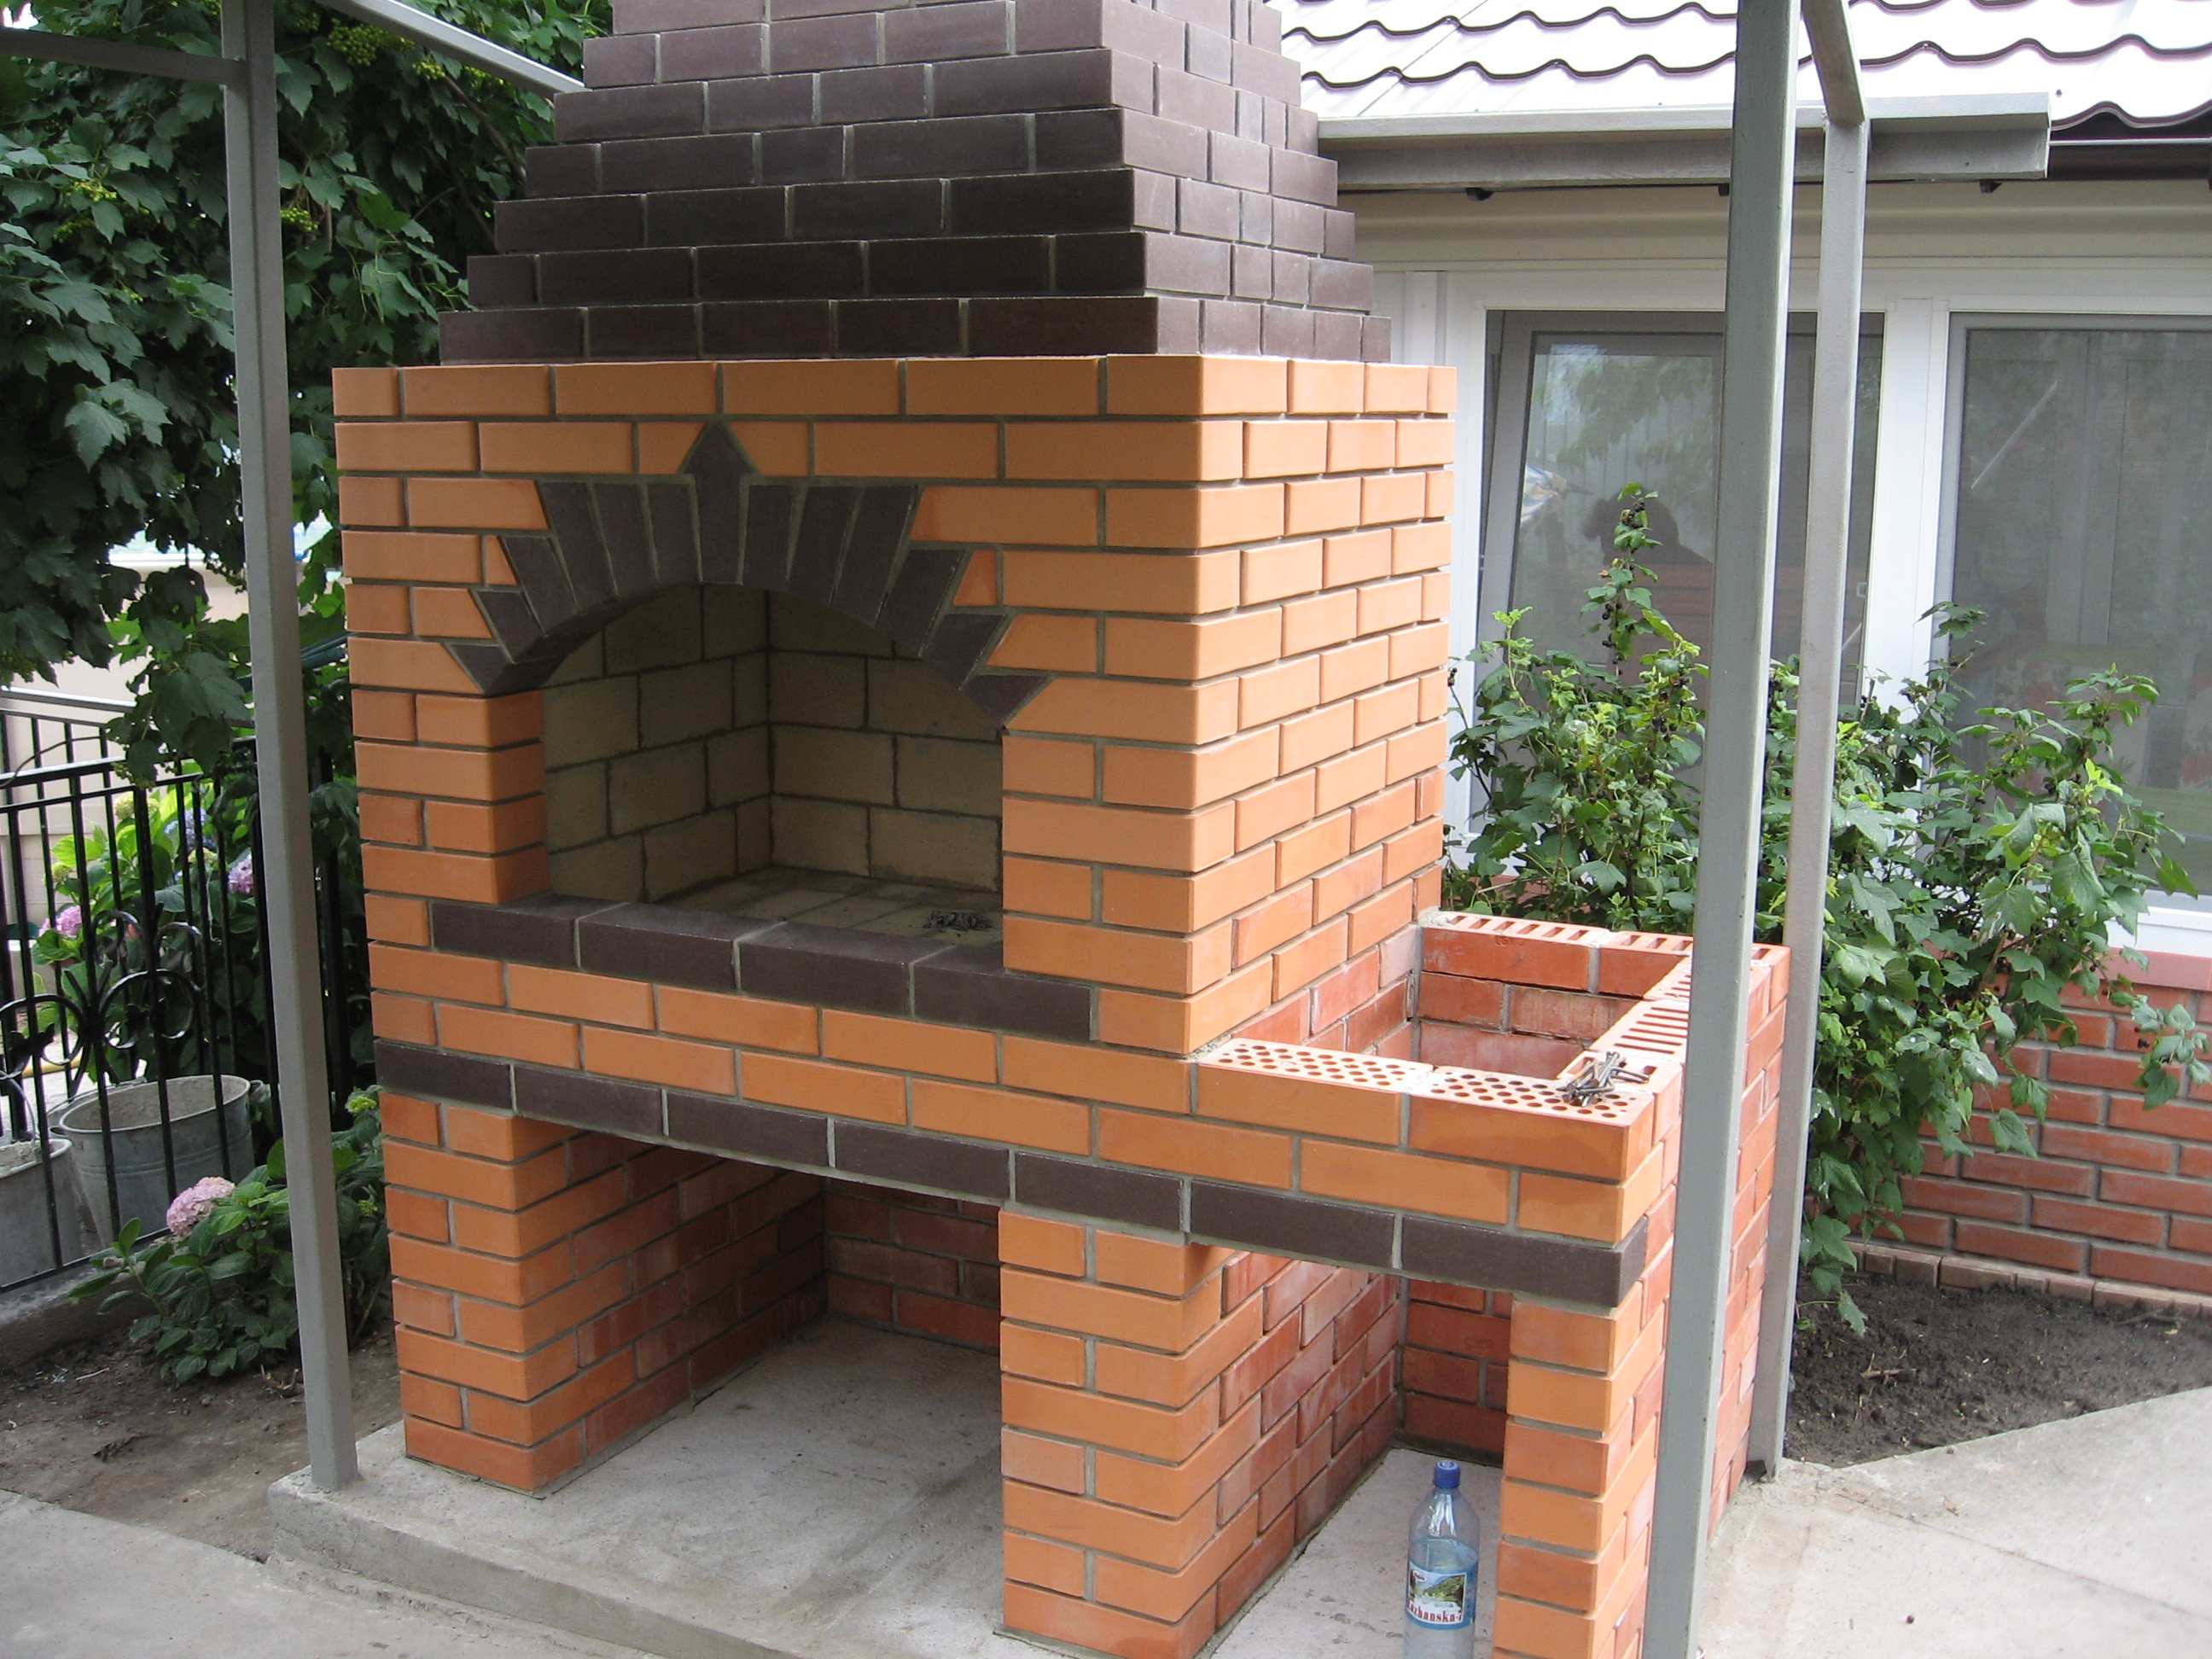
After completing the chimney masonry, cover it with a cap to protect the firebox from precipitation.
We have successfully built the brick barbecue grill, also known as a brick oven. Wait for the mortar to dry, and then you can test it out.
Questions and Tips for Brick Barbecue Grill Masonry
Here, we will address some of the most frequently asked questions about building a brick barbecue grill (grill) by yourself and provide answers to them.
What size should the smoke collector be?
The size of the smoke collector depends on the size of the firebox portal. The optimal ratio should be no less than 100-120%. In our step-by-step instructions, the portal height is 6 rows, and the smoke collector’s height is 8 rows.
What height should the chimney be?
The chimney’s height is proportional to the smoke collector’s height and should be no less than 100-120% of its height.
What diameter should the chimney flue be?
The chimney flue’s cross-section depends on the firebox portal’s area. The optimal flue area is 1/8 – 1/10 of the portal’s area. The extreme range is from 1/6 to 1/13.
What should be used to fill the gap between the firebox and the facing?
At the front, around the portal, you can fill the gap with basalt cardboard. There’s no need to fill the rest of the space, so leave it empty.
Should the metal angle in the lintels be painted?
We recommend priming and painting the angles with heat-resistant paint. However, even if you don’t do this, it won’t cause any significant issues. The unpainted angle’s service life will still be sufficient.
Brick Barbecue Grill – Step-by-Step Video Instructions.