How to Create Unique Decor: Decoupage Technique by Hand
Old items can serve their owners for a long time if special techniques are used to extend their life. One of these techniques is decoupage. There’s no need to search for suitable tools and materials for a long time – they are available in regular stores. The technique is based on working with paper and napkins, and the main tools for the job are glue, scissors, and brushes. The technique itself is quite simple, and with patience and careful work, anyone can learn it, even beginners.
This article describes the basic decoupage techniques as well as working with materials. By following simple tips, anyone can master the technique in a short time.
Base and Surface for Work
So, what is this technique all about? Decoupage is a decorated item where a design is applied to paper or another material, covered with several layers of varnish. The base can be any material that does not absorb moisture well. Here’s what specialists usually use in this method:
- Wooden surfaces (the level of processing doesn’t matter);
- Treated plywood (it can be used untreated as well);
- Various types of plastic;
- Glass products;
- Porcelain items or ceramics.
As you can see from the list, almost any material is suitable for this technique, except for porous uneven surfaces. This is why the decoupage technique is used for decorating tableware, furniture, window frames, and even doors.
Tools for Decoupage
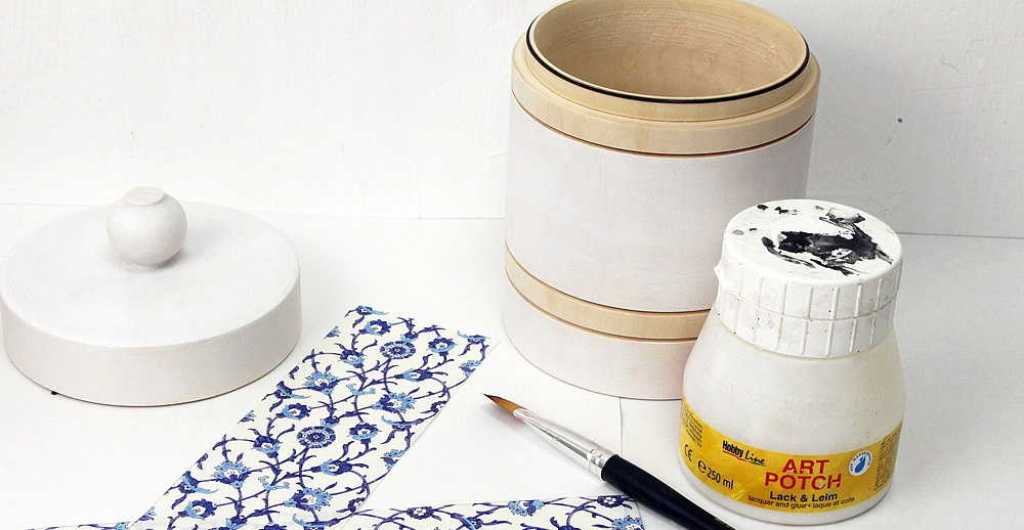
As mentioned earlier, the tools for this technique can be found in a regular stationery store. The main working materials include:
- Small scissors (it’s better to use several types with different blade shapes, including manicure scissors);
- Brushes – you can also prepare brushes of different sizes. The most suitable options are from 0.8 to 2.5 cm. It’s better to use synthetic bristles (they should be thin enough). Brushes are mainly used for applying glue to the surface of the item;
- Sponge – this tool will be convenient for applying acrylic paint to the item’s surface. The only thing to be prepared for is that the base will become slightly rough. If you want to avoid this effect, it’s better to use a large, flat brush (the size also depends on the dimensions of the item);
- Several rollers. They will be used for applying varnish to the finished item, so you should also prepare several sizes;
- Palette – its functionality, as usual, is to mix several colors to achieve the desired shade of the item. You can use a plastic plate or lid as this tool;
- For preparatory work, you will also need a pencil, ruler, and eraser.
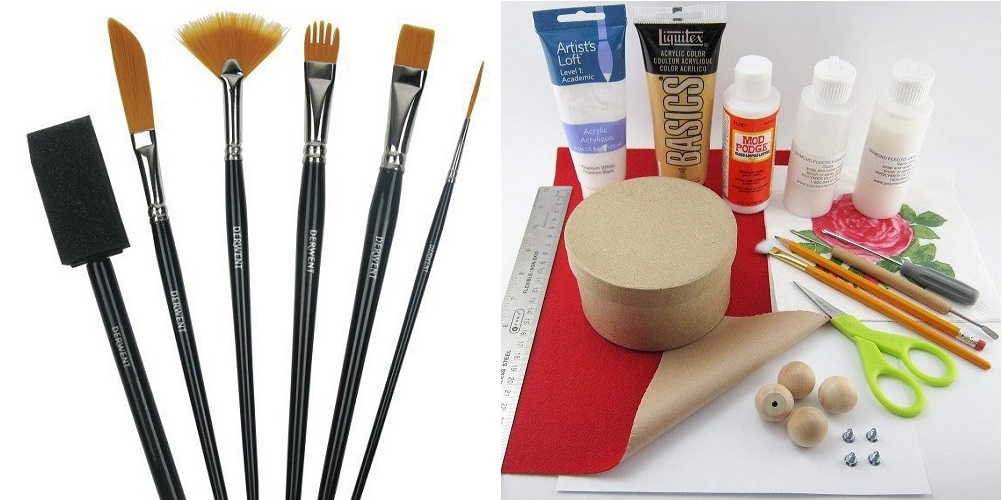
What Other Materials Will You Need
Once all the tools are gathered, it’s time to prepare the consumable materials. Without a doubt, paper or napkins come to mind immediately, but they have a special place in this article. You will also need the following materials:
- Acrylic varnish (water-based) – it allows you to preserve the appearance of the item for a long time and protects it from darkening;
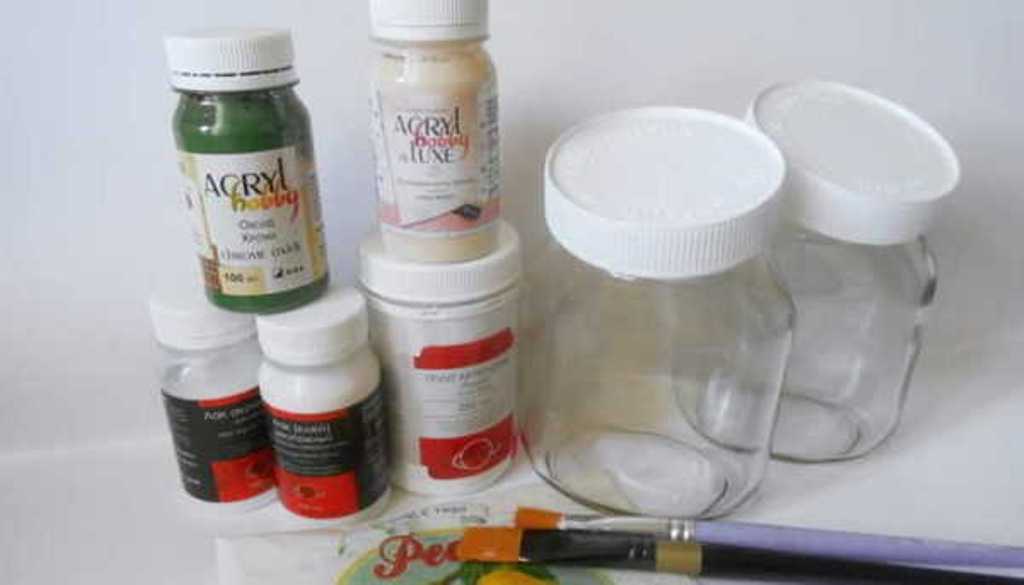
- Acrylic paints – you’ll need them to create a unified composition with additional shades;
- Sandpaper – it’s better to get several degrees of hardness (it also depends on the base and the size of the item). It’s better to prepare options with grains from 250 to 800;
- Decoupage glue – a cheaper alternative like PVA glue will also work;
- Primer, if you have to work with wood and need to reduce its absorbent properties;
- Putty material – it can help eliminate defects on a wooden surface.

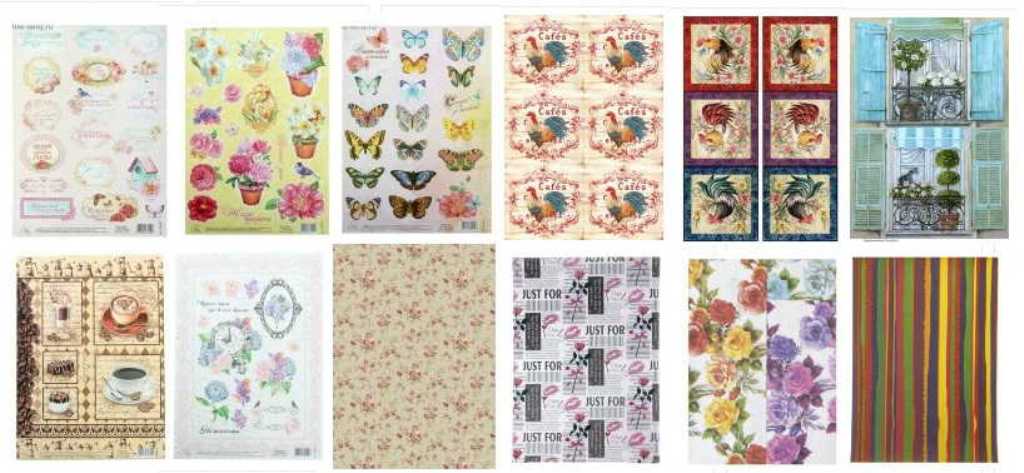
The Foundation of It All: Types of Napkins and Paper
Most often, decoupage involves the use of paper or napkins. They are glued to a specific surface and then covered with a layer of varnish. When it comes to specific types, the following are popular choices:
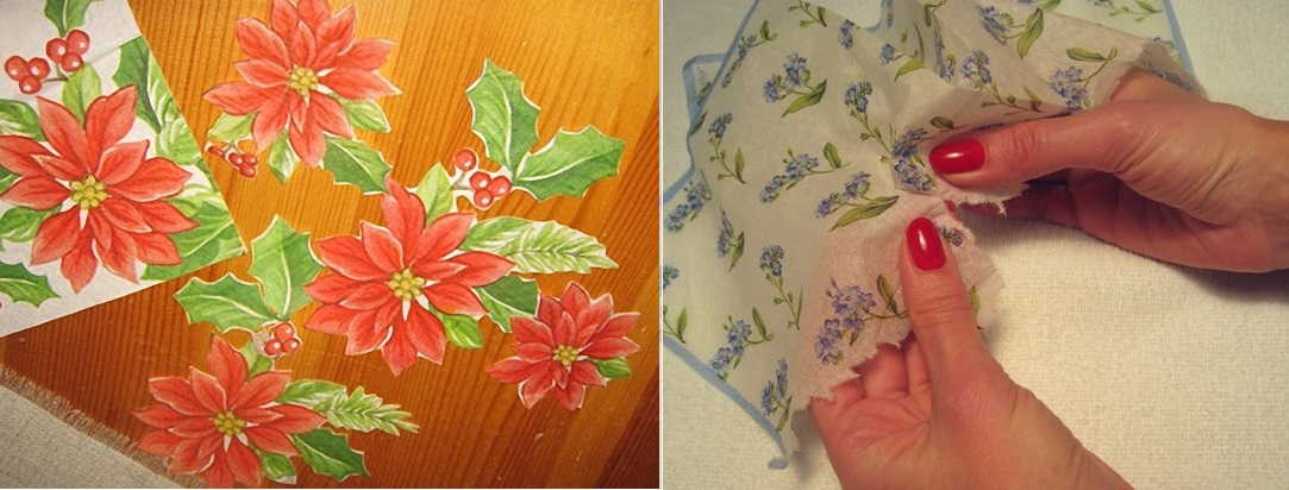
- Three-ply napkins. In this case, the design should be on the top layer. It is carefully separated, and further work is done with it;
- Rice paper – this material is easy to work with, and it does not deteriorate or lose its shape when exposed to water;
- Decoupage paper cards – the base is regular paper with a pattern. It is also suitable for gluing onto flat and smooth surfaces;
- Printing on photo paper – most printing agencies allow you to order the printing of any image. The design is transferred to thin photo paper. However, this will require additional knowledge and decoupage techniques.

Step-by-Step Decoupage Process
The goal of this entire technique is to embellish a simple surface with a beautiful image. This process is based on a person’s creative perspective, so there is no one correct way to work. Different surface materials can be used as a base, as well as various techniques and methods. It’s best to choose the method that seems the simplest and works best for you.
Experts who have been practicing decoupage for a long time recommend starting with attaching large fragments and details. When you can do this without flaws and imperfections, you can move on to creating items with smaller details and explore the techniques of three-dimensional decoupage. Below are the steps for working with large details.
Preparation
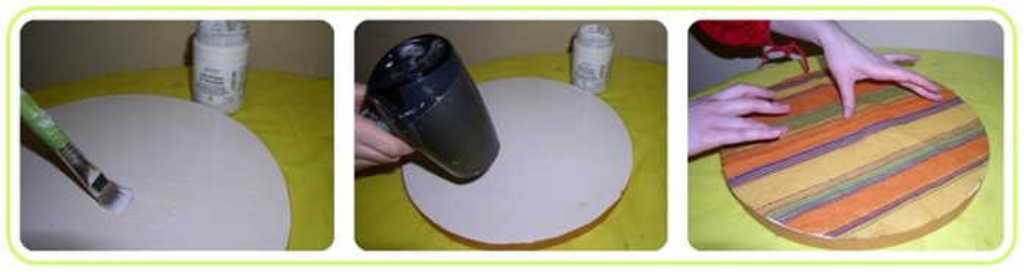
The very first step before starting the technique is preparing the base. Ideally, it should be smooth and even, without any irregularities, dents, or bumps (unless intentionally designed that way).
To achieve this effect, it’s recommended to use putty material or sandpaper. After performing the leveling work, the surface should be coated with primer and white paint.

How to Work with Napkins
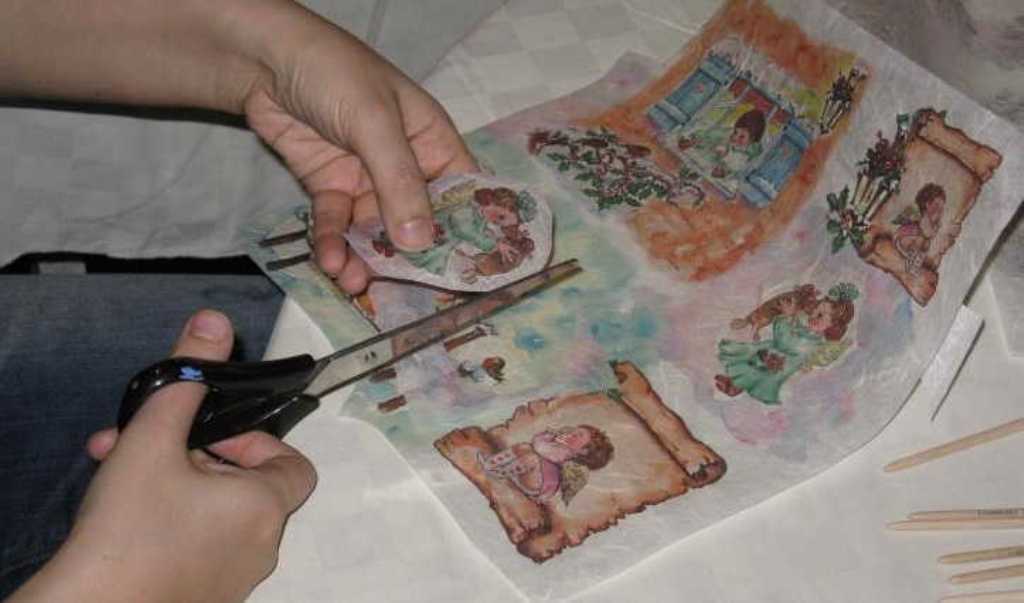
There are several ways to work with this material. If the base is flat and smooth, you can attach the napkin as a whole. However, if there are any curves on it, you will need to join the napkin in fragments. You can use scissors or carefully tear it into pieces.
Attachment Techniques
Those who are new to decoupage often prefer to use small details for their work. This is a good approach for beginners, but it’s best to choose an item with the simplest form – surfaces without additional curves are recommended.
If you plan to work with small details, you can apply glue either with a thin brush or with your fingers. After applying, you can also smooth out the napkin. The type of brush depends on the individual – choose the option that feels most comfortable to work with. Some people prefer to do the main work with their fingers – this way, you can feel any imperfections in the material.
Glue is usually applied to the surface or directly onto the napkin, and you can use one of the following methods:
- You can apply glue to the entire area and then join the surfaces from the middle of the napkin. When smoothing, move towards the edges of the item to remove any excess air bubbles;
- You can apply glue only to the center of the fragment and then smooth it towards the edges of the surface.

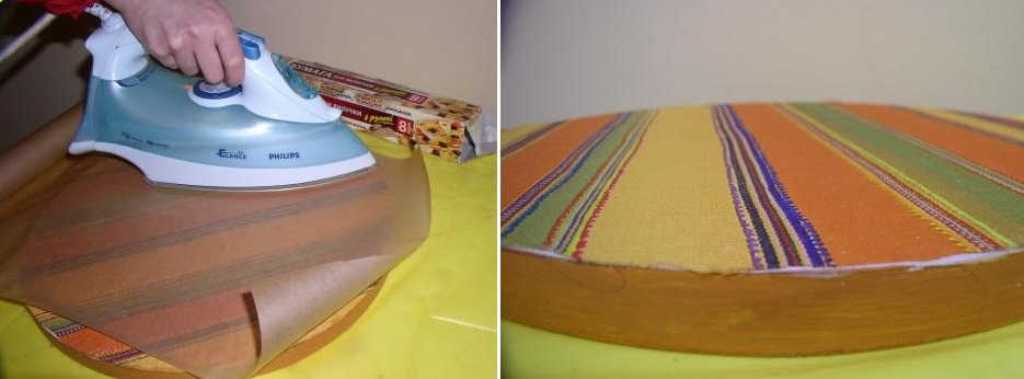
Technique Using Glue and Iron
There is another method that allows you to avoid wrinkles: smoothing the surface from air bubbles. After priming, apply glue (PVA or a glue stick) to the base evenly to avoid creating visible glue trails. Let it dry for a while (you can use a hairdryer).
After that, place the napkin on the base and smooth it with your hand. Place a piece of paper on top and use an iron to smooth the surface from the edges.
Method Using a File and Water
This decoupage technique is perfect for beginners and involves using a file, glue, and water. It’s best to use this method if you plan to decorate large portions of a design. Pour a little water onto the center of the film, then place the design face down onto it. Carefully smooth it out and remove any air bubbles.
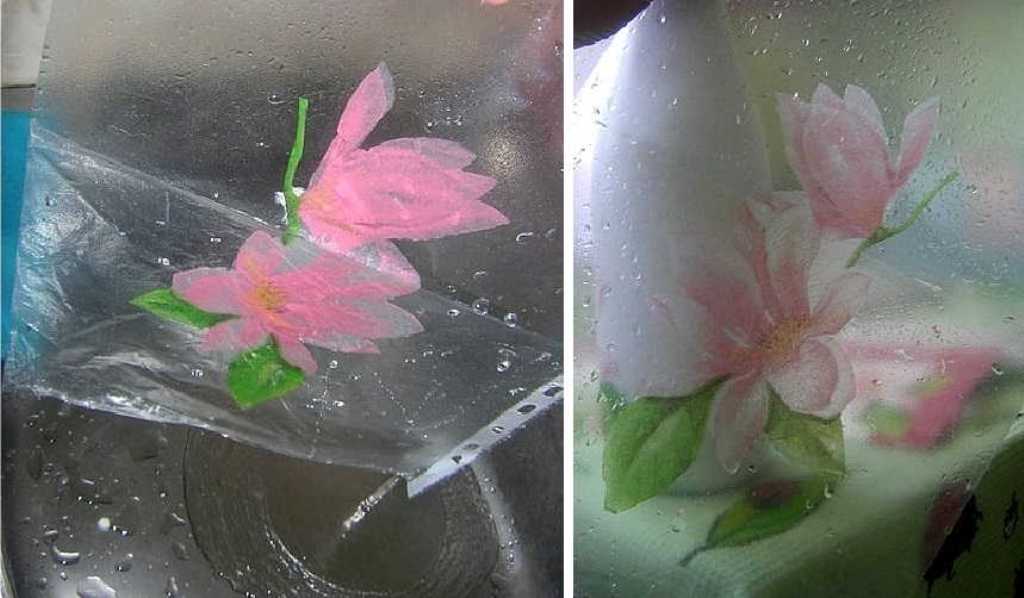
Afterward, gently grasp the edges of the film and drain any excess water. The design will stay on the film. Then you can start applying the design to the surface. Place the design onto the surface and carefully smooth it out. The key is to do everything slowly and carefully, which will help you avoid wrinkles and bubbles.
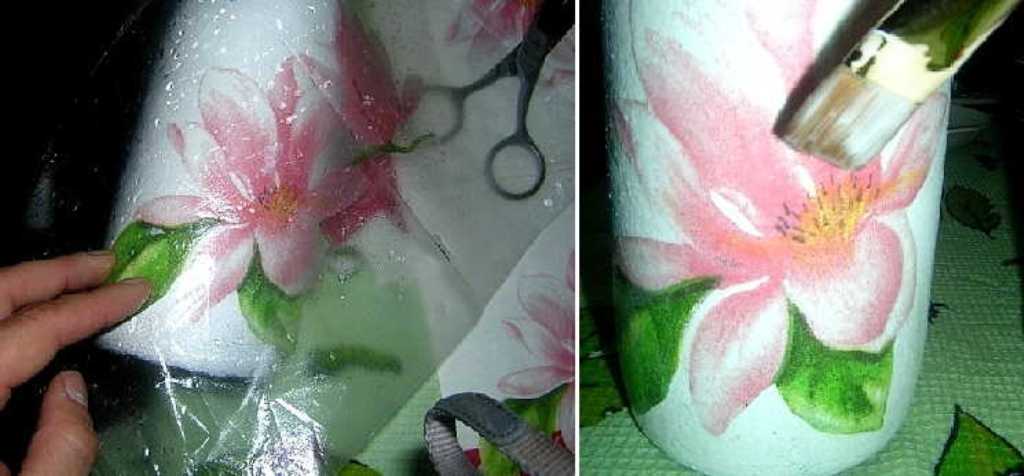
Once one edge is adhered, move on to working with PVA glue. Dilute it and apply it to the napkin. Finally, apply a fresh layer of varnish to the item.
Useful Tips
To successfully create a decoupage decoration quickly and neatly, there are several small tricks when working with this decorative method. These tricks also help prevent wrinkles on the item:
- Pre-soak all the design fragments with water using a spray bottle. Moistening the napkin with water will help it stretch. If it has lost its shape, you can carefully iron it before proceeding with traditional decoupage methods. The entire subsequent process becomes easier and faster.
- You can moisten the design fragments with varnish. This will make the napkin’s texture stiffer, helping to avoid wrinkles. However, if using this trick, apply glue only to the surface because the napkin will repel it.
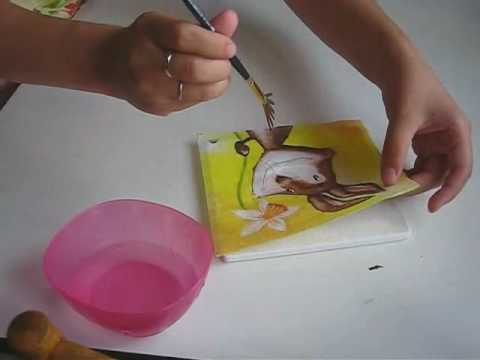
- You can place the napkin on the surface and then start applying glue. For more details on this method, refer to the video.
How to Fix Imperfections
If your item consists of several small details that are combined into a single composition, you should use your fingers or a thin brush to smooth out the edges of the fragments. If you notice any irregularities in some areas, you can correct them using paints and different shades.
If the surface is still slightly damp, you can also use a thin brush and paints to enhance the details. Some details can be highlighted with additional colors to make them more distinct.
After this, you can finish the borders of the finished piece. There are several methods for this as well. In some cases, people prefer to eliminate the edges by cutting them, while in others, you can paint the sides. Additionally, in some cases, the edges of the napkin are folded over. There are many techniques depending on what you are working with.
Finally, let the item dry. If you want to speed up the process, you can use a hairdryer, but maintain a safe distance to prevent any shifting of the details.
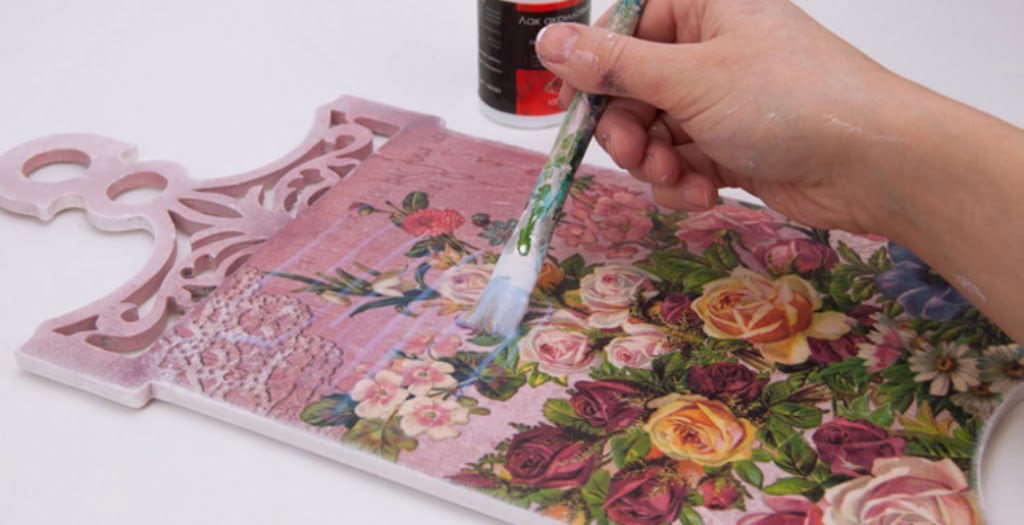
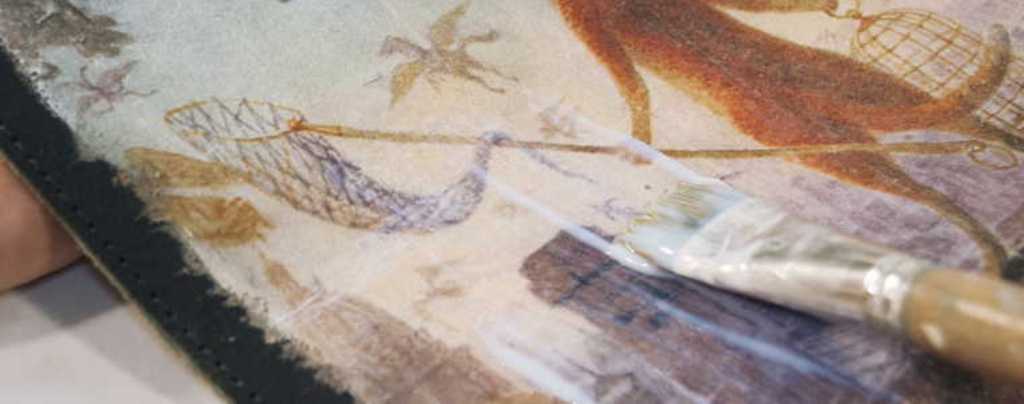
Surface Varnishing
To finish the item, apply a layer of varnish. It’s best to use water-based acrylic varnish. Apply it in two coats. If you expect the item to undergo frequent use, you can use 3-4 layers for added durability.

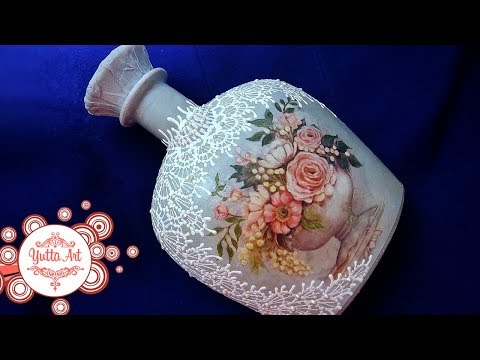
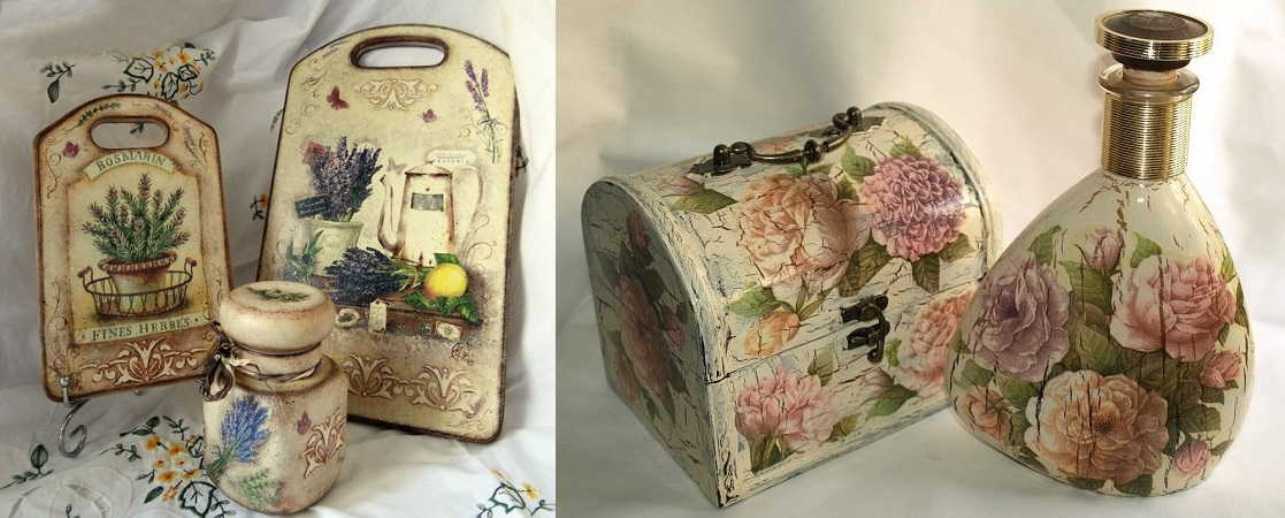
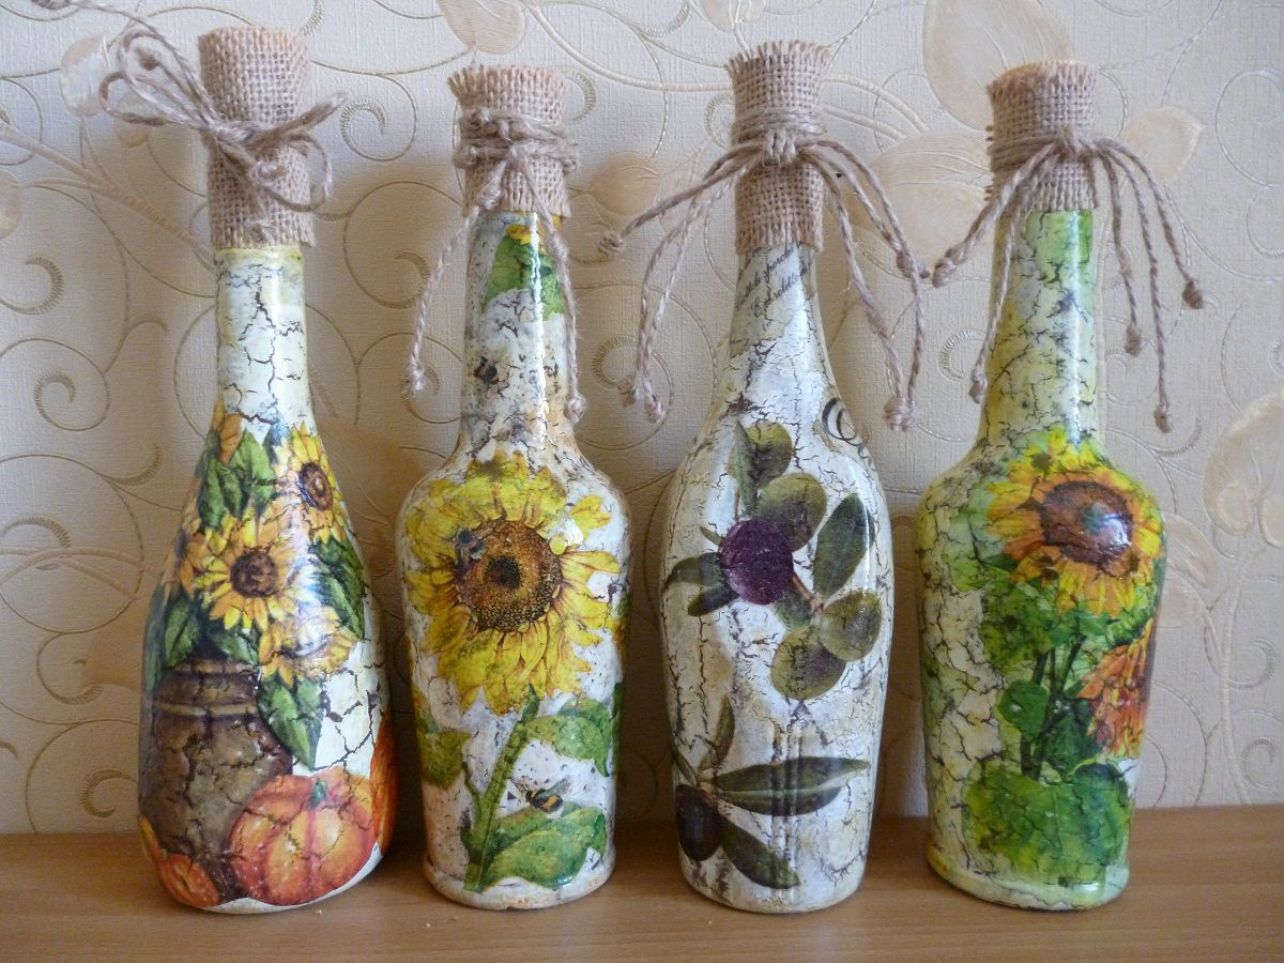
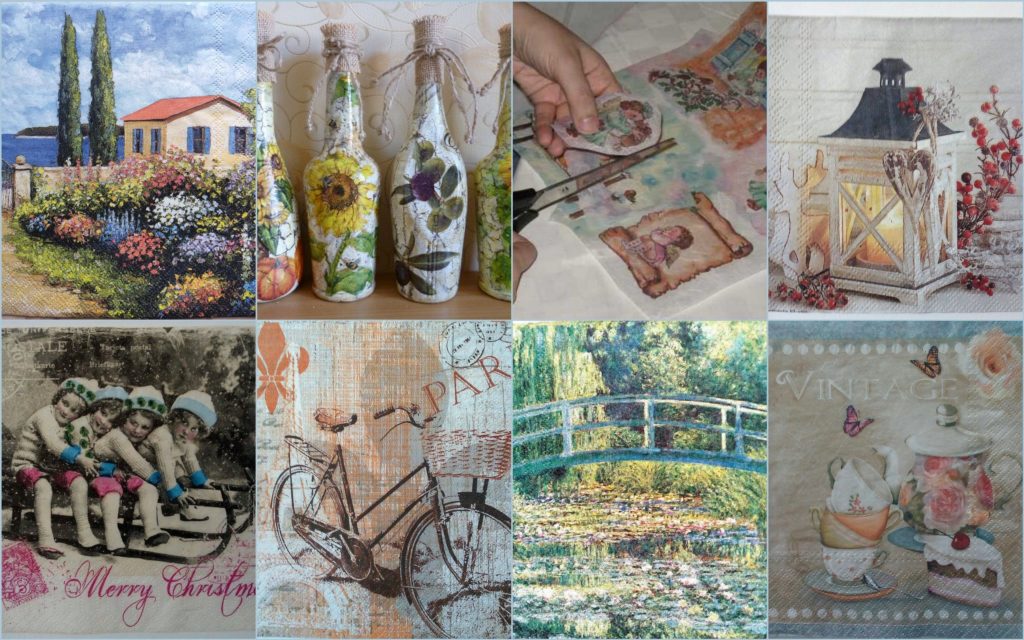
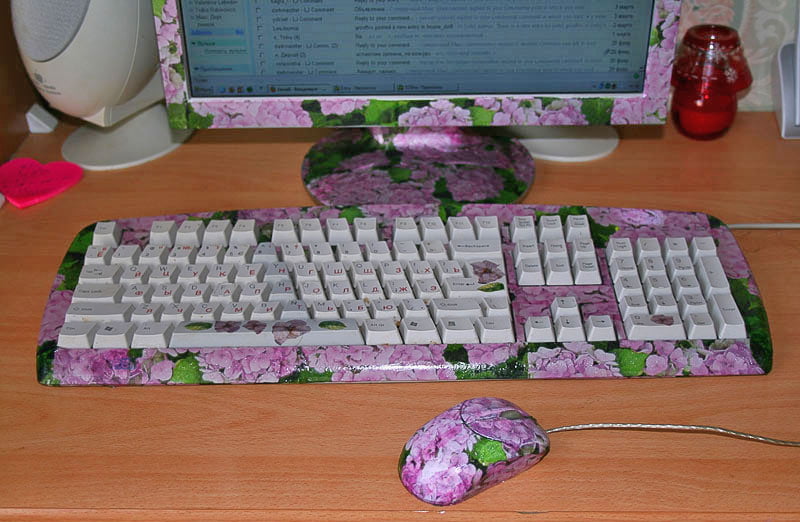
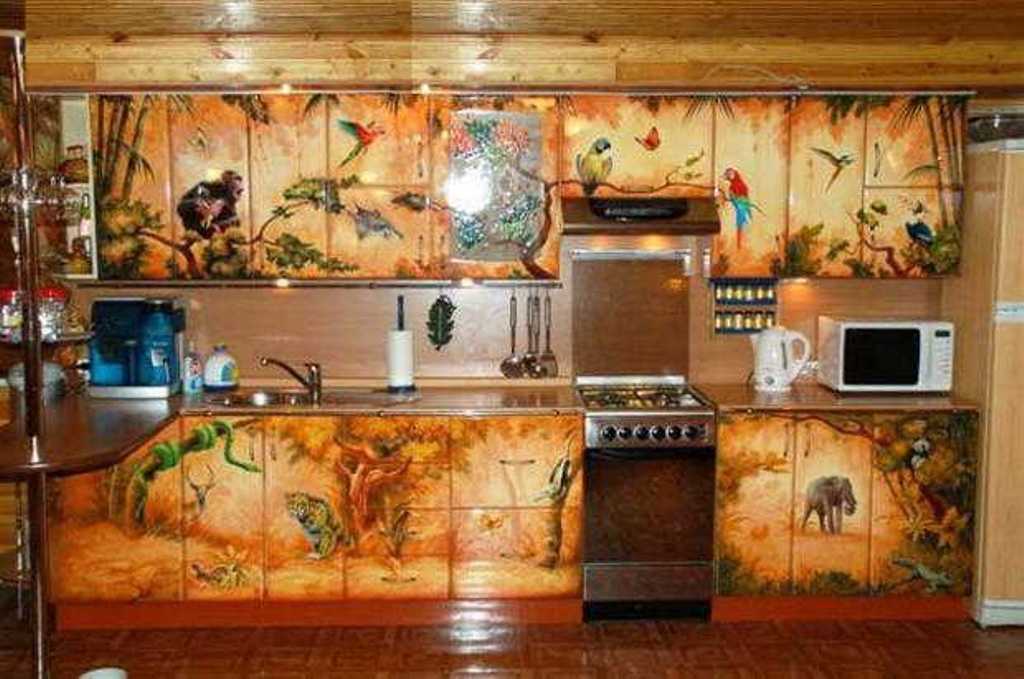
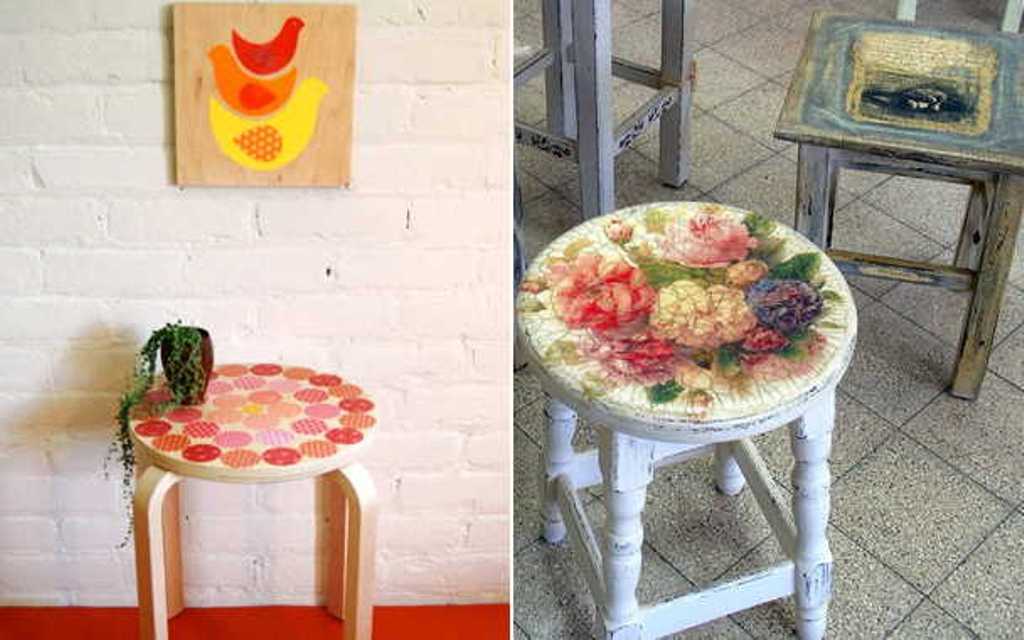
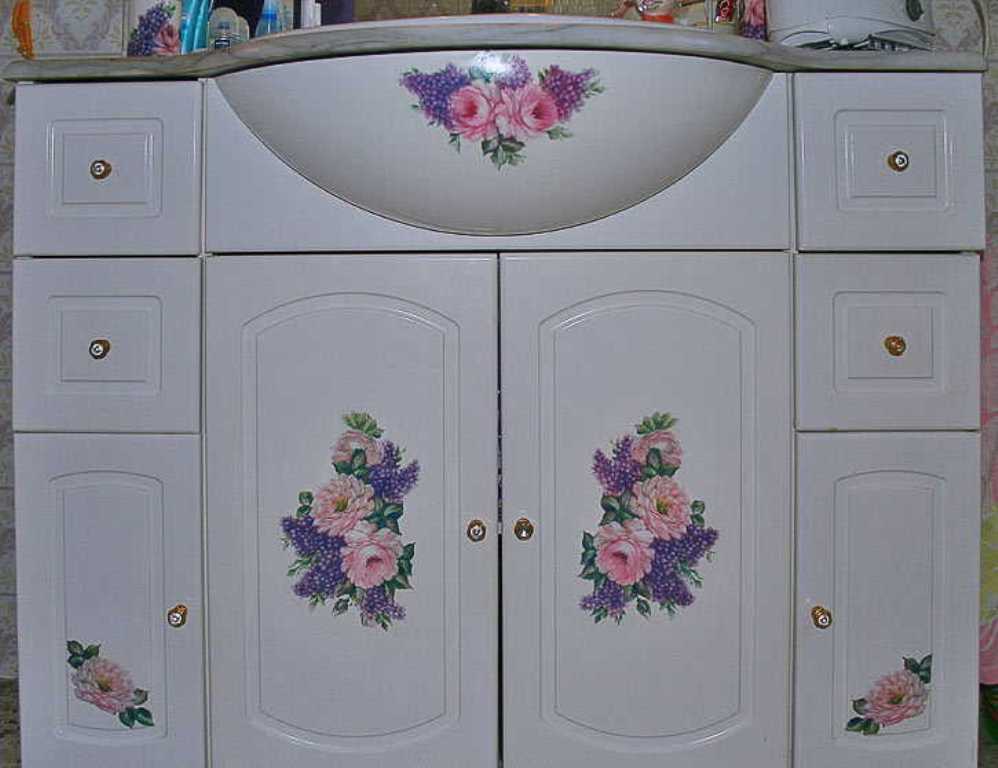
Decoupage Craft Photos
At the end, we invite you to take a look at several photos showcasing examples of items crafted using the decoupage technique.
Decoupage for Beginners, Video Tutorial