Finishing a house with decorative plaster is gaining more and more popularity. Decorative wall plaster is applied not only in private homes but also in apartments. In this regard, many are curious about what this material is and what it’s used for.
So, what is decorative plaster? It’s a special, flexible mixture, often containing various types of small stones, mica, and the like. Its purpose is to decorate and finish walls, and less commonly, ceilings. But how does it differ from regular plaster? Let’s take a look at its composition.
Composition of Decorative Plaster
Decorative plaster is made from:
- Lime, cement, gypsum, acrylic, silicate, and others – as binding components. These are responsible for adhering the plaster to the surface. Gypsum is used very rarely because such a mixture would set quickly, making it difficult to apply patterns or designs.
- Fillers – in most types of decorative plaster, fillers like sand, mica, crushed marble, small stones, etc., are present. They are used to give the plaster its decorative texture.
- Additives – these can include anti-foaming agents, plasticizers, and more.
- Water – and, finally, a solvent for the entire mixture.
In simpler terms, decorative plaster differs from regular plaster mainly in its filler. But it’s precisely these components that make it unique. What sets decorative plaster apart from traditional finishing materials like wallpaper, for example, is its decorative texture.
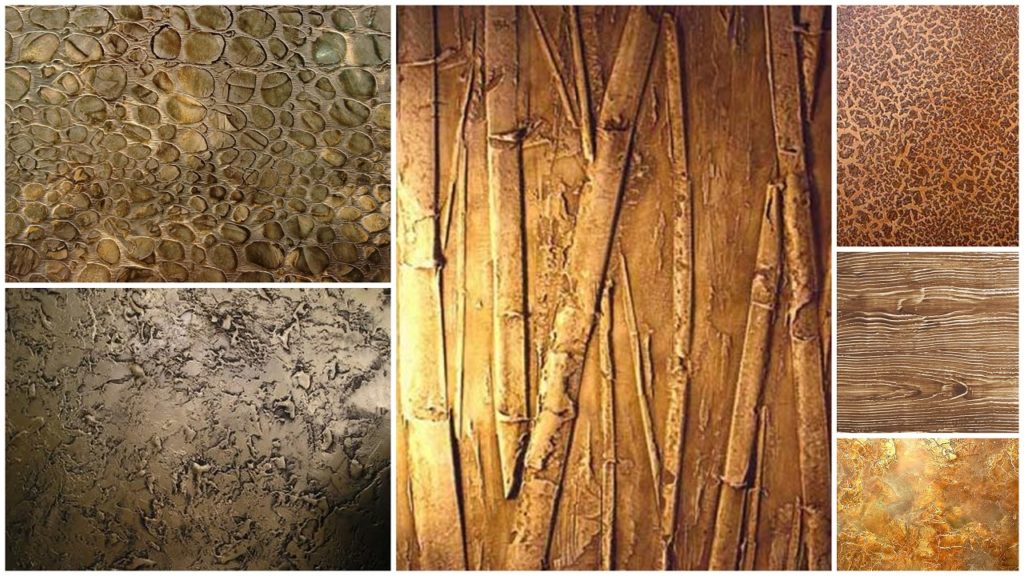
Wallpaper or Decorative Plaster
If you’re facing the challenging decision of choosing a material for wall finishing and debating between decorative plaster and wallpaper that mimics it, we suggest comparing them to make the right choice.
Firstly, let’s talk about the cost of the material. The simplest wallpapers designed to imitate decorative plaster are cheaper than the plaster itself. However, it’s not that straightforward. When you factor in the preparatory work for wallpaper application, such as wall leveling, puttying, smoothing, adhesive, and so on, the cost advantage won’t be as significant. The exception might be Venetian decorative plaster. In this case, wallpaper imitating Venetian plaster will be much more affordable than the original.
Secondly, the lifespan of the finish is a crucial consideration. Decorative plaster clearly has the upper hand here. It can last for at least 30 years, and some types can even endure for 50-60 years. On the other hand, wallpapers may need replacement within a maximum of 15 years and, in most cases, already within 5-10 years. By the way, don’t forget to calculate the cost of changing wallpapers when comparing material prices.
Thirdly, maintenance. Decorative plaster can be easily cleaned and washed, while not all types of wallpaper can boast the same feature.
Fourthly, it’s the uniqueness of the patterns achievable with decorative plaster. Wallpapers, on the other hand, come with a finite variety of patterns.
We could continue listing the advantages and disadvantages of both decorative plaster and wallpapers mimicking it, but the conclusions are already evident. If you prioritize simplicity and cost-effectiveness, then your choice should be wallpaper. If you’re willing to invest, seek uniqueness in your decor, and desire durability, then opt for decorative plaster finishes.
Types of Decorative Plaster
All decorative plaster can be categorized into two major groups.
Types of Decorative Plaster:
- Decorative plaster for interior work
- Decorative plaster for exterior work
These two types of plaster differ in that exterior decorative plaster is more resistant to ultraviolet radiation, meaning it fades less in the sun. Additionally, exterior decorative plaster handles “wet” weather conditions much better. It is resistant to rain, snow, and so on.
Due to its properties, decorative plaster for the exterior of a house comes in fewer varieties. Therefore, we will explore options for decorative plaster used in interior finishing, as they also include options suitable for the exterior of a house.
Types of Interior Decorative Plaster
1. Relief – they are named so because the patterns they create have a relief texture. They are further divided into subtypes:
- Structural decorative plaster – the pattern is primarily achieved through the composition of the decorative plaster. Ingredients such as small stones, quartz sand, and similar materials in the mixture give the pattern a specific texture during application. Typical representatives include decorative plasters like “Koroyed,” “Shuba,” and “Barashek.”
- Textured decorative plaster – this type of decorative plaster is characterized by its fine grain and flexibility. The pattern is created through a special application technique, using various tools such as brushes, film, sponges, etc. Both makeshift items and specialized industrial tools like rollers with specific stencil patterns can be used.
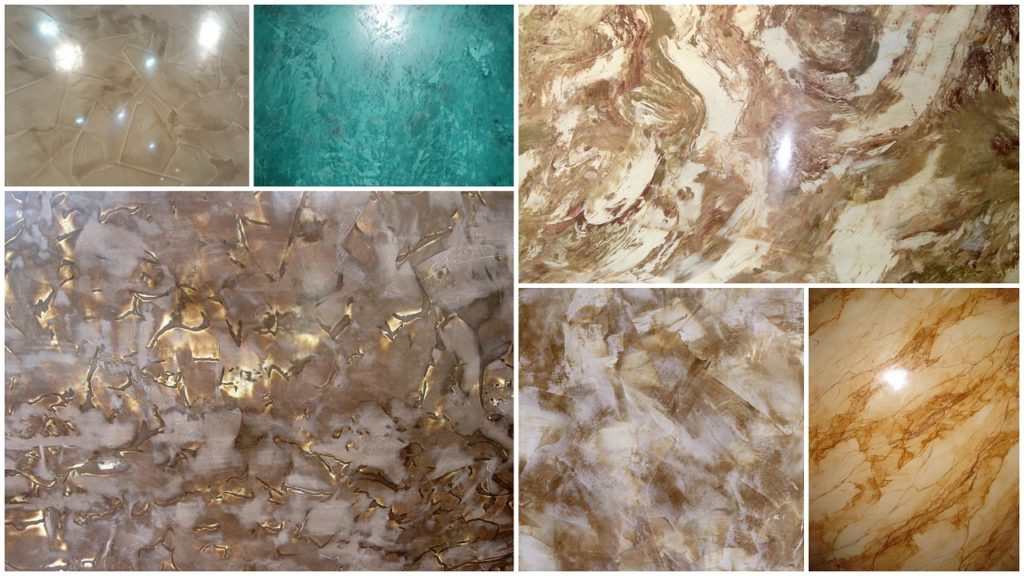
2. Smooth – in this case, the pattern has a smooth finish. An example of this is “Venetian” decorative plaster, which mimics the look of marble or onyx.
Decorative plaster for interior wall finishing and exterior façade finishing also differs in its composition. Depending on the primary binding element, decorative plasters can be categorized into the following types:
- Acrylic decorative plaster – contains acrylic resins. It offers good protection against water and moisture but has poor breathability. It has lower resistance to abrasion compared to other types of decorative plaster and is less fire-resistant.
- Mineral decorative plaster – primarily composed of cement, lime, and gypsum. This is a natural plaster suitable for interior finishing in areas with regular humidity. For exterior use and in areas like bathrooms and kitchens, it requires additional protection such as painting or varnishing. Its good breathability contributes to a healthy and pleasant indoor microclimate.
- Silicone decorative plaster – a versatile mixture suitable for all types of spaces and building façades. It offers good vapor permeability, moisture resistance, and resistance to abrasion, making it suitable for various finishing tasks.
- Silicate decorative plaster – another versatile mixture for interior and exterior decoration. It’s not afraid of water, sunlight, and is antistatic. However, it requires skill for application as it sets quickly.
We hope you now have a clear understanding of the types and compositions of decorative plaster. Let’s take a look at photos of decorative plaster in interior settings.
Decorative Plaster in Interior Design
With various types of decorative plaster and application techniques, you can achieve a wide range of designer effects. Here, everyone can find a pattern that suits their taste. However, keep in mind that the samples of decorative plaster in the store and the final result on your wall may not always match. Each application of decorative plaster is unique. Nevertheless, the effects achievable can be summarized.
Effects of Decorative Plaster
- Venetian Plaster: Resembles polished stone or a marble surface. It can be applied to properly prepared surfaces.
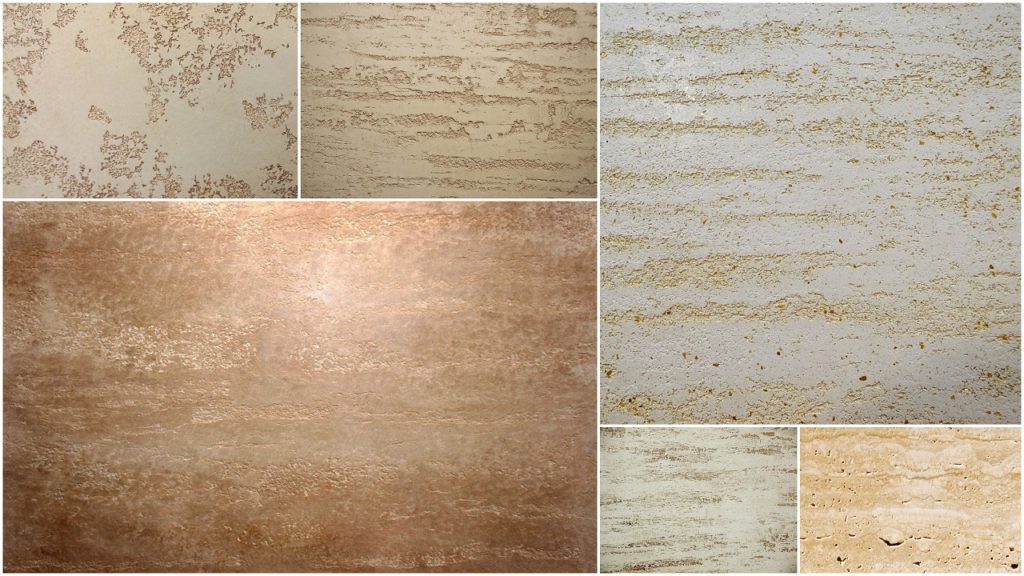
- Travertine Effect: Perfectly mimics the look of travertine stone. Its porous surface and pale color make it an excellent room decoration.
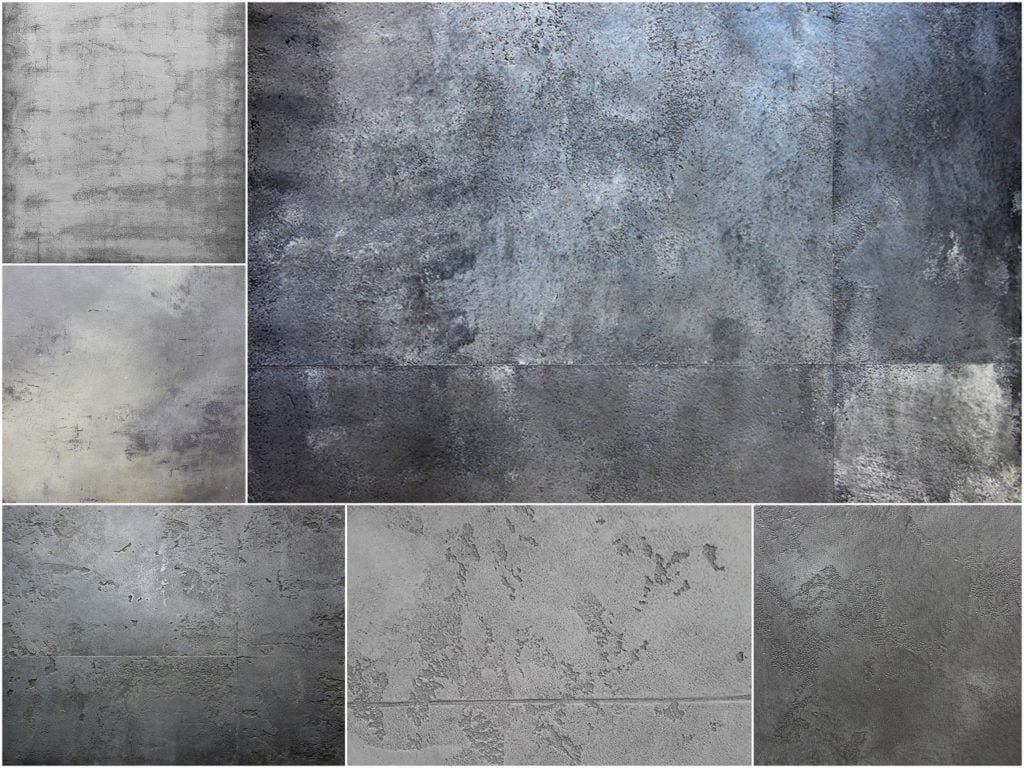
- Concrete Effect: This type of plaster creates a perfect illusion of a concrete wall.
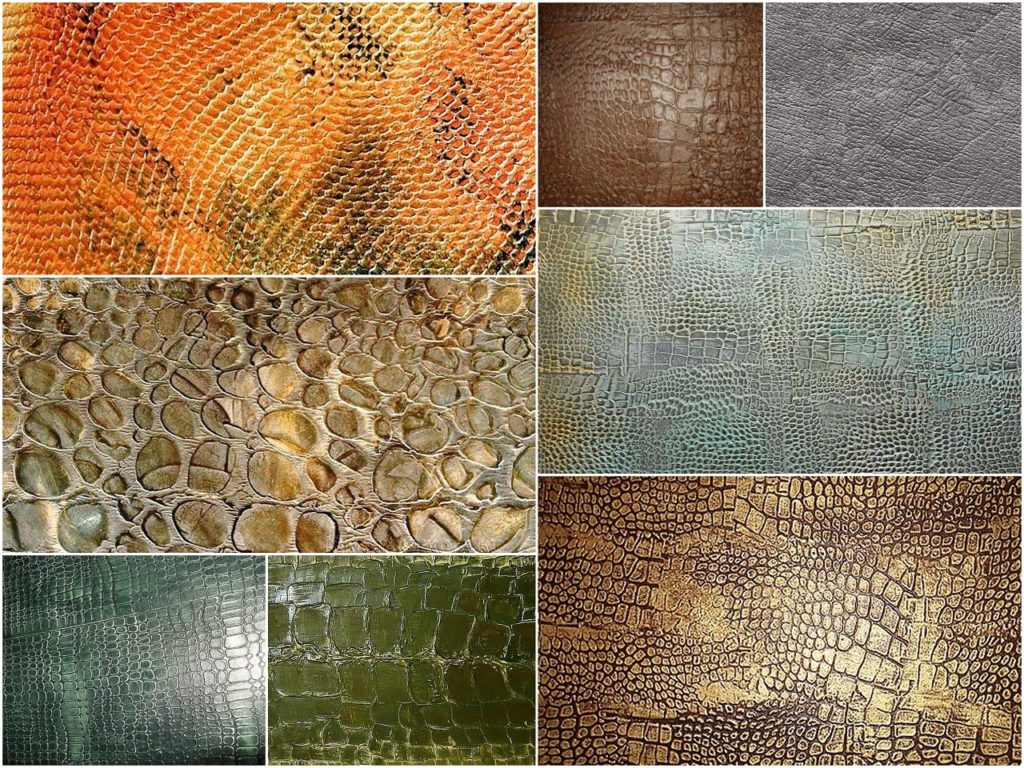
- Leather Effect: Ideal for those who appreciate understated luxury. Its texture effectively mimics a leather-clad wall. Using various tools, you can create imitations of different types of leather.
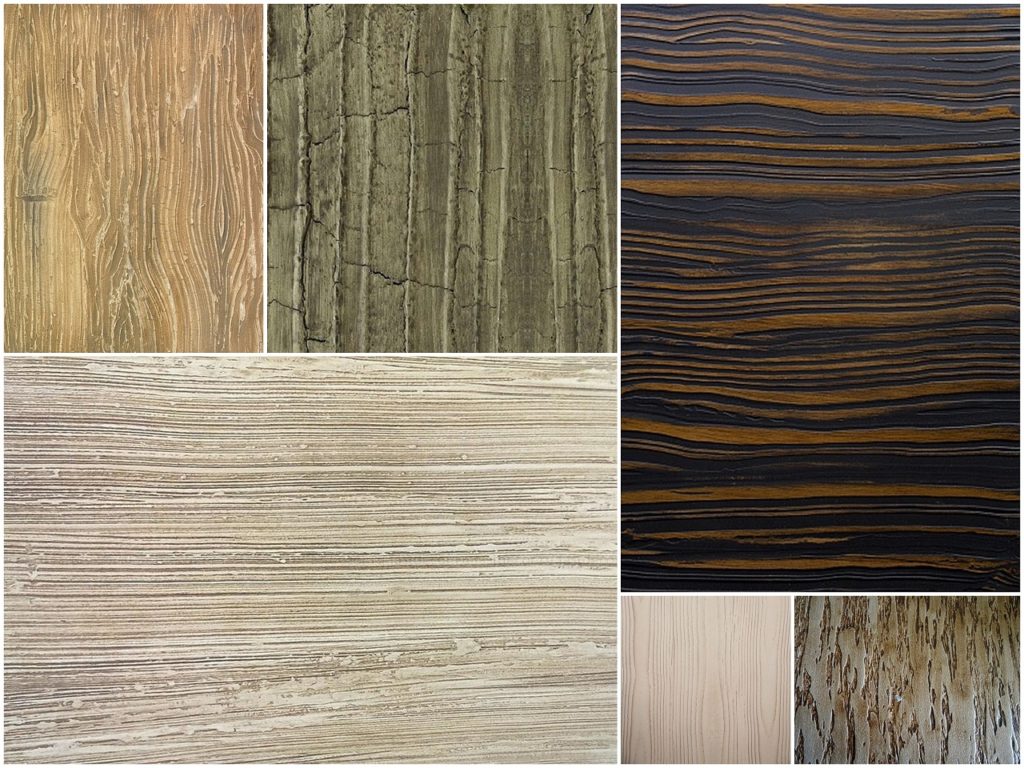
- Wood Effect: Incredibly accurate imitation of a wooden surface, thanks to the precise reproduction of fine details and patterns of wood.
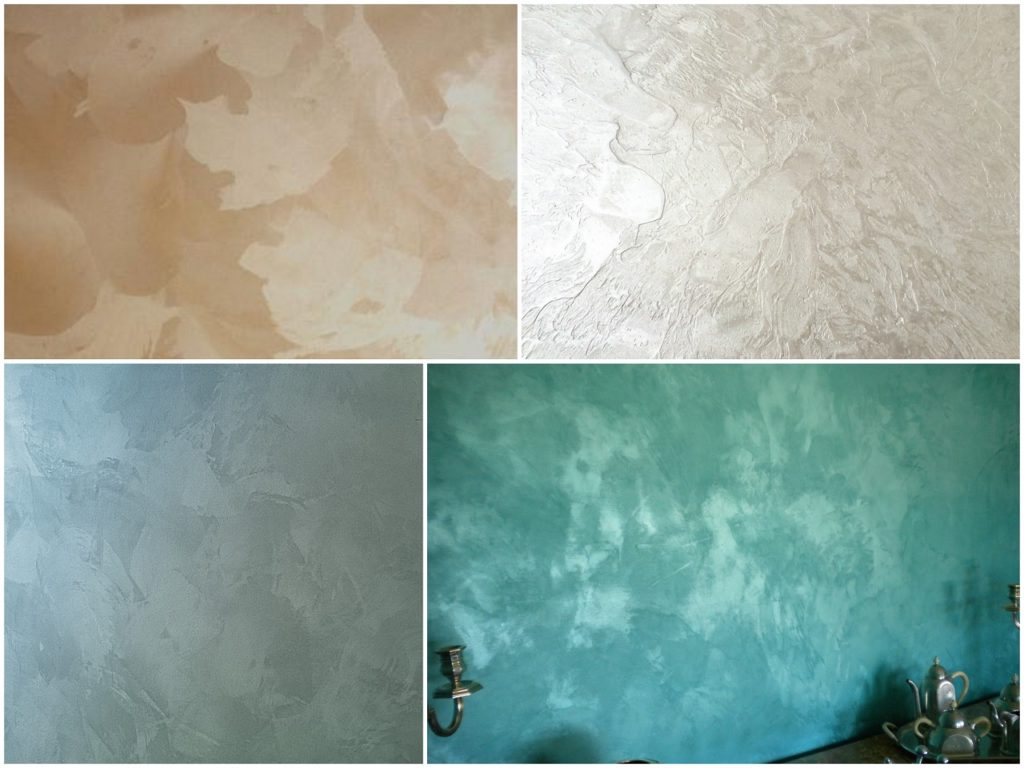
- Silk Effect: Achieved using a pearlescent finish that smoothly shimmers, creating the illusion of a silk-clad wall.
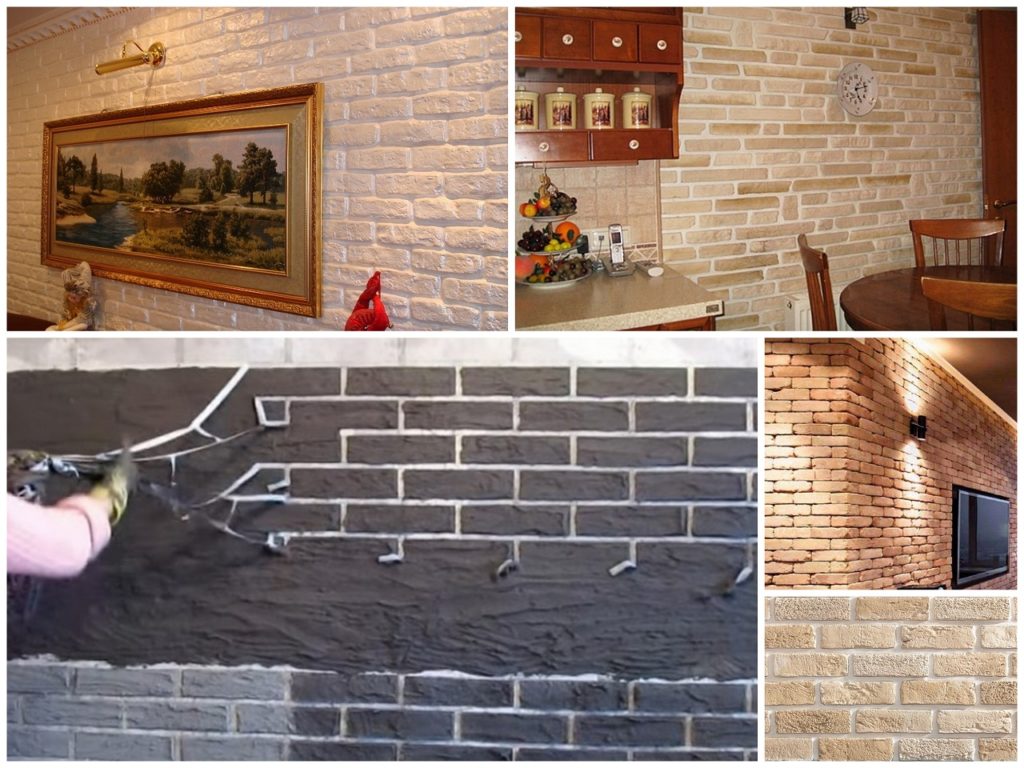
- Brickwork Effect: Popular due to its lower cost compared to real bricks and the accurate imitation of brick presence in the interior.
- Bark Effect: By using this technique, you can achieve a pattern that mimics the texture of the surface damaged by bark beetles.
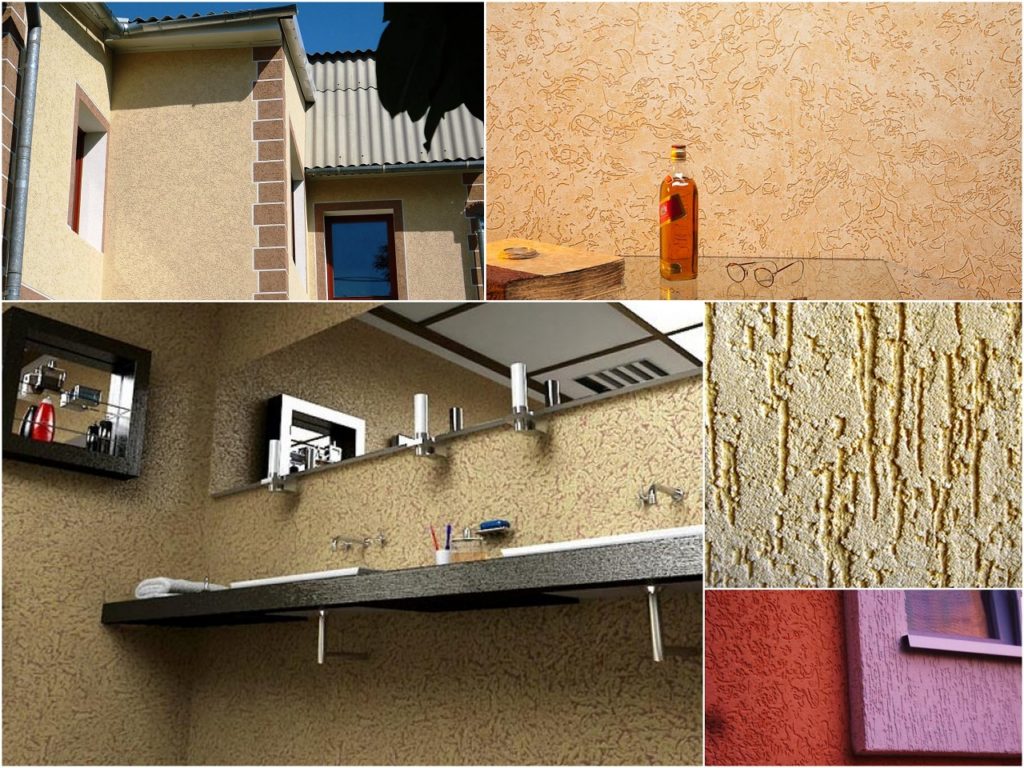
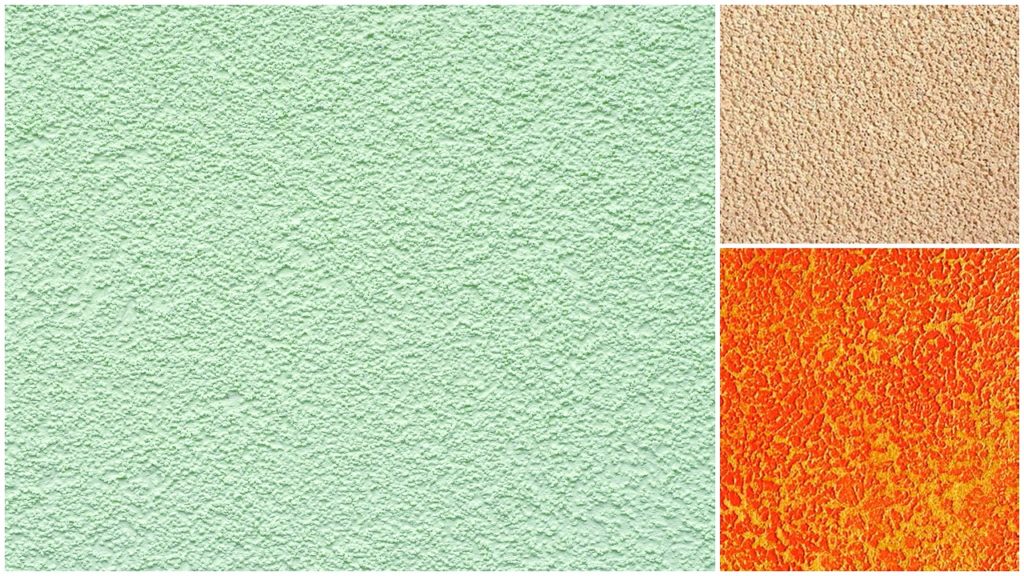
- Orange Peel Effect: Ideal for applying under paint in rooms with an Eastern design.
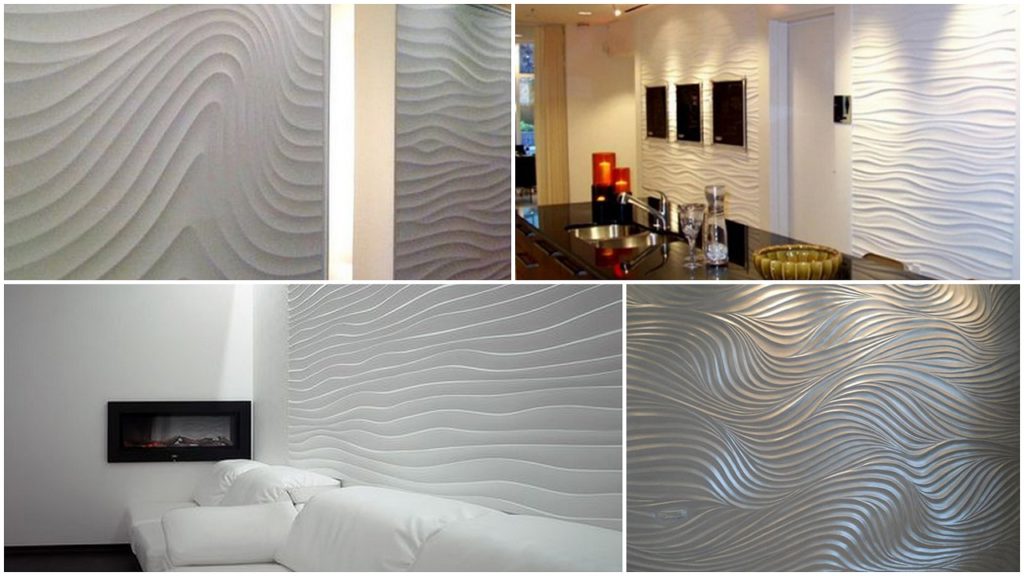
- Wave Effect: Imitates the appearance of ocean waves. It looks stunning on the surface when the right paint is selected.
- Floral Effect: Floral decorative plaster is used frequently and stands out among the various decorative plaster styles. When creating a pattern, the shape and appearance of the flower depend solely on the spatula and its movements. In this case, there is no restriction on color or form. The finished wall can be decorated with a single color or using various techniques.
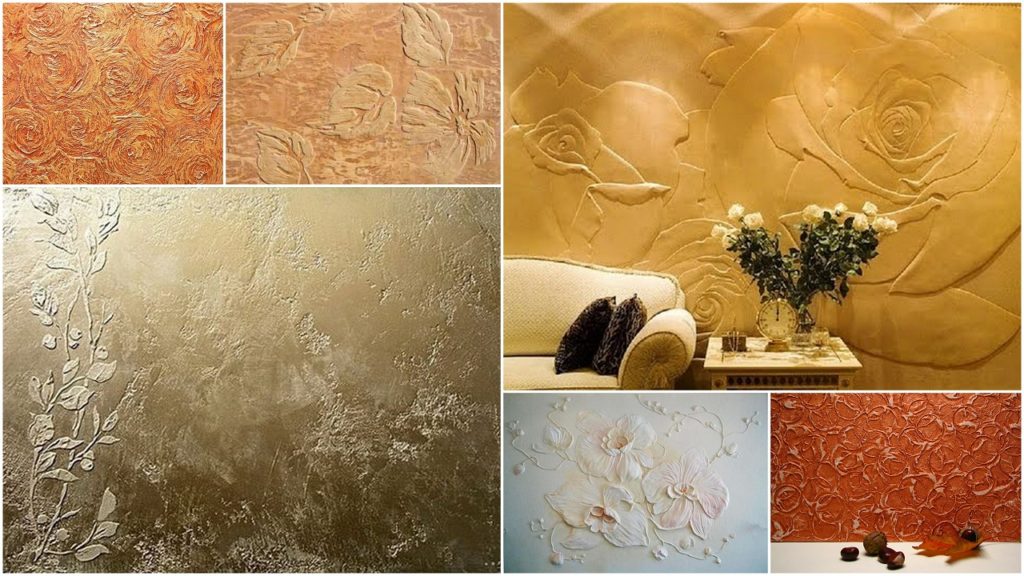
The variety of decorative plaster finishes is extensive. Some people prefer ready-made, templated patterns, while others enjoy creating their own patterns that resonate with their artistic vision.
Using Decorative Plaster in Room Interiors
Decorative plaster in an apartment serves as one of the primary room decor elements. A well-chosen design of decorative plaster can enhance the interior’s beauty and perfectly complement the chosen style. Additionally, each room in the apartment requires an individual approach due to its unique layout and external characteristics.
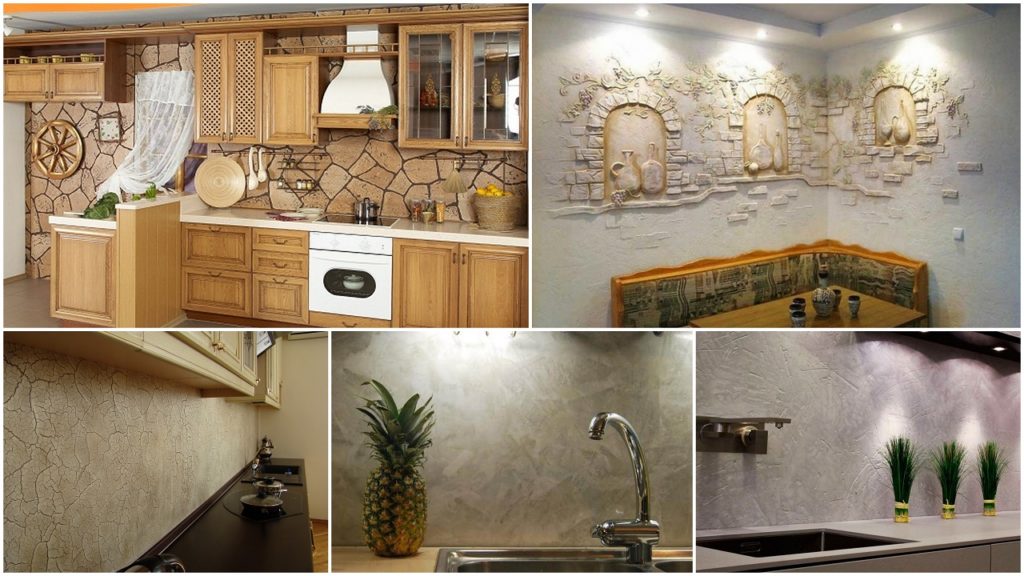
- Decorative Plaster in the Kitchen
Using this type of finishing material in the kitchen is an excellent choice since it is easy to clean and looks quite dignified on the wall surface. Types of plaster used for decoration include Venetian plaster, marble or stone surface imitation, silk imitation, plaster with fine or coarse granules, and more.
The key point to emphasize is that decorative plaster should be applied to only one wall in the room to avoid making the kitchen too “heavy” and spoiling the room’s design.
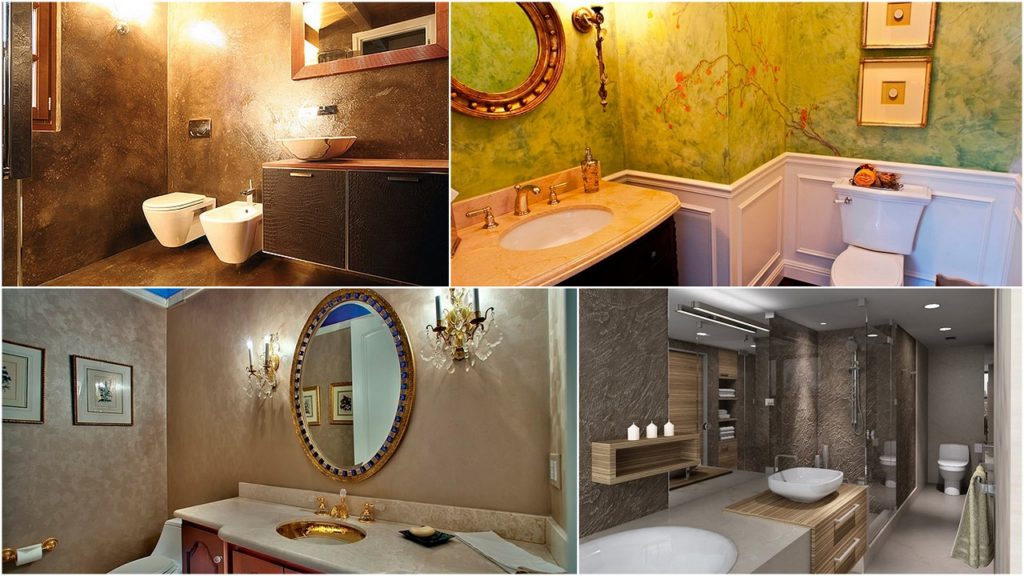
- Decorative Plaster in the Bathroom
Due to the unique characteristics of this room, it is recommended to use plaster based on cement or sanitary plaster, which can withstand the overall humidity of the room and is environmentally friendly.
Often, when decorating with decorative plaster in the bathroom, Venetian plaster or various textured types that are easy to clean are used.
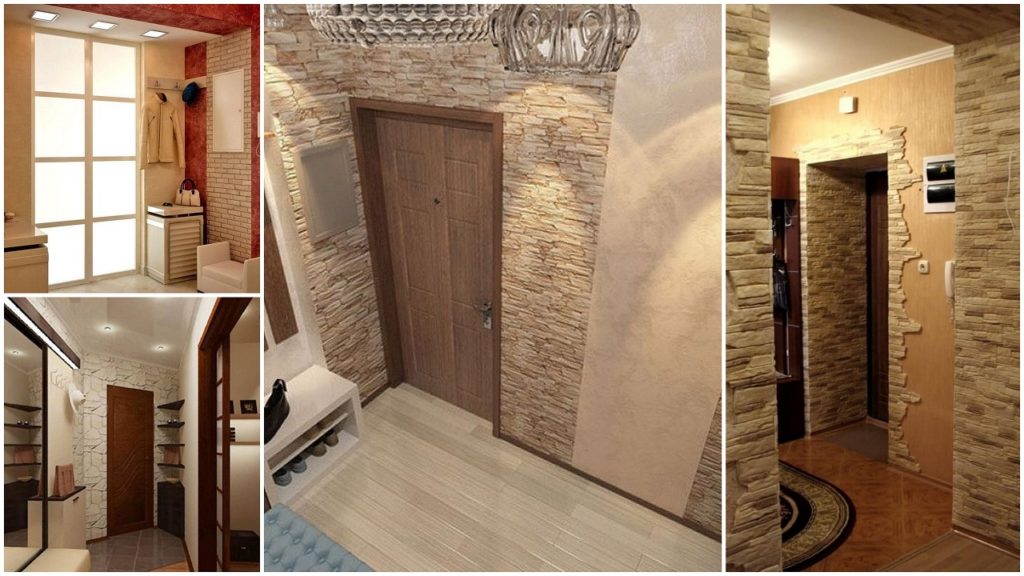
- Decorative Plaster in the Hallway
Decorative plaster in the hallway, as well as in the corridor, shapes the overall impression of the apartment’s design. Speaking of types of decorative plaster for rooms of this type, you can name the main ones that best meet the requirements (resistance to cold, moisture, and good durability): velvet and silk effects, “corrugated” effect, and Venetian plaster.
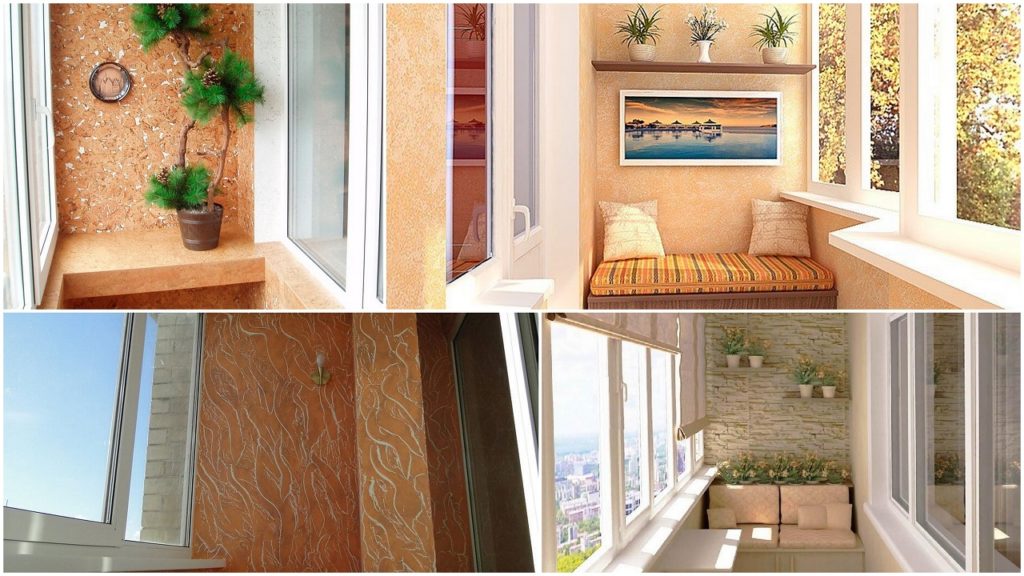
- Decorative Plaster on the Balcony
Finishing the balcony with decorative plaster allows you to maintain design harmony with all the rooms in the apartment. It also serves as excellent thermal insulation, is easy to maintain, provides sound insulation, and allows the walls to breathe. Various types of plaster are used for wall decoration, ranging from textured varieties with imitations of different plants and reliefs to, for example, stone or brick imitations.
DIY Decorative Plaster
If store-bought options for decorative plaster don’t meet your needs for some reason, you might be wondering how to make decorative plaster yourself. Well, this is entirely doable for anyone, and it can also save you quite a bit on materials. Let’s clarify right away that self-made decorative plaster won’t be as high in quality and durability as factory-made material. However, a lifespan of 10-15 years is quite sufficient for most people, especially considering the relative affordability of such finishing.
So, how do you make decorative plaster? It all depends on the room you want to decorate with your DIY decorative plaster, and whether you plan to use it for interior or exterior purposes. In these cases, the materials used will differ.
For interior decoration with normal humidity, you can make DIY decorative plaster from either gypsum-based or cement-based putty or plaster.
Here’s how to make it yourself for interior use:
- Take an equal amount of starting and finishing gypsum putty. Instead of starting putty, you can use gypsum plaster, which is what people usually mean by ordinary plaster.
- In a bucket of room-temperature water, pour the mix of putties or alternate adding them.
- You can add a little diluted wallpaper glue. This will enhance resistance to mold and fungi and slightly extend the mixture’s working time.
- Mix everything thoroughly with a mixer or a drill with a suitable attachment.
- The resulting mixture should have the consistency of regular sour cream.
- Your DIY decorative plaster made from regular putty is ready!
Important! Decorative plaster prepared in this way dries fairly quickly. Prepare an amount of the mixture that you can apply within 10-15 minutes. It’s even better if you have two people working together: one applies the base layer, and the other immediately creates the design.
You can also use this type of decorative plaster in areas with increased humidity, such as the kitchen and bathroom. However, it will need to be protected with a water-repellent sealant.
For exterior finishing, the above-mentioned plaster option won’t work, but you can replace gypsum putty with regular tile adhesive. Any cement-based tile adhesive suitable for ceramic tiles will suffice. To enhance flexibility and adhesion, add a bit of primer to the water.
With this mixture, for example, you can create a decorative “corrugated” plaster by adding fine stones with a particle size of about 2 mm.
Important! Remember that the decorative plaster you create needs to be protected from moisture with exterior paint.
How to Apply Decorative Plaster
Regardless of whether you made the decorative plaster yourself or bought it ready-made in a store, applying decorative plaster is done in the same way.
To start, you need to learn how to apply decorative plaster correctly. This knowledge will help you understand the process better and control the workers. It will also be useful if you plan to do the decorative plastering yourself.
Prepare the necessary tools for applying decorative plaster:
- Builder’s bucket
- Trowel for decorative plaster
- Spatulas
- Trowel
- Rollers for decorative plaster
- Painter’s tape
- Wax for decorative plaster
- Mixer or drill with an attachment
- Lacquer for decorative plaster
- Stencils for decorative plaster
It’s possible that you won’t need everything on the list, depending on the type of plaster you’re using and the application technique for your decorative plaster. For example, if you plan to apply decorative plaster with a roller, then you’ll need it. If the decoration will be done using improvised tools, add them to the appropriate list.
So, how to apply decorative plaster to walls? Or maybe you need decorative plaster for the ceiling? Let’s try to summarize the processes that need to be performed regardless of the type of plaster and where it’s applied.
- Preparing the surface for decorative plaster involves preparing the walls or ceiling, getting the tools ready, and using painter’s tape to mask off areas for decoration.
- Preparing the decorative plaster – be sure to read the manufacturer’s instructions, if available. They contain useful information such as the plaster’s coverage per square meter, the required amount of water, and other proportions, working time with the mixture, drying time for the decorative plaster, and more.
Let’s delve into some details. Decorating walls with DIY decorative plaster starts with preparing the base. Whether it’s walls or the ceiling, they should be free from major dents, cracks, or protrusions. Old finishes should be removed, and the surface should be primed. If you plan to apply decorative plaster to drywall, make sure to fill in the joints and screw heads. Walls prepared for decorative plastering don’t need as meticulous preparation as ceilings. The reason is that walls typically receive a slightly thicker layer of decorative plaster than ceilings, and it hides minor imperfections like scratches or uneven spots.
An exception is applying Venetian plaster. In this case, both walls and ceilings should be as smooth and clean as possible.
Methods of Applying Decorative Plaster
You can apply interior decorative plaster to the prepared surface using a trowel and a spatula. A trowel can be used, and in some cases, a sprayer if you plan to apply it with a splatter method. In any case, the application technique for decorative plaster is the same at the initial stage. First, apply the base layer, making it even. Then, decorate it while it’s still wet. The decoration method depends on the type of plaster you’re using and your creativity.
If you’re applying decorative wall plaster yourself for the first time, practice on a piece of drywall or an area of the wall that will be covered by furniture. As you gain experience, move on to other sections.
The application technique for Venetian decorative plaster is slightly different. It’s applied in thin layers with a rubber trowel in various directions. There can be 5-8 layers, and each layer should be allowed to dry thoroughly before applying the next.
Exterior Decorative Plaster
Performing exterior finishing with decorative plaster on your own is not a difficult task. The main challenge is working at heights if your house is more than one story. The application technique for exterior decorative plaster is almost the same as applying decorative plaster indoors. Let’s take a look at applying decorative “corrugated” plaster on the exterior of the house as an example.
How to Apply Decorative “Corrugated” Plaster
Start by preparing the surface as described above: level out significant height differences and clean the area. Then, apply a primer. It’s best to use a primer with quartz sand. Prepare the decorative plaster mixture. Apply the plaster with a trowel in a thin layer. Let the “corrugations” dry slightly before you begin the decorating process.
Move the trowel over the plaster, making circular motions. Alternatively, you can make only vertical or horizontal movements, depending on the pattern you want to achieve. The movements should not be too forceful.
Painting Decorative Plaster
There are no special secrets to painting decorative plaster. We believe anyone can handle this task. Just choose the right paint for exterior or interior work, as well as the nap length of the roller. A solid background is created with a roller with long nap. If you want to paint only the top raised layer, use a foam roller and apply without excessive pressure on the wall.
Repairing Decorative Plaster
Decorative plaster occasionally requires repair or restoration. It may develop cracks, bulges, peeling, or chips. Repairing a damaged area is not difficult and can be done by yourself.
If you notice bulging plaster, tap the entire wall’s surface with a wooden mallet and listen to the sound it makes. A dull sound will indicate the area where the plaster has detached. Remove the damaged section of plaster using a hammer drill, chisel, or similar tools. Then, clean the wall with a metal brush and prime it. Before applying a new layer of decorative plaster, moisten not only the cleaned area but also the surrounding plaster with warm water for better adhesion between materials.
Try to match the texture and pattern of the repaired plaster to the original. To minimize the difference in the pattern, repair the plaster in a rectangular area.
After the plaster has completely dried, repaint it. This will help camouflage joint lines and unevenness between layers.
Cracks in decorative plaster can be repaired in a similar way. Expand the crack and follow the steps described above.
Decorative Plaster Reviews
Our description of decorative plaster was intended to help you decide if you need such a finish and if it suits your home. And if you answered “Yes” to these questions, then you’ve probably wondered: which decorative plaster is the best choice?
Reviews from real buyers and users play a significant role in choosing decorative plaster. Those who have lived with decorative plaster for several years can provide insights into what nuances to consider or even warn against purchasing a specific type of decorative plaster from a particular manufacturer or store.
Here are some typical reviews of decorative plaster:
We installed Venetian plaster in shades of green in our bathroom. It looks fabulous. Tiles wouldn’t have been the same. The seamless decorative finish changes color with lighting, making it truly mesmerizing. Admittedly, it came at a considerable cost, but we were willing to pay for the beauty.
I decided to use textured plaster to renovate my restroom. I did it myself after reading articles online and watching tutorials. It adhered perfectly to the plastered walls, but I struggled with the drywall. I had to apply the decorative plaster on the floor as well because it leaves marks on the decorative plaster.
We created the decorative plaster ourselves and applied it. Our whole family got involved, and we’re extremely satisfied with the result. No one else has patterns like these, and it turned out to be very budget-friendly, which was unexpected.
It’s certainly a remarkable product, but the price is astronomical. I’m going to put up wallpaper under my decorative finish; it’s cheaper and more practical.
We applied decorative plaster in our kitchen, and the walls look very intriguing. However, I wish we had used tiles for the backsplash. I’m tired of cleaning grease stains near the stove. Learn from my mistakes.
